16. Notifications
A Notifier is an instance of a Notification type (Email, Slack, Webhook, etc.) with a name, description, and a defined configuration.
For example:
- A username, password, server, and recipients are needed for an Email notifier
- The token and a list of channels are needed for a Slack notifier
- The URL and Headers are needed for a Webhook notifier
A Notification is a manifestation of the notifier; for example, when a job fails, a notification is sent using the configuration defined by the Notifier.
At a high level, the typical flow for the notification system works as follows:
- A user creates a notifier to the Tower REST API at the
/api/v1/notifiersendpoint (either through the API or through the Tower UI). - A user assigns the notifier to any of the various objects that support it (all variants of job templates as well as organizations and projects) and at the appropriate trigger level for which they want the notification (error, success, or any). For example a user may wish to assign a particular Notifier to trigger when Job Template 1 fails. In which case, they will associate the notifier with the job template at
/api/v1/job_templates/n/notifiers_errorAPI endpoint.
16.1. Notifier Hierarchy
Notifiers assigned at certain levels will inherit notifiers defined on parent objects as such:
- Job Templates will use notifiers defined on it as well as inheriting notifiers from the Project used by the Job Template and from the Organization that it is listed under (via the Project).
- Project Updates will use notifiers defined on the project and will inherit notifiers from the Organization associated with it
- Inventory Updates will use notifiers defined on the Organization that it is listed under
- Ad-hoc commands will use notifiers defined on the Organization that the inventory is associated with
16.2. Workflow
When a job succeeds or fails, the error or success handler will pull a list of relevant notifiers using the procedure defined above. It will then create a Notification object for each one containing relevant details about the job and then sends it to the destination (email addresses, slack channel(s), sms numbers, etc). These Notification objects are available as related resources on job types (jobs, inventory updates, project updates), and also at /api/v1/notifications. You may also see what notifications have been sent from a notifier by examining its related resources.
If a notification fails, it will not impact the job associated to it or cause it to fail. The status of the notification can be viewed at its detail endpoint (/api/v1/notifications/<n>).
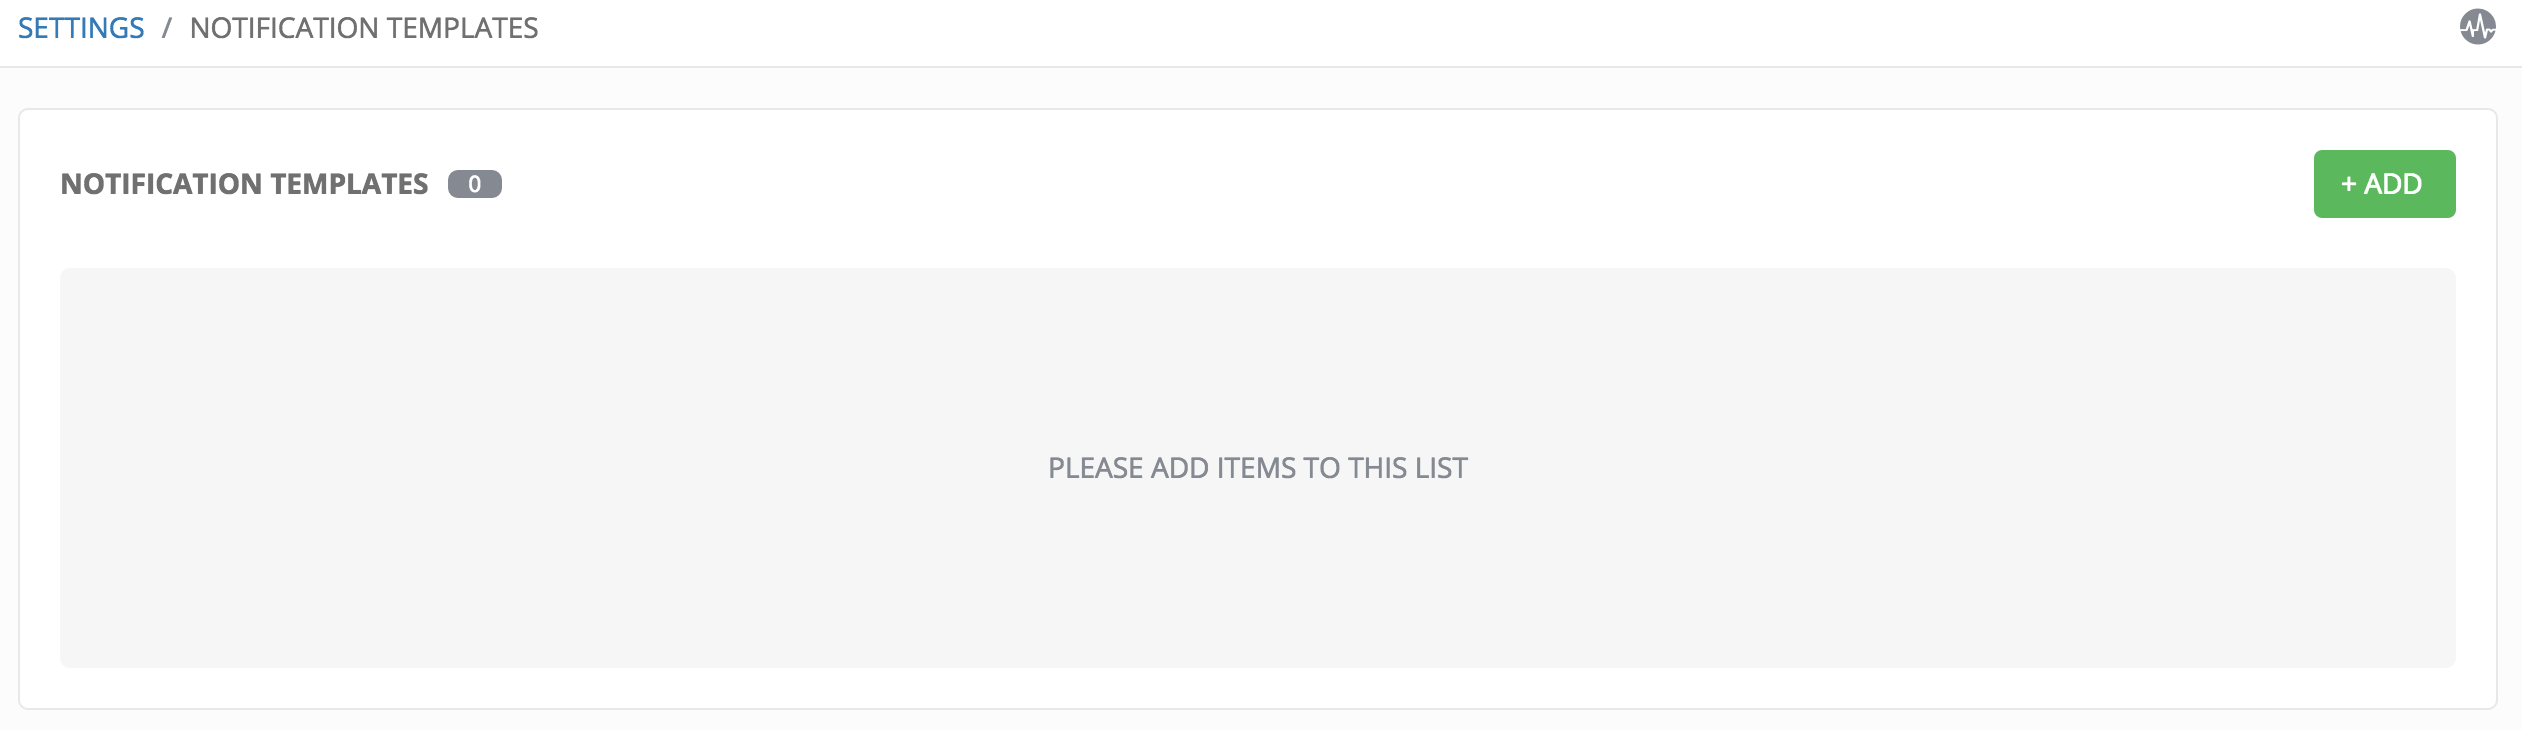
16.3. Create a Notification Template
To create a Notification Template, click the  button and select Notifications.
16.4. Notification Types
Each of these have their own configuration and behavioral semantics and testing them may need to be approached in different ways. The following sections will give as much detail as possible.
16.4.1. Email
The email notification type supports a wide variety of SMTP servers and has support for TLS/SSL connections.
You must provide the following details to setup an email notification: - Username - Host - Sender email - Recepient list - Password - Port
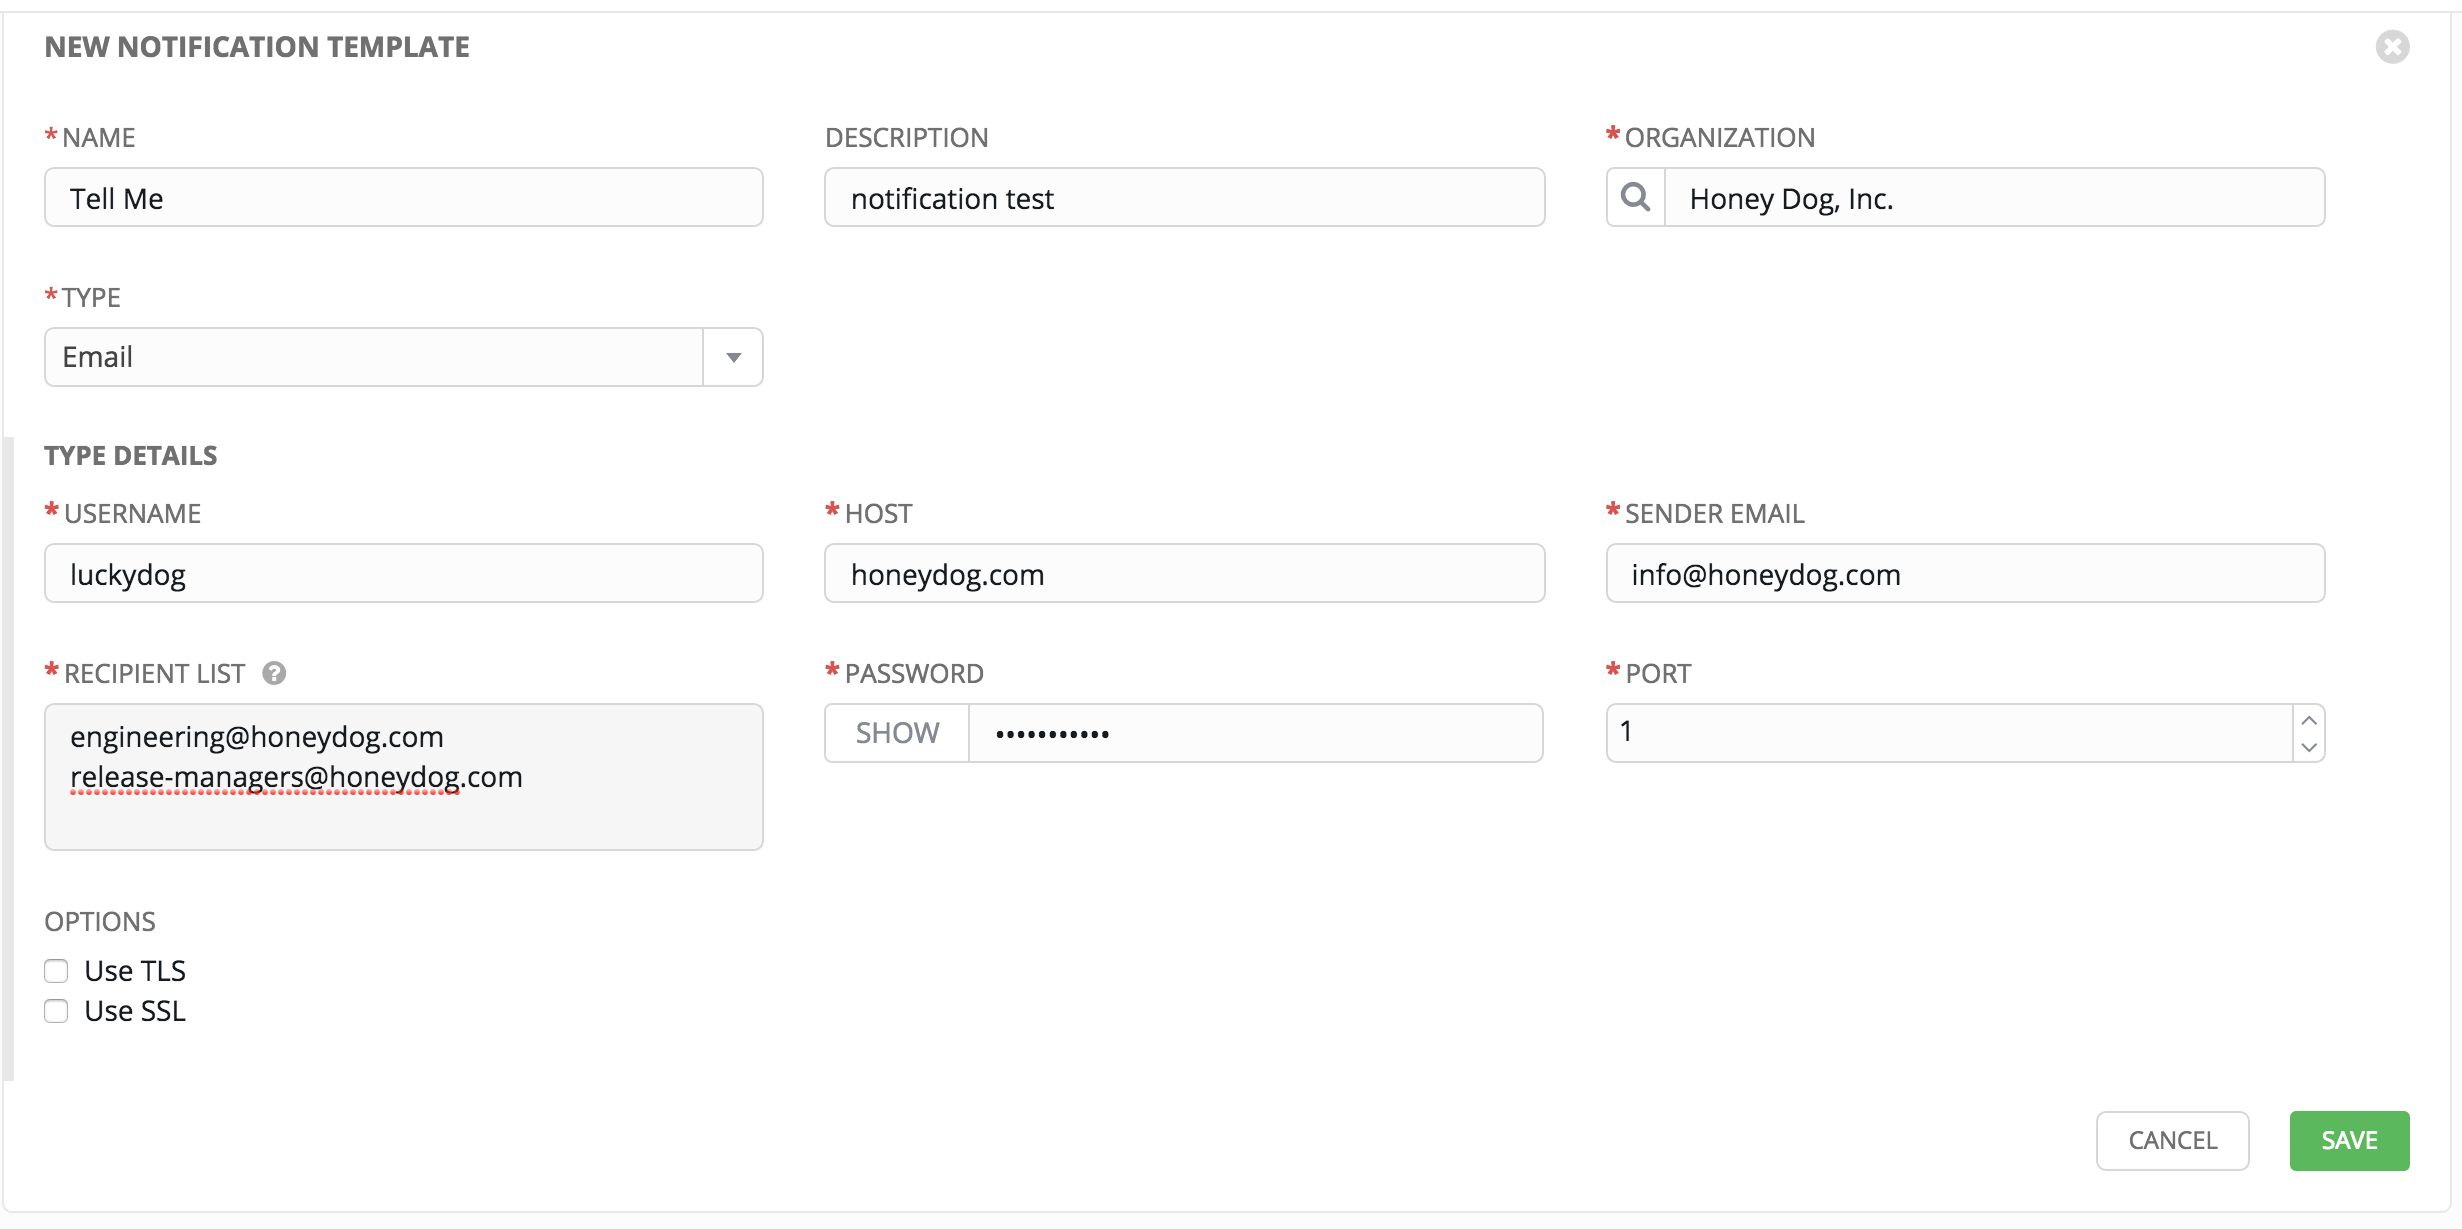
Caution
TLS and SSL connections are mutually exclusive and should not be selected at the same time. Be sure to only select one–checking both causes the notification to silently fail.
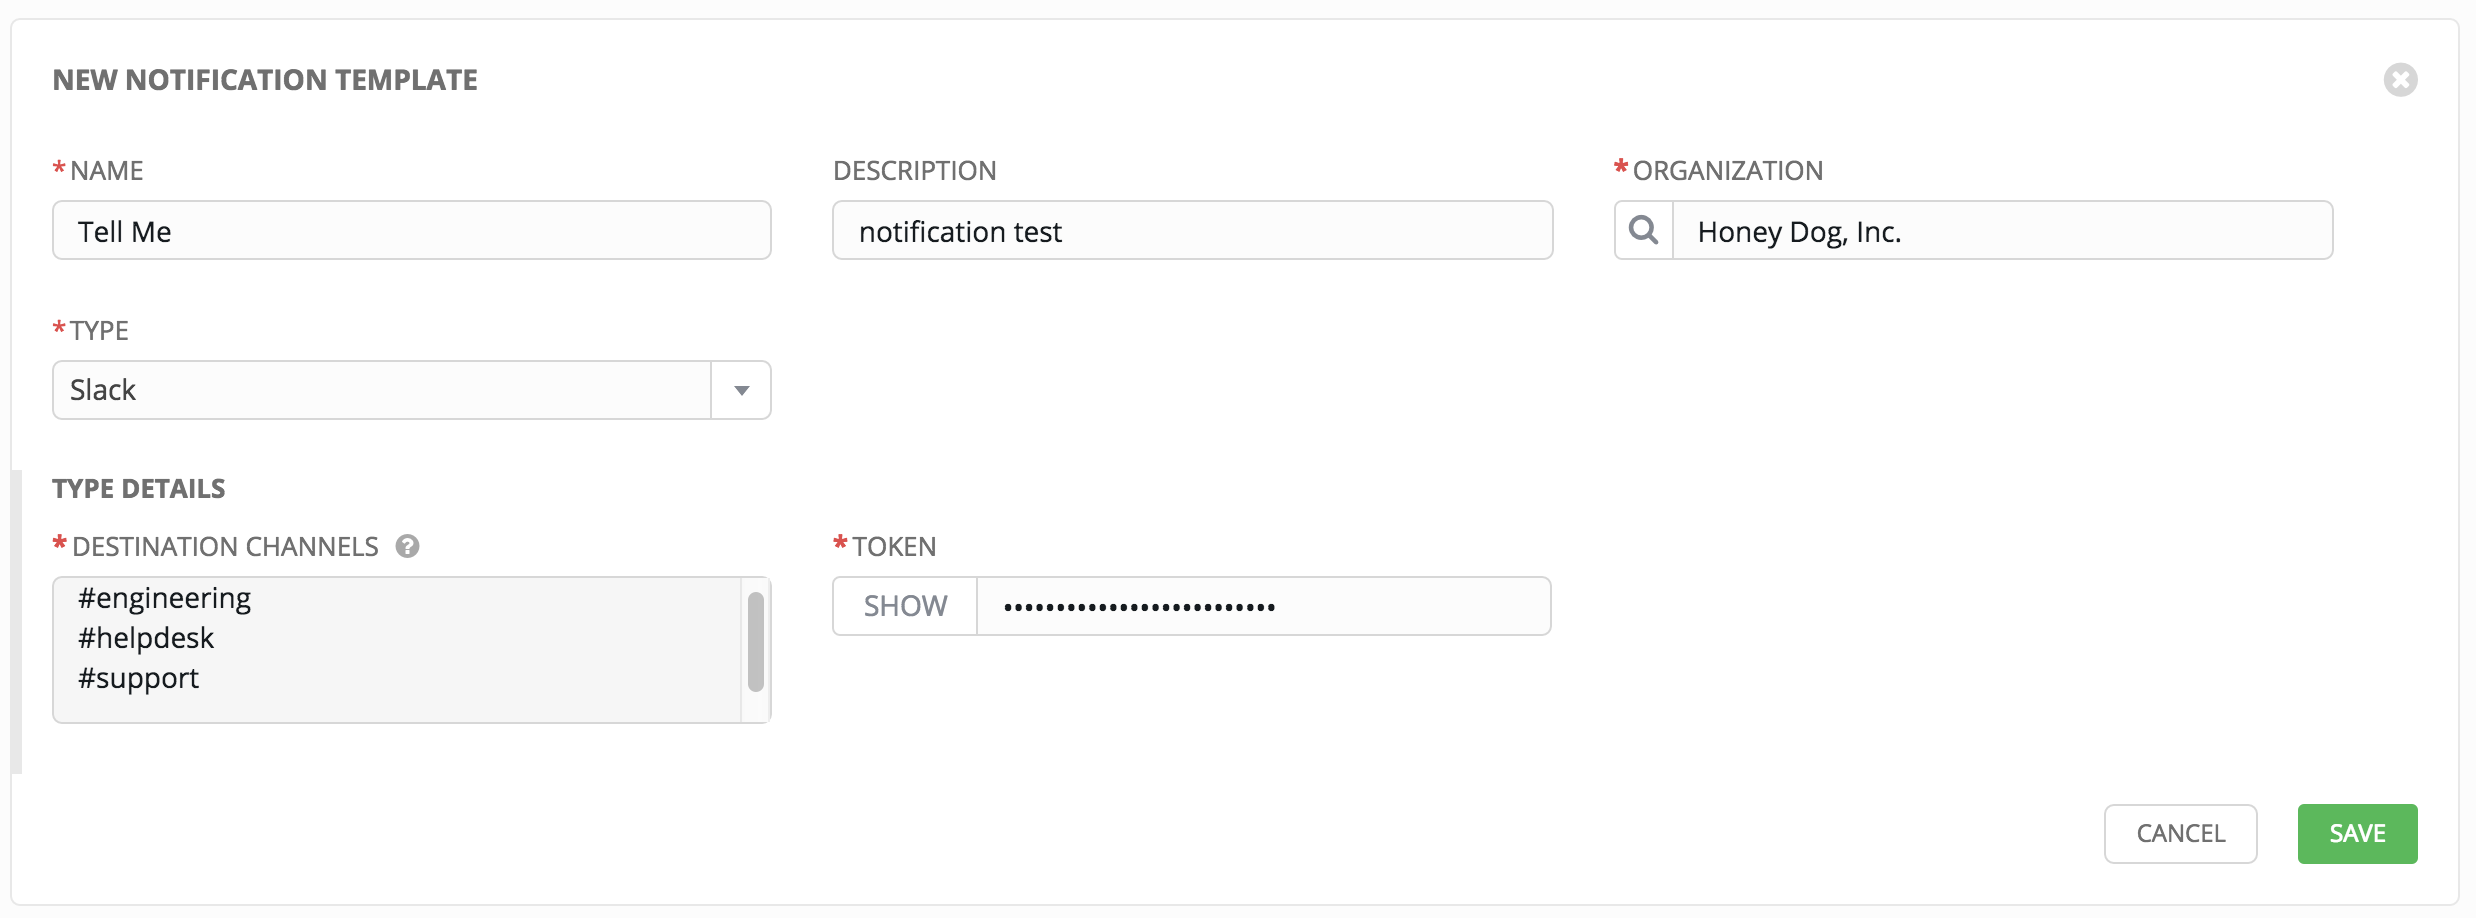
16.4.2. Slack
Slack, a collaborative team communication and messaging tool, is pretty easy to configure.
You must supply the following to setup Slack notifications:
- A token (which you can obtain from creating a bot in the integrations settings for the Slack team at https://api.slack.com/bot-users)
- Destination channel(s)
You must also invite the notification bot to join the channel(s) in question. Note that private messages are not supported.
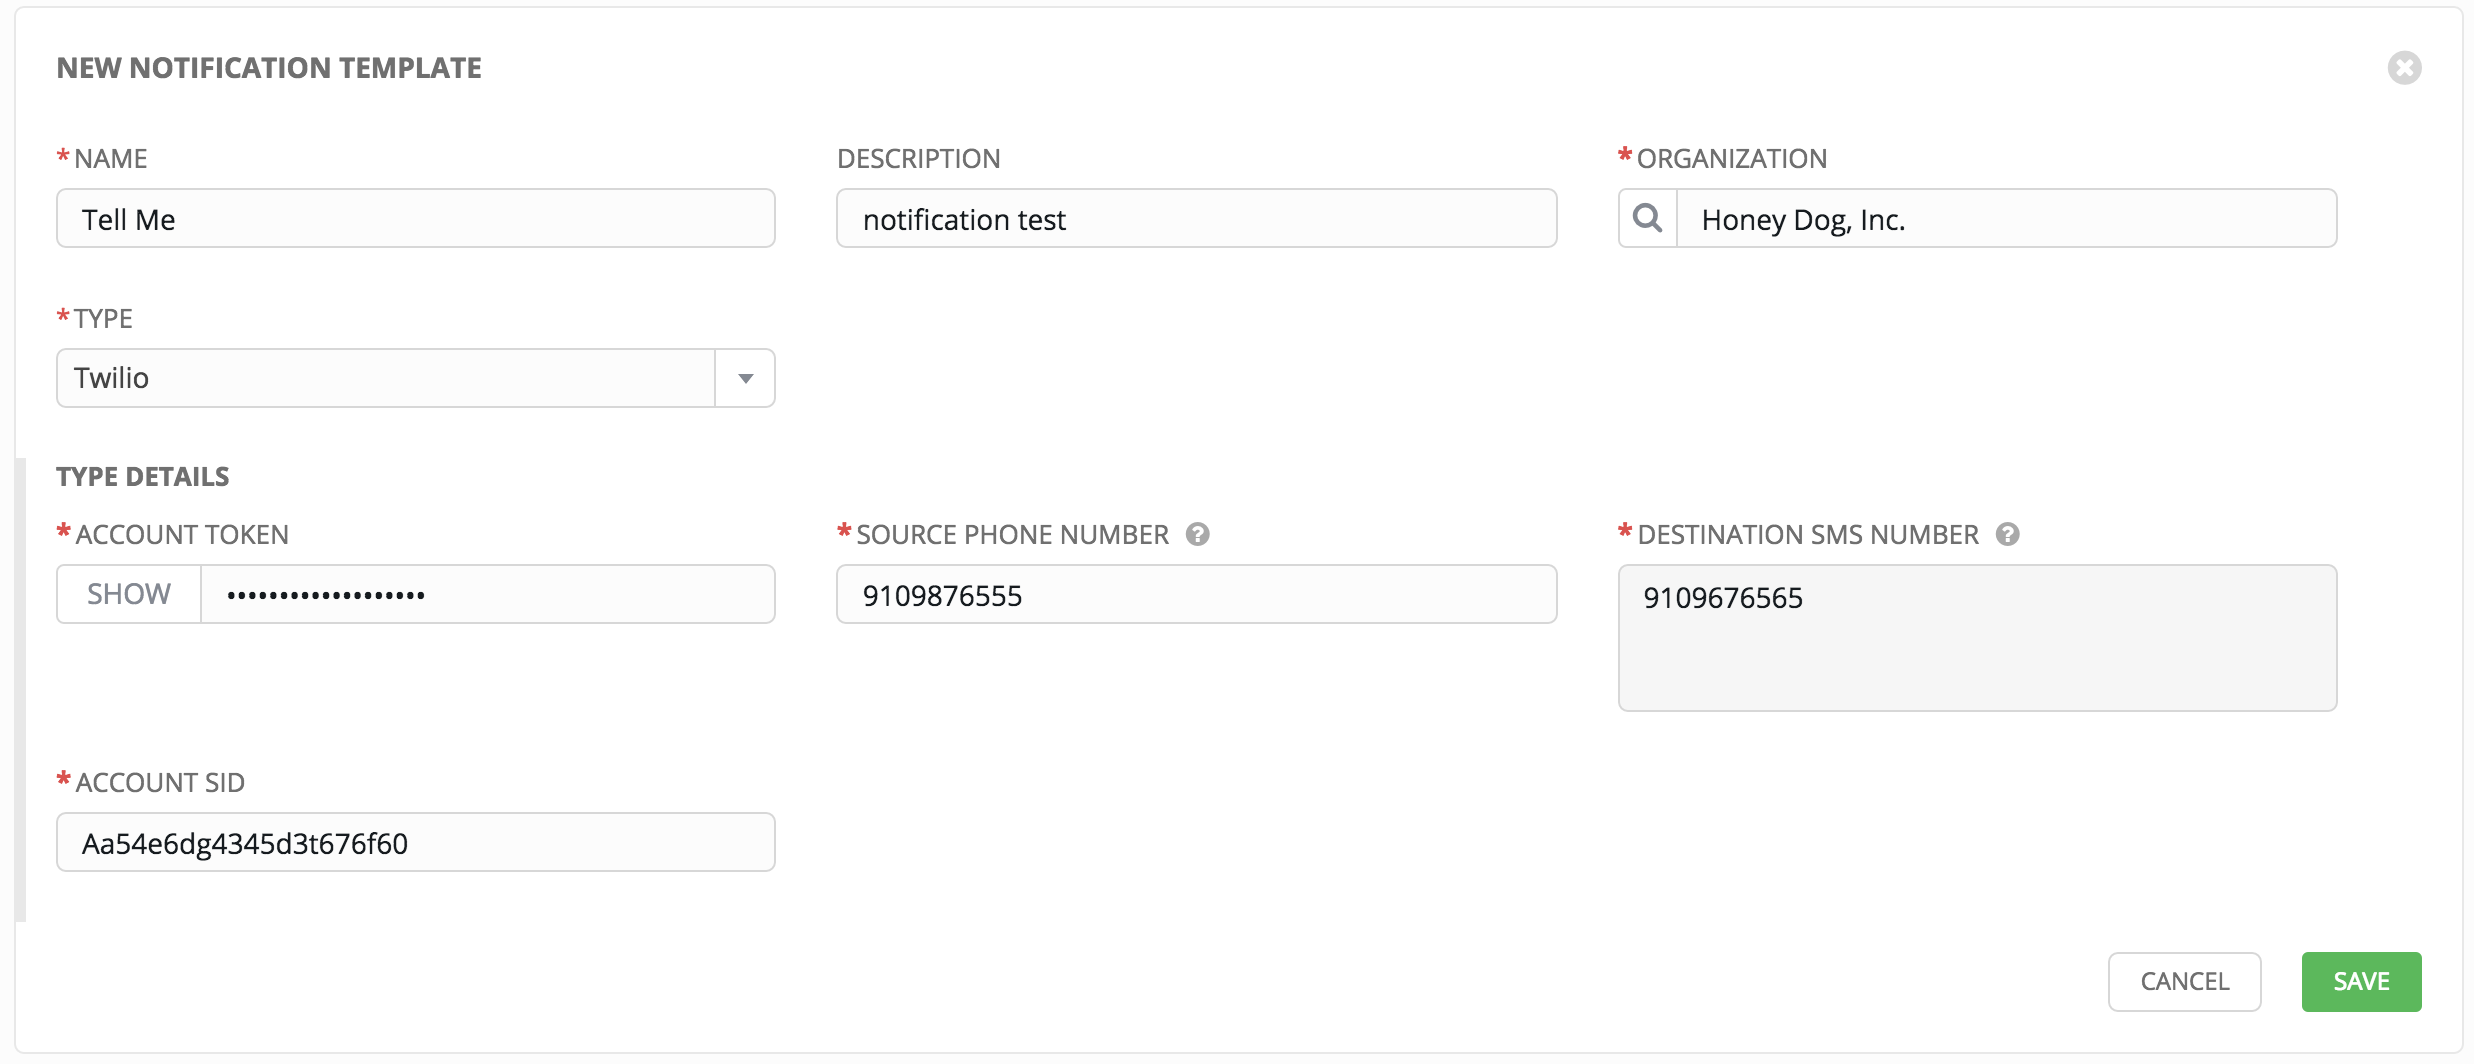
16.4.3. Twilio
Twilio service is an Voice and SMS automation service. Once you are signed in, you must create a phone number from which the message will be sent. You can then define a “Messaging Service” under Programmable SMS and associate the number you created before with it.
Note that you may need to verify this number or some other information before you are allowed to use it to send to any numbers. The Messaging Service does not need a status callback URL nor does it need the ability to Process inbound messages.
Under your individual (or sub) account settings, you will have API credentials. Twilio uses two credentials to determine which account an API request is coming from. The “Account SID”, which acts as a username, and the “Auth Token” which acts as a password.
To setup Twilio, provide the following details:
- Account Token
- Source phone number (this is the number associated with the messaging service above and must be given in the form of “+15556667777”)
- Destination phone number (this will be the list of numbers to receive the SMS and should be the 10-digit phone number)
- Account SID
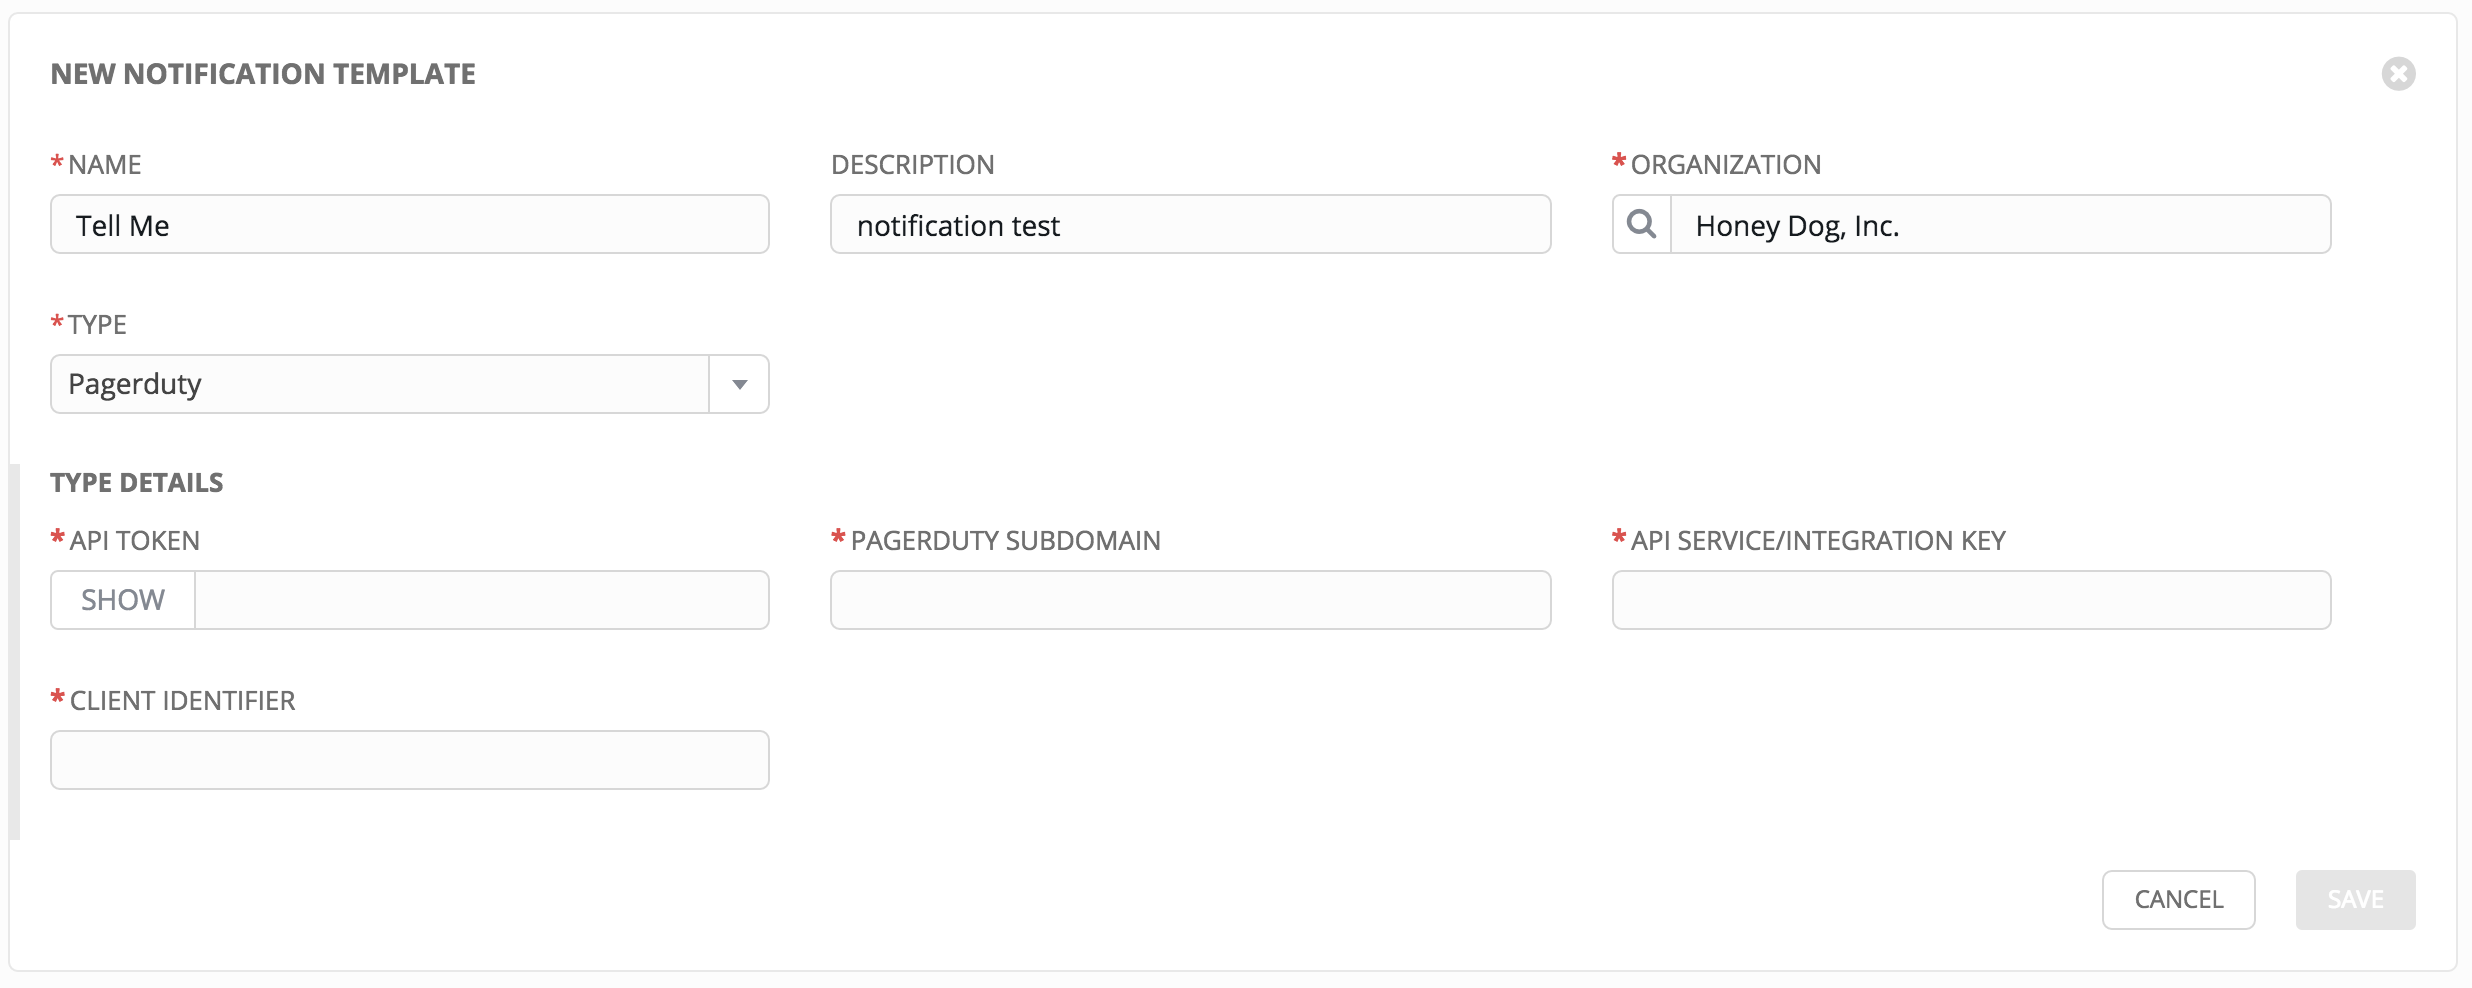
16.4.4. PagerDuty
PagerDuty is a fairly straightforward integration. The user must first create an API Key in the pagerduty system (this is the token that is given to Tower) and then create a “Service” which provides an “Integration Key” that will also be given to Tower. The other options of note are:
- API Token: The user must first create an API Key in the PagerDuty system (this is the token that is given to Tower.
- PagerDuty Subdoman: When you sign up for the PagerDuty account, you receive a unique subdomain to communicate with. For instance, if you signed up as “towertest”, the web dashboard will be at
towertest.pagerduty.comand you will give the Tower APItowertestas the subdomain (not the full domain). - API Service/Integration Key
- Client Identifier: This will be sent along with the alert content to the pagerduty service to help identify the service that is using the api key/service. This is helpful if multiple integrations are using the same API key and service.
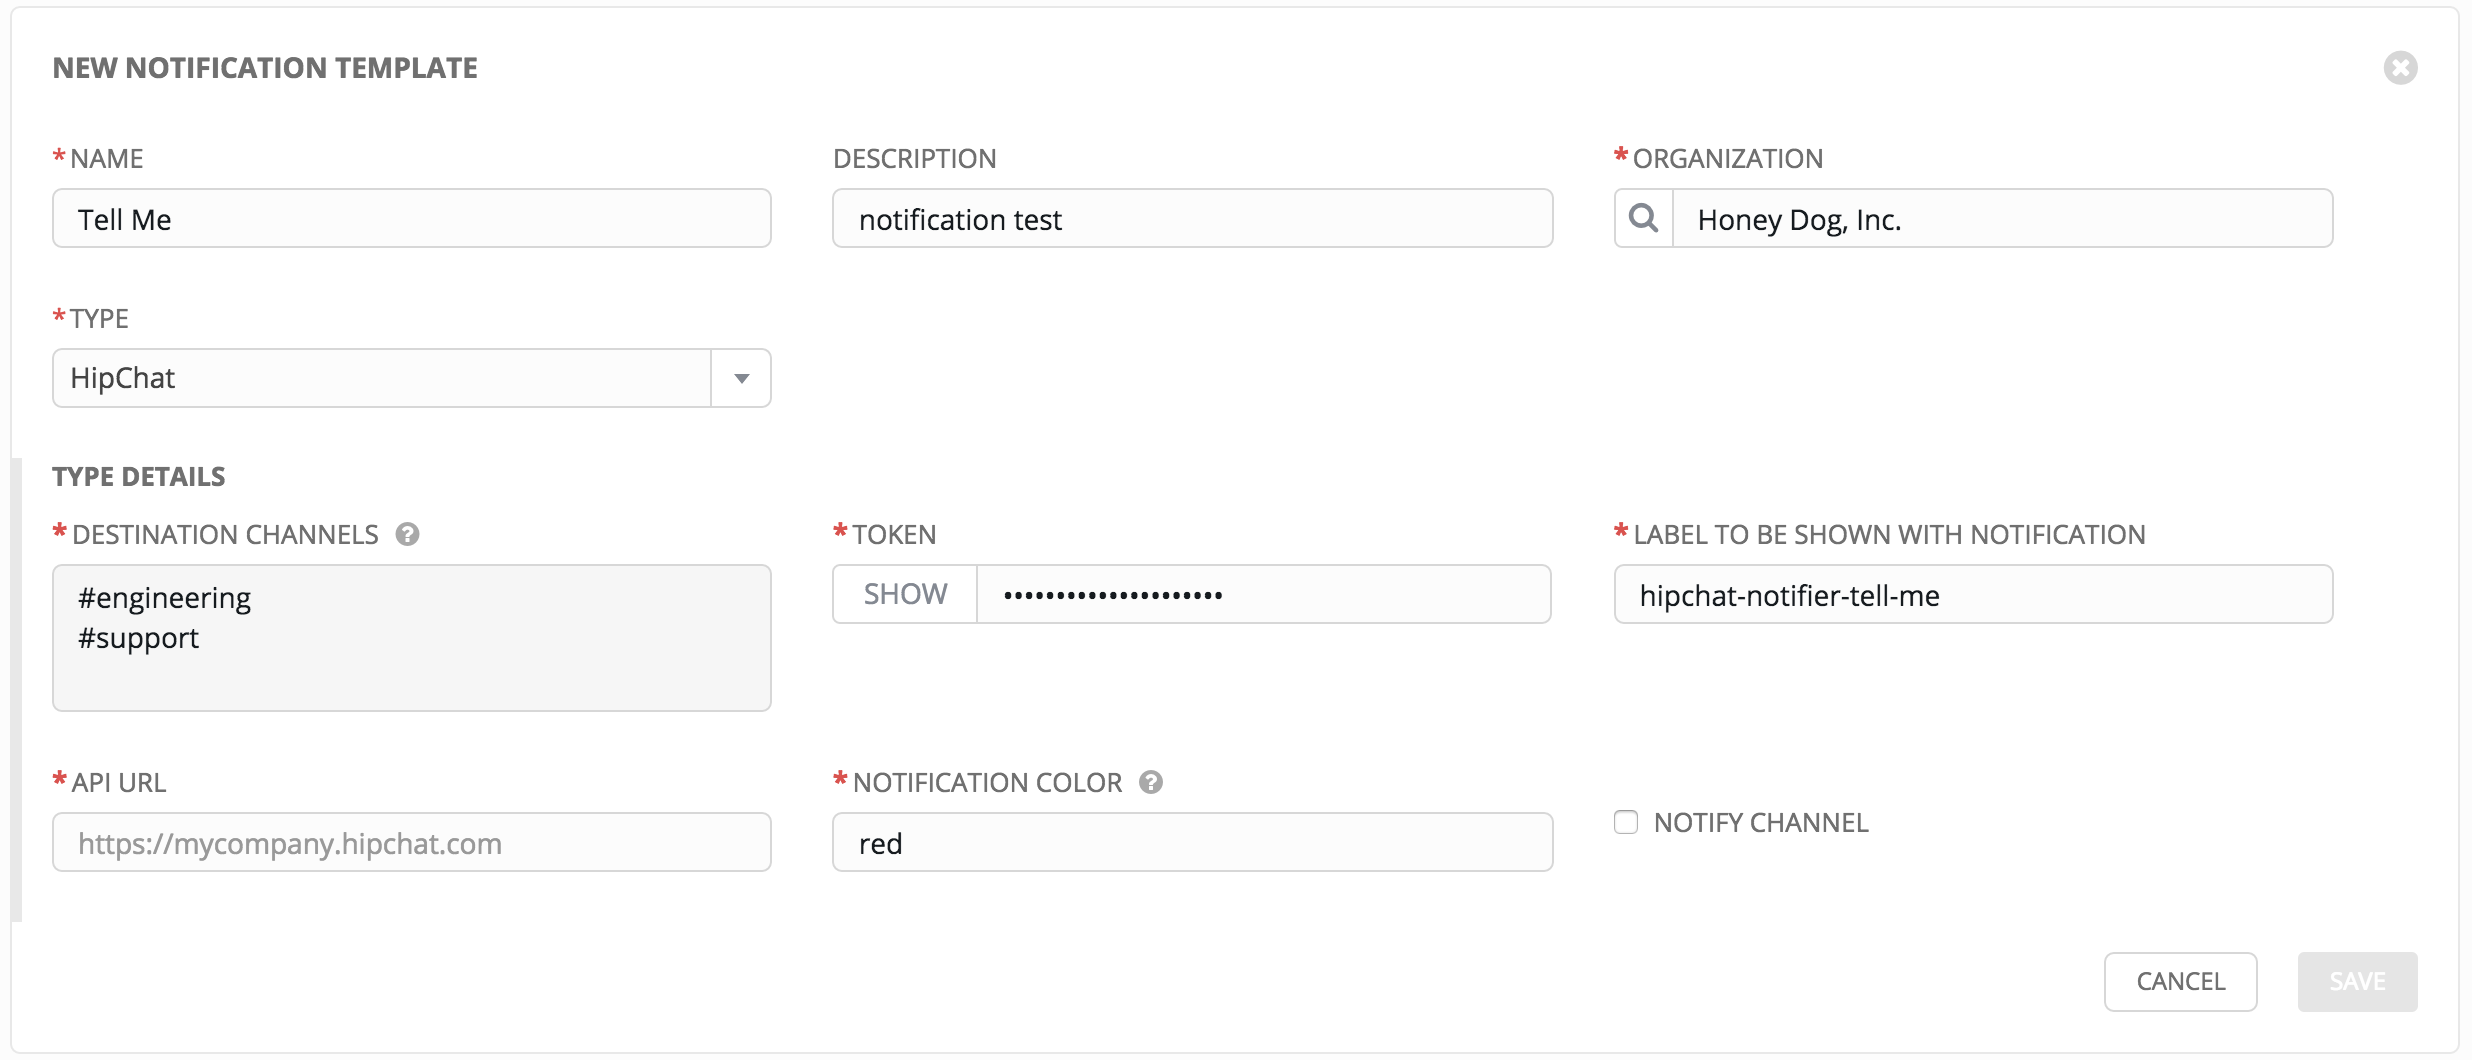
16.4.5. HipChat
There are several ways to integrate with HipChat. The Tower implementation uses HipChat “Integrations”. Currently you can find this at the bottom right of the main HipChat webview. From there, you will select “Build your own Integration”. After creating that, it will list the auth_token that needs to be supplied to Tower. Some other relevant details on the fields accepted by Tower for the HipChat notification type:
- Destination Channels: Channels which should receive the notification (“engineering” or “#support”, for example).
- Token: The token listed after building your own HipChat integration.
- Label to be shown with notification: Along with the integration name itself this will put another label on the notification (which could be helpful if multiple services are using the same integration to distinguish them from each other).
- API URL: The URL of the Hipchat API service. If you create a team hosted by them it will be something like:
https://team.hipchat.com. For a self-hosted integration, use a base URL similar tohttps://hipchat.yourcompany.com/and add in appropriate Destination Channels without the#leading them (“engineering” rahter than “#engineering”). - Notification Color: This will highlight the message as the given color. If set to something HipChat does not expect, then the notification will generate an error in the given color.
- Notify Channel: Selecting this will cause the bot to “notify” channel members. Normally it will just be stuck as a message in the chat channel without triggering anyone’s notifications. This option will notify users of the channel respecting their existing notification settings (browser notification, email fallback, etc.).
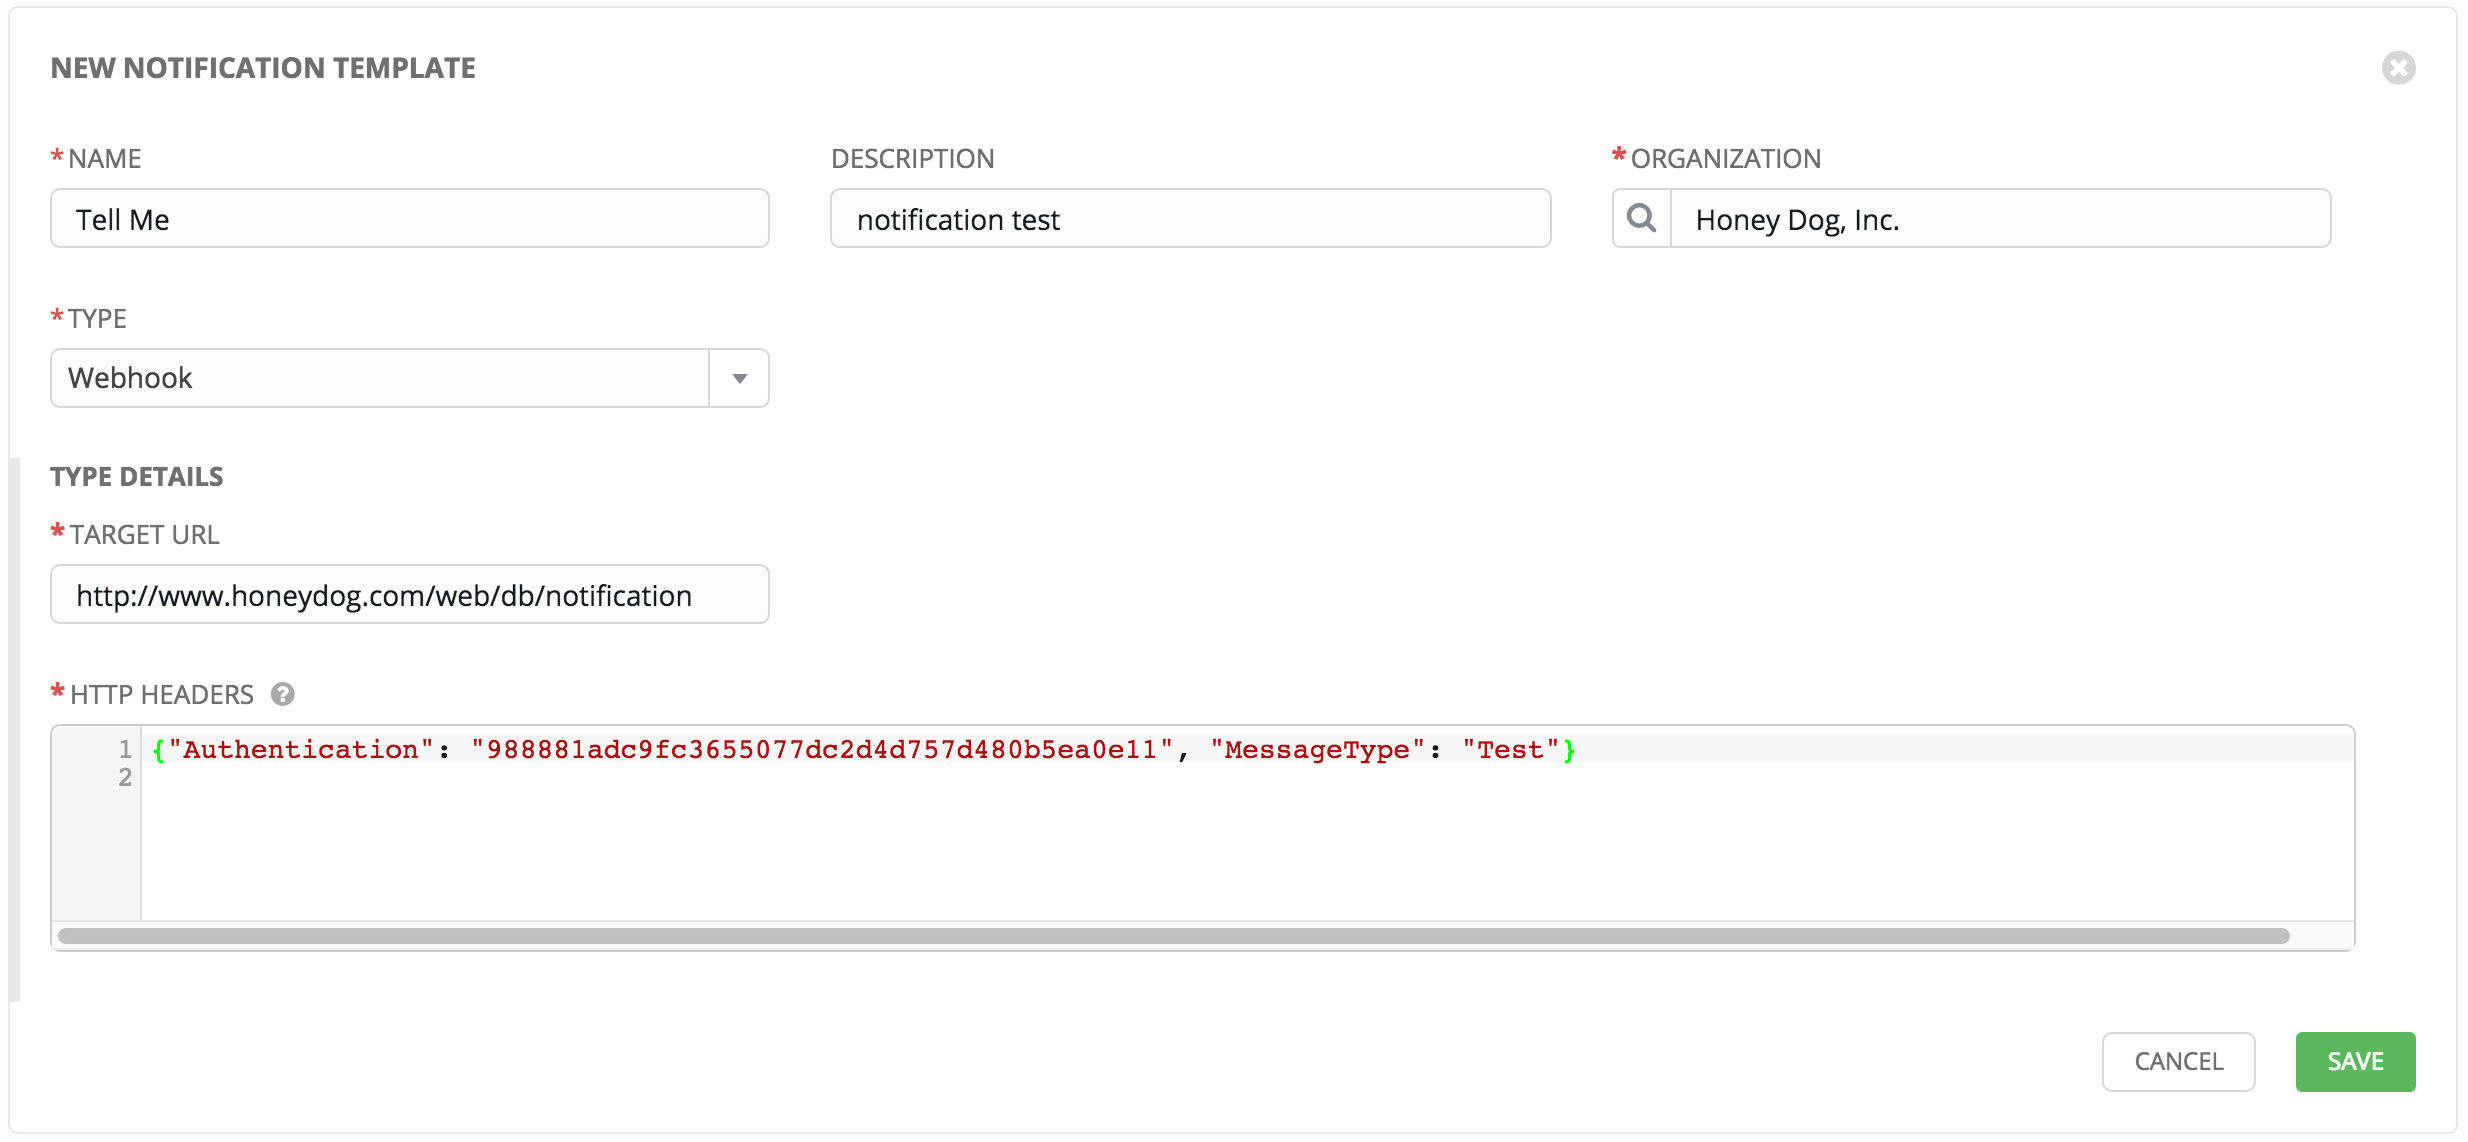
16.4.6. Webhook
The webhook notification type in Ansible Tower provides a simple interface to sending POSTs to a predefined web service. Tower will POST to this address using application/json content type with the data payload containing all relevant details in json format.
The parameters are pretty straightforward:
Target URL: The full URL that will be POSTed to
HTTP Headers: Headers in JSON form where the keys and values are strings. For example:
{"Authentication": "988881adc9fc3655077dc2d4d757d480b5ea0e11", "MessageType": "Test"}
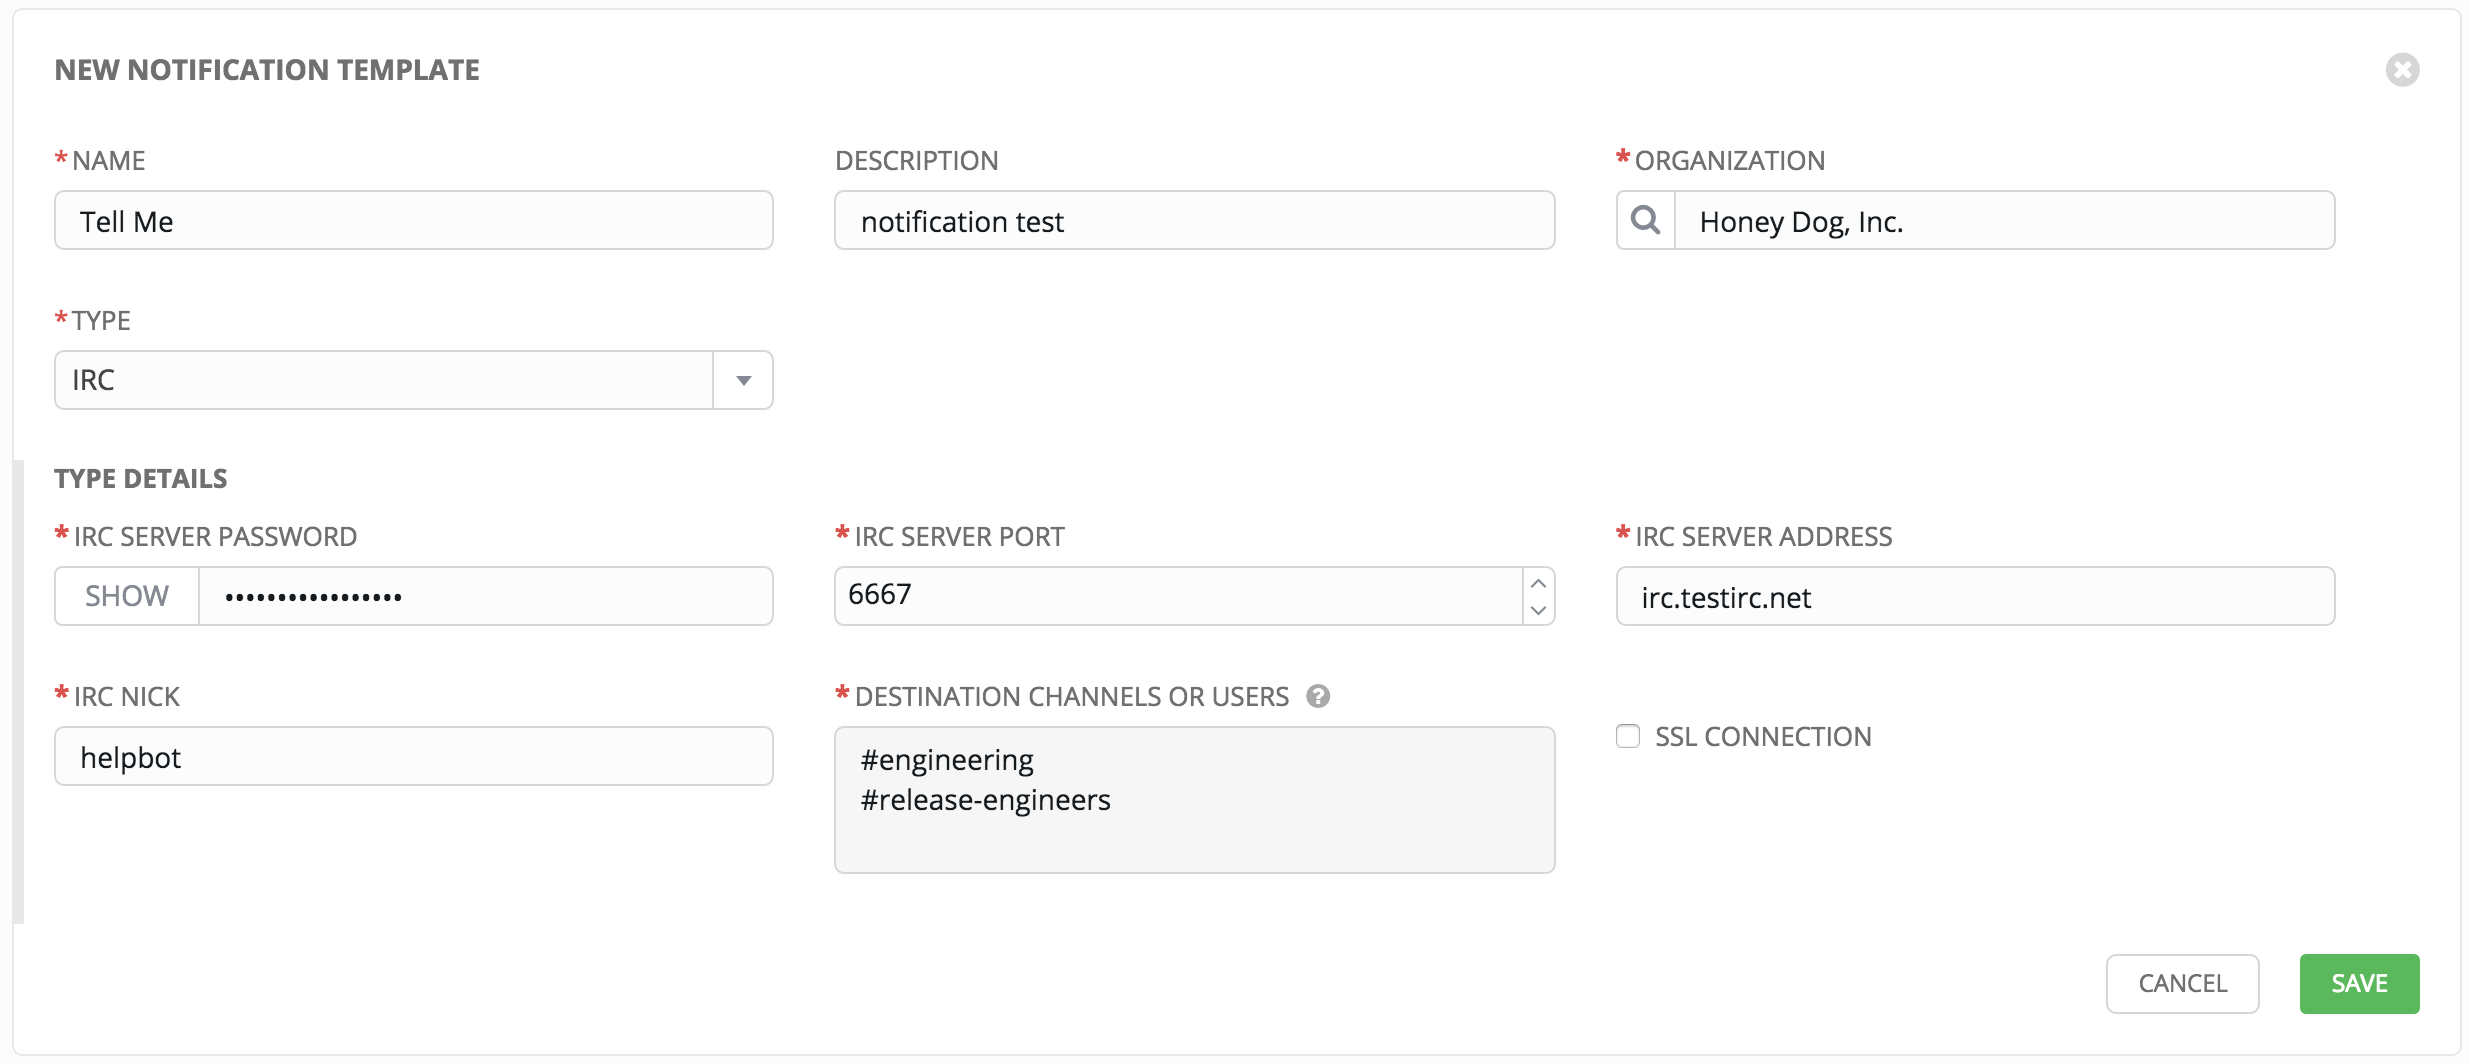
16.4.7. IRC
The Tower IRC notification takes the form of an IRC bot that will connect, deliver its messages to channel(s) or individual user(s), and then disconnect. The Tower notification bot also supports SSL authentication. The Tower bot does not currently support Nickserv identification. If a channel or user does not exist or is not on-line then the Notification will not fail; the failure scenario is reserved specifically for connectivity.
Connectivity information is straightforward:
- IRC Server Password: IRC servers can require a password to connect. If the server does not require one, leave blank
- IRC Server Port: The IRC server Port
- IRC Server Address: The host name or address of the IRC server
- IRC Nick: The bot’s nickname once it connects to the server
- Destination Channels or Users: A list of users and/or channels to which to send the notification.
- SSL Connection: Should the bot use SSL when connecting
16.5. Configuring the towerhost hostname
In /etc/tower/settings.py, you can modify TOWER_URL_BASE='https://tower.example.com' to change the notification hostname, replacing https://tower.example.com with your preferred hostname. You must restart Tower services after saving your changes with ansible-tower-service restart.
Refreshing your Tower license also changes the notification hostname. New installations of Ansible Tower 3.0 should not have to set the hostname for notifications.
16.5.1. Resetting the TOWER_URL_BASE
The primary way that Tower determines how the base URL (TOWER_URL_BASE) is defined is by looking at an incoming request and setting the server address based on that incoming request.
Tower takes settings values from the database first. If no settings values are found, Tower falls back to using the values from the settings files. If a user posts a license by navigating to the Tower host’s IP adddress, the posted license is written to the settings entry in the database.
To change the TOWER_URL_BASE if the wrong address has been picked up, navigate to the license from the Tower Settings () Menu’s ‘VIEW YOUR LICENSE’ link using the DNS entry you wish to appear in notifications, and re-add your license.