25. Instance Groups
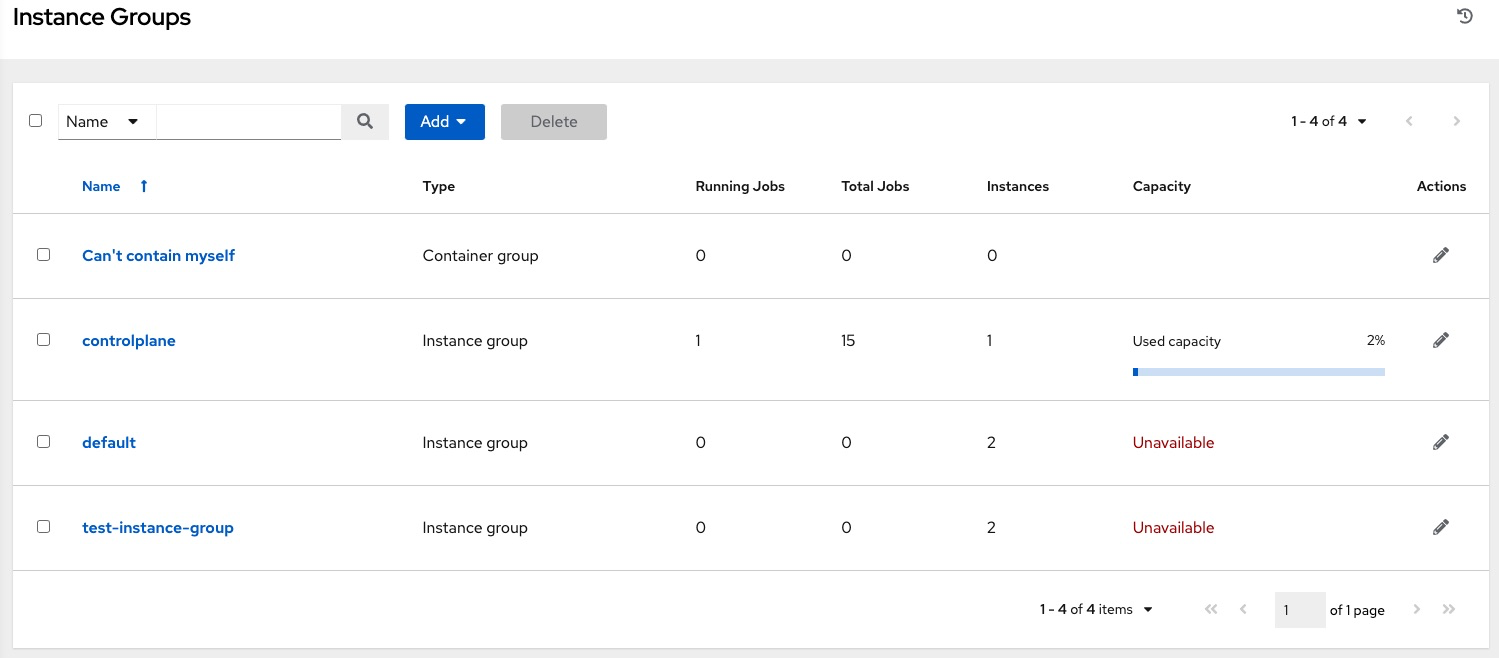
An Instance Group provides the ability to group instances in a clustered environment. Additionally, policies dictate how instance groups behave and how jobs are executed. The following view displays the capacity levels based on policy algorithms:

For more information about the policy or rules associated with instance groups, see the Instance Groups section of the Automation Controller Administration Guide.
If you want to connect your instance group to a container, refer to Container Groups for further detail.
For an in-depth discussion on these concepts, refer to the Feature Spotlight: Instance Groups and Isolated Nodes blog.
25.1. Create an instance group
To create a new instance group:
Click Instance Groups from the left navigation menu to open the Instance Groups configuration window.
Click Add and select Add instance group.

Enter the appropriate details into the following fields:
Name. Names must be unique and must not be named controller.
Policy instance minimum. Enter the minimum number of instances to automatically assign to this group when new instances come online.
Policy instance percentage. Use the slider to select a minimum percentage of instances to automatically assign to this group when new instances come online.
Note
Policy instance fields are not required to create a new instance group. If you do not specify values, then the Policy instance minimum and Policy instance percentage default to 0.
Max concurrent jobs. Specify the maximum number of forks that can be run for any given job.
Max forks. Specify the maximum number of concurrent jobs that can be run for any given job.
Note
The default value of 0 for Max concurrent jobs and Max forks denotes no limit. See Instance group capacity limits in the Automation Controller Administration Guide for more detail.
Click Save.
Once the instance group is successfully created, the Details tab of the newly created instance group remains, allowing you to review and edit your instance group information. This is the same screen that opens when the Edit ( ) button is clicked from the Instance Groups list view. You can also edit Instances and review Jobs associated with this instance group.

25.1.1. Associate instances to an instance group
To associate instances to an instance group:
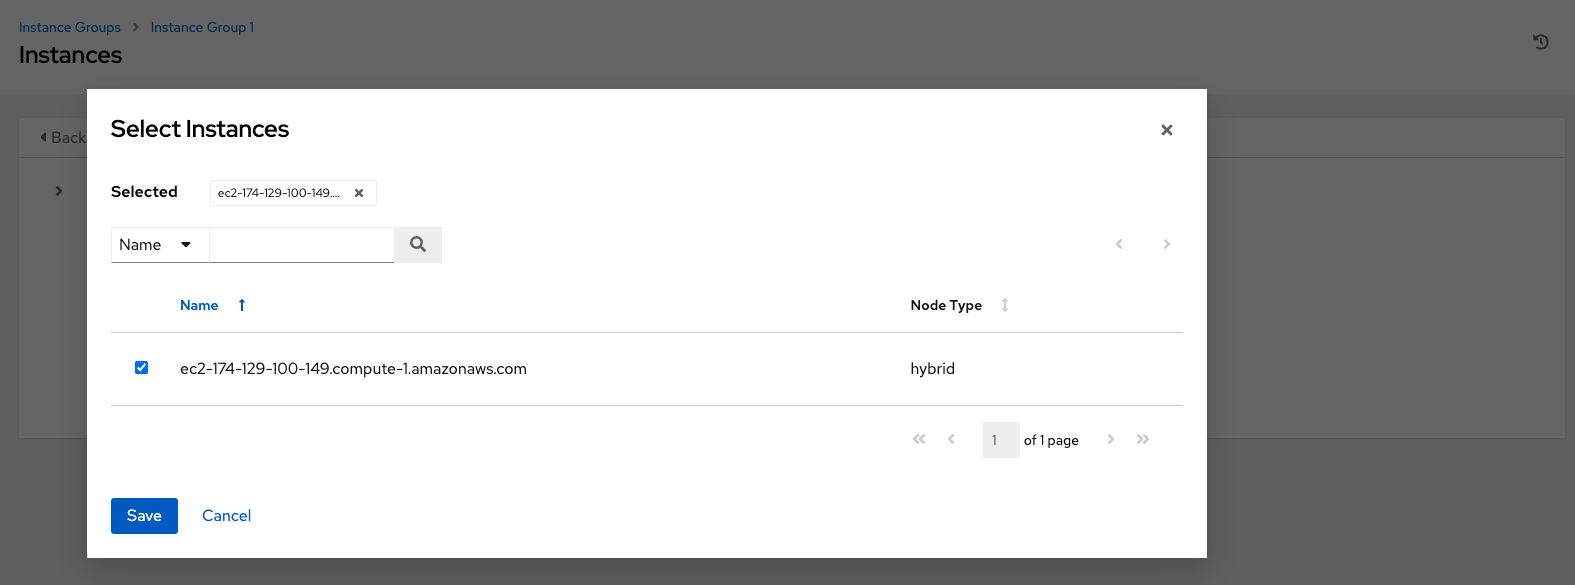
Click the Instances tab of the Instance Group window and click the Associate button.
Click the checkbox next to one or more available instances from the list to select the instance(s) you want to associate with the instance group.

In the following example, the instances added to the instance group displays along with information about their capacity.
This view also allows you to edit some key attributes associated with the instances in your instance group:

25.1.2. View jobs associated with an instance group
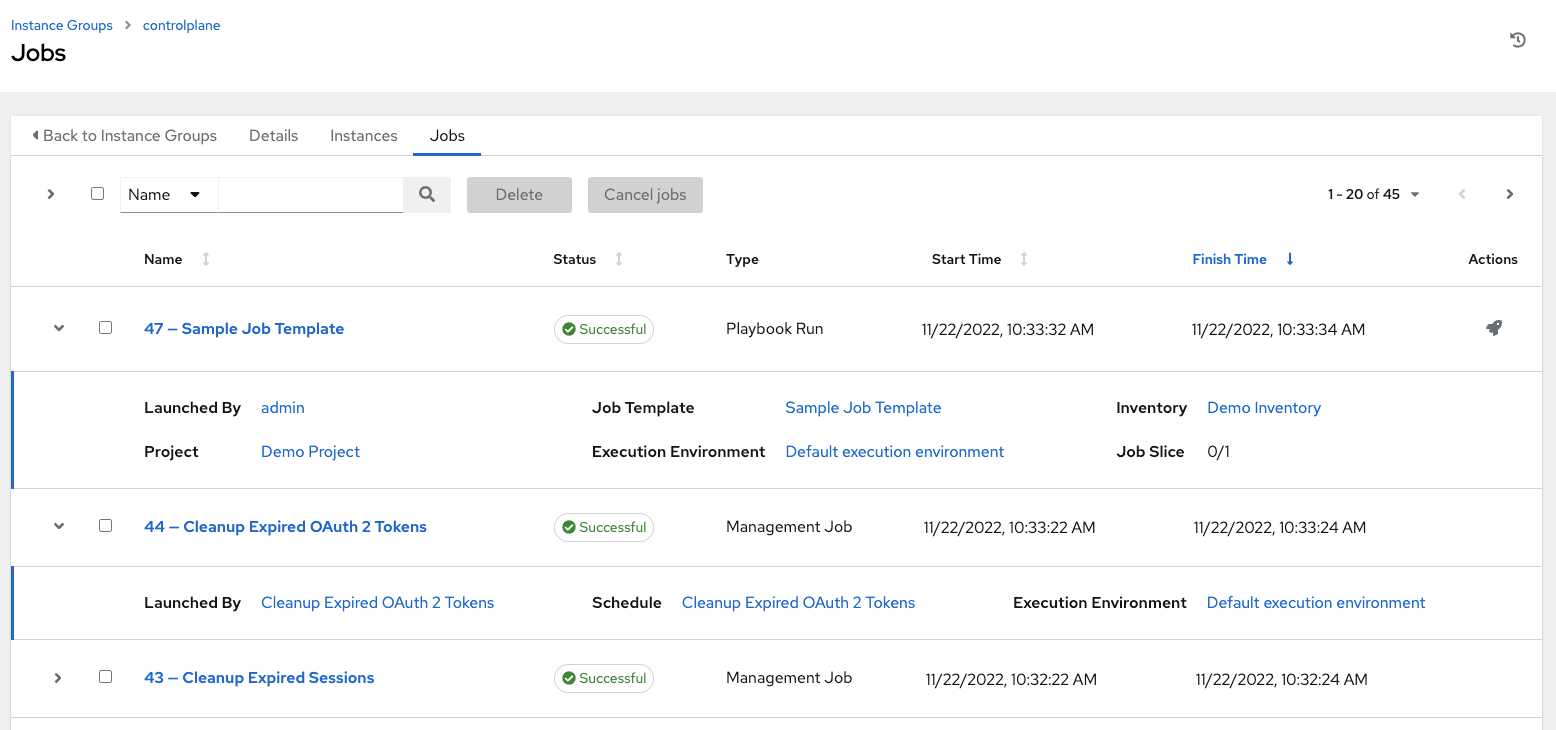
To view the jobs associated with the instance group, click the Jobs tab of the Instance Group window and then click Expanded to expand the view to show details about each job.

Each job displays the job status, ID, and name; type of job, time started and completed, who started the job; and applicable resources associated with it, such as template, inventory, project, execution environment, etc.
The instances are run in accordance with instance group policies. Refer to Instance Group Policies in the Automation Controller Administration Guide.
