8. Users
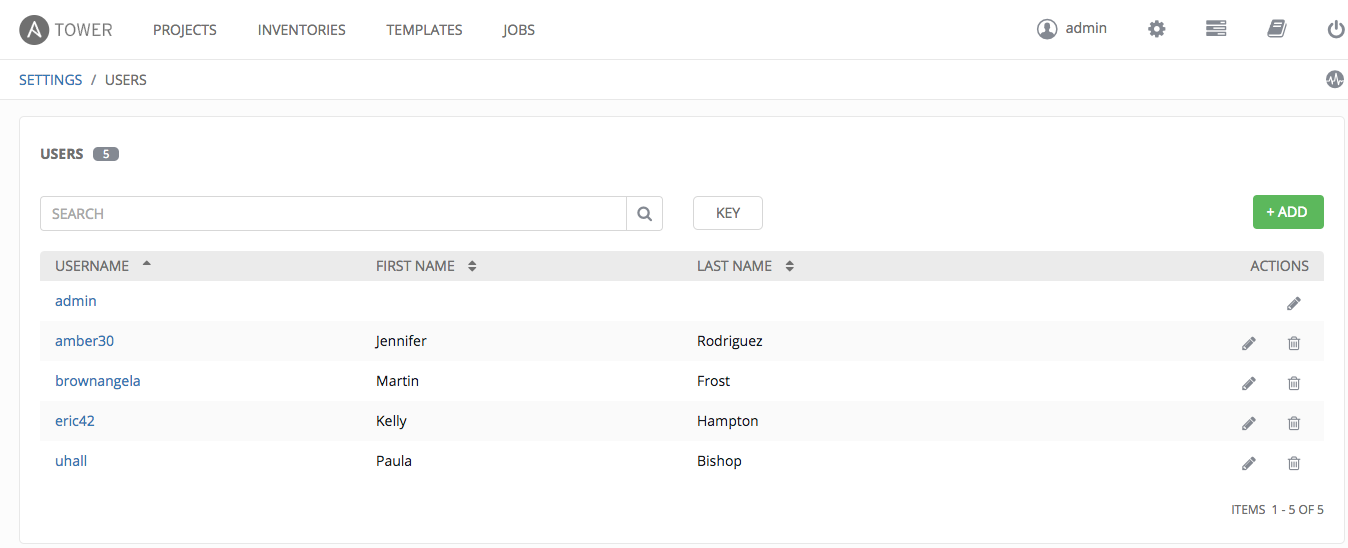
A User is someone who has access to Tower with associated permissions and credentials. The Users link (found by clicking on the Settings ( ) menu and selecting Users) allows you to manage all Tower users. The User list may be sorted and searched by Username, First Name, or Last Name headers to toggle your sorting preference).
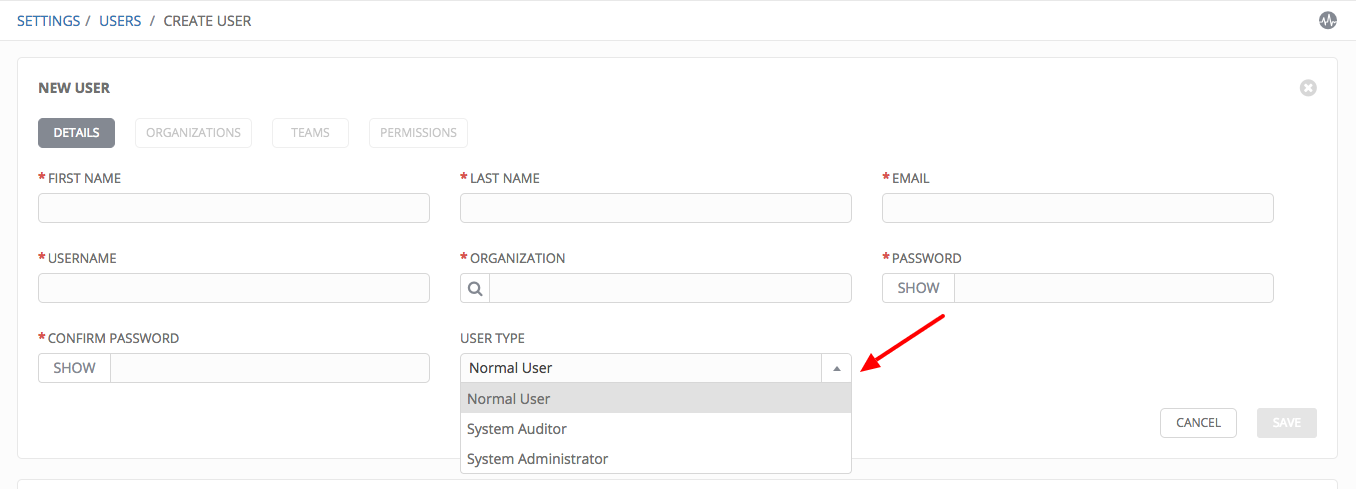
There are three types of Tower Users that can be assigned from the Create User screen:
- Normal User: Normal Users have read and write access limited to the resources (such as inventory, projects, and job templates) for which that user has been granted the appropriate roles and privileges.
- System Auditor: Auditors implicitly inherit the read-only capability for all objects within the Tower environment.
- System Administrator: A Tower System Administrator (also known as Superuser) has admin, read, and write privileges over the entire Tower installation. A System Administrator is typically responsible for managing all aspects of Tower and delegating responsibilities for day-to-day work to various Users.
Note
The initial user (usually “admin”) created by the Tower installation process is a Superuser. One Superuser must always exist. To delete the “admin” user account, you must first create another Superuser account.
8.1. Create a User
To create a new user:
- Click the
 button, which opens the Create User dialog.
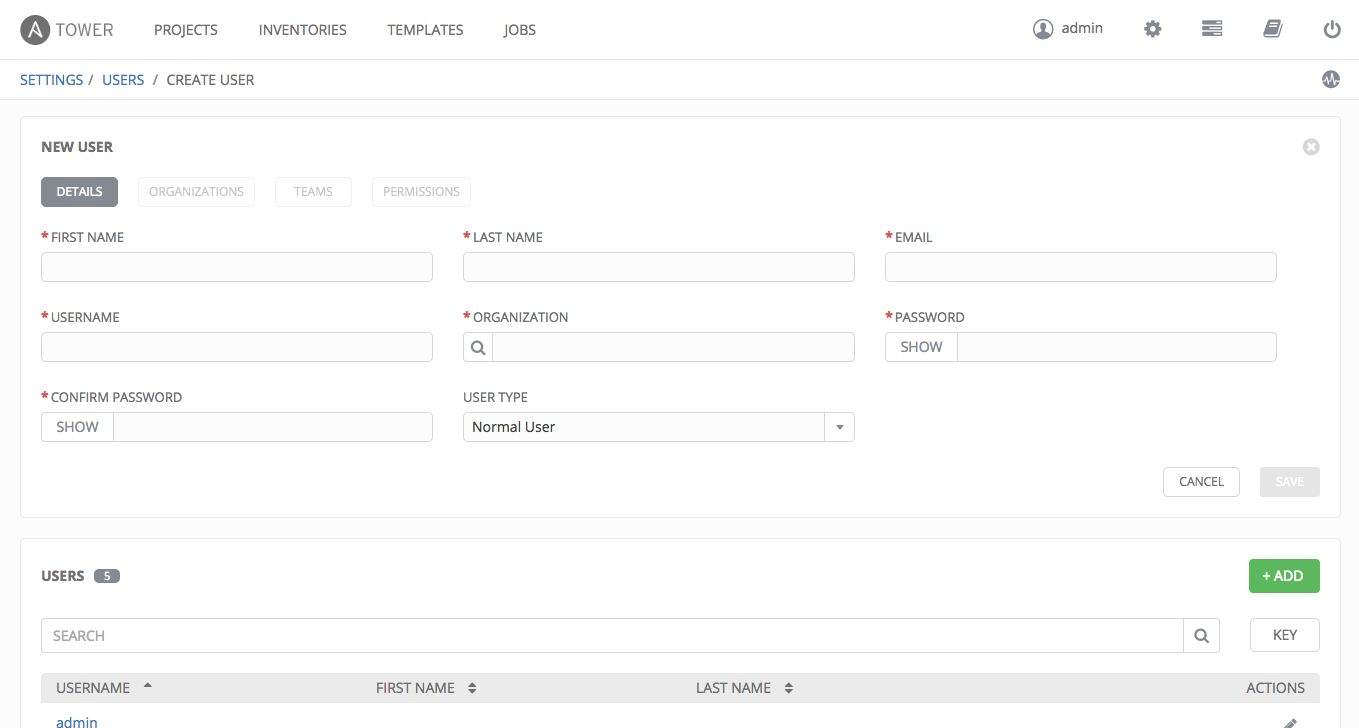
- Enter the appropriate details into the following fields:
- First Name
- Last Name
- Username
- Organization (Choose from an existing organization–this is the default organization if you are using a Self-Supported level license.)
- Password
- Confirmation Password
- User Type (The System Administrator, superuser, has full system administration privileges for Tower. Assign with caution!)
- Select Save when finished.
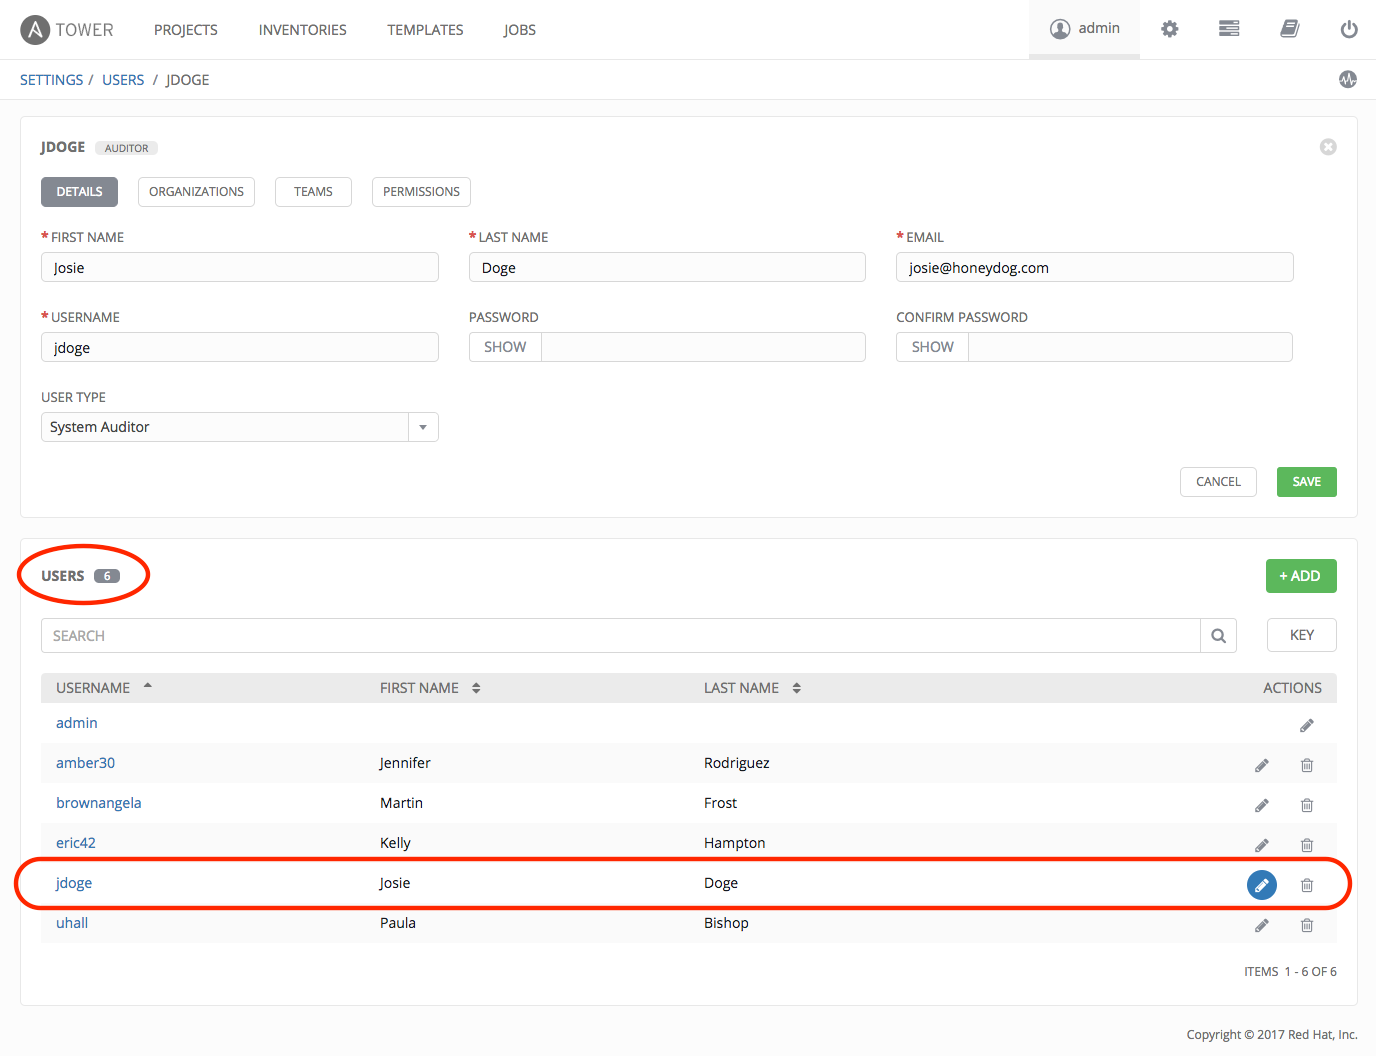
Once the user is successfully created, the User dialog opens for that newly created User. Note the count for the number of users has also been updated, and a new entry for the new user is added to the list of users below the edit form. This is the same dialog that is opened if the Edit ( ) button beside a User is clicked from the Users link within Tower’s Settings (
 ). Here, the User’s Organizations, Teams and Permissions, as well as other user membership details, may be reviewed and modified.
8.2. User Types - Quick View
Once a user has been created, you can easily view permissions and user type information by looking beside their user name in the User overview screen.

If the user account is associated with an enterprise-level authentication method (such as SAML, RADIUS, or LDAP), the user type may look like:

If the user account is associated with a social authentication method, the user type will look like:

8.3. Users - Organizations
This displays the list of organizations of which that user is a member. This list may be searched by Organization Name or Description. Organization membership cannot be modified from this display panel.

8.4. Users - Teams
This displays the list of teams of which that user is a member. This list may be searched by Team Name or Description. Team membership cannot be modified from this display panel. For more information, refer to Teams.
Until a Team has been created and the user has been assigned to that team, the assigned Teams Details for the User appears blank.

8.5. Users - Permissions
The set of Permissions assigned to this user (role-based access controls) that provide the ability to read, modify, and administer projects, inventories, job templates, and other Tower elements are Privileges.
This screen displays a list of the privileges that are currently available for a selected User. The privileges list may be sorted and searched by Name, Type, or Role.
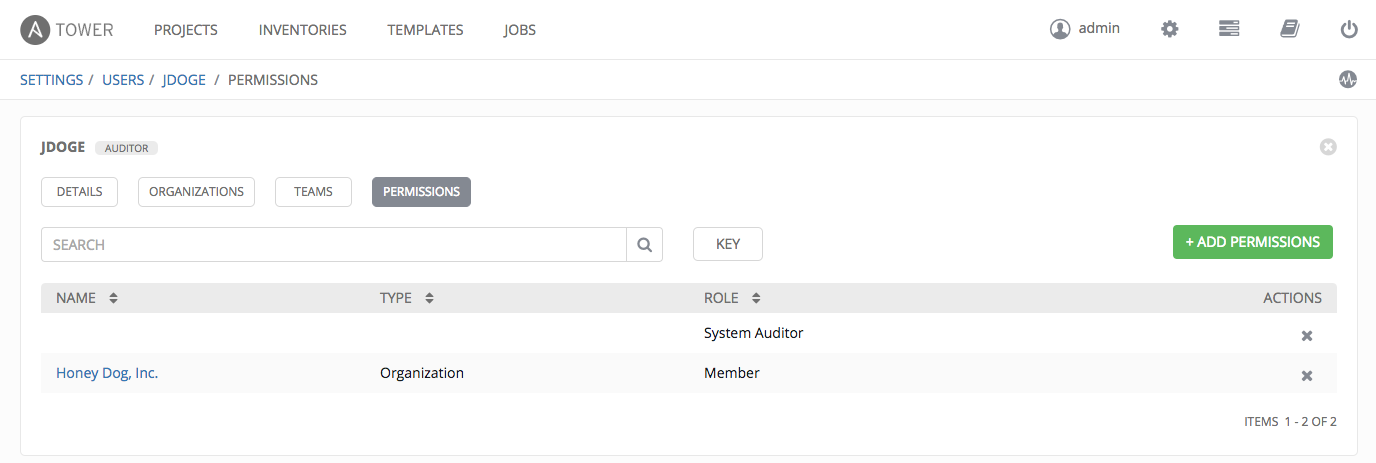
8.5.1. Add Permissions
To add permissions to a particular user:
- Click the
 button, which opens the Add Permissions Wizard.
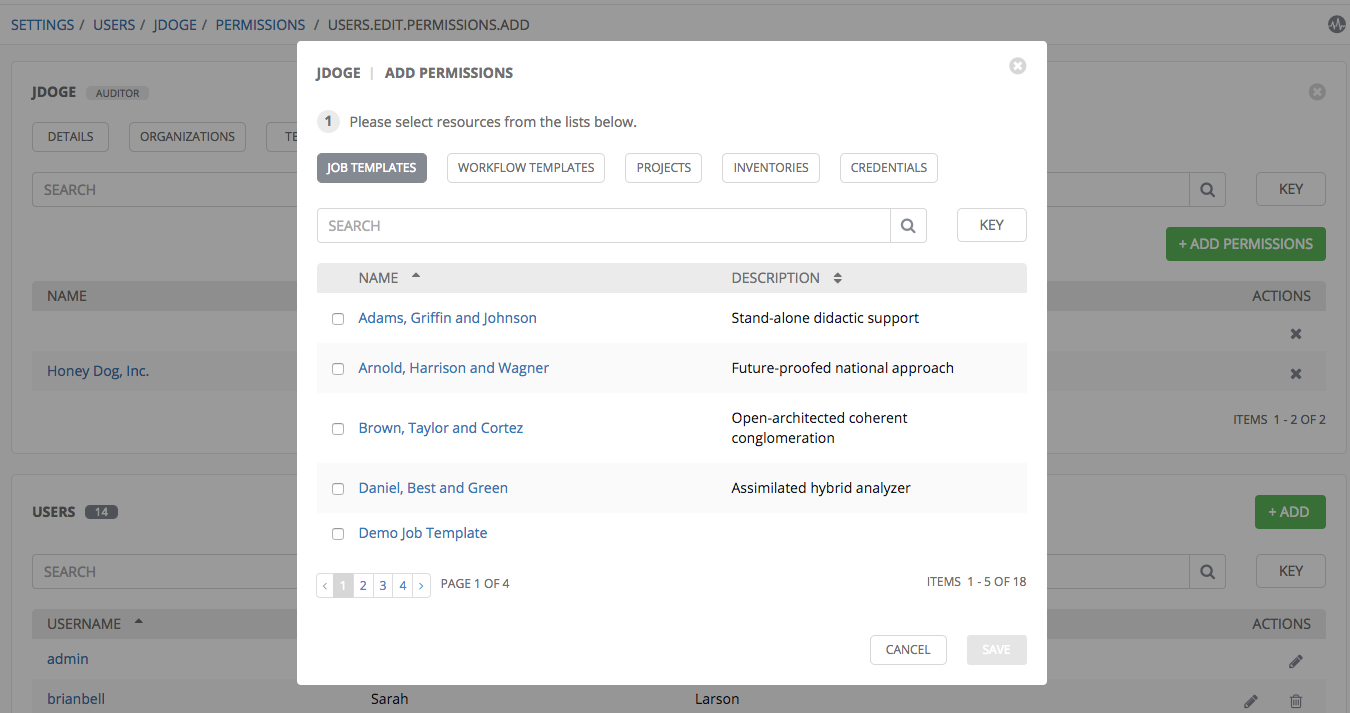
Click to select the Tower object for which the user will have access:
- Job Templates. This is the default tab displayed in the Add Permissions Wizard.
- Workflow Templates
- Projects
- Inventories
- Credentials
Note
You can assign different roles to different resources all at once to avoid having to click the
 button. To do so, simply go from one tab to another after making your selections without saving.
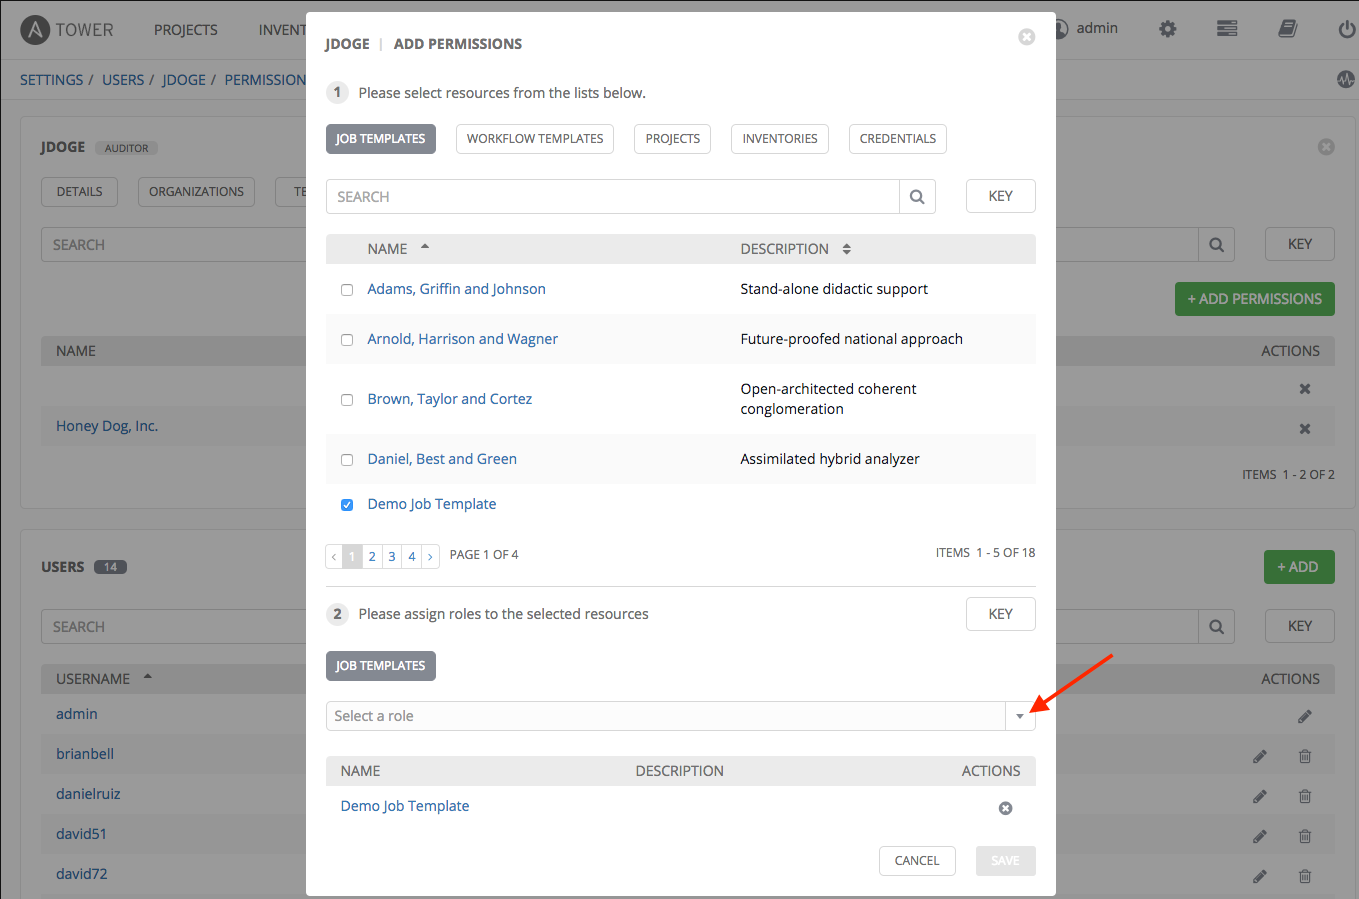
Perform the following steps to assign the user specific roles for each type of resource:
In the desired tab, click the checkbox beside the name of the resource to select it.
The dialog expands to allow you to select the role for the resource you chose.
Select the role from the drop-down menu list provided:
- Admin allows read, run, and edit privileges (applicable to all Tower objects)
- Execute allows read and run privileges (applicable to job templates and workflow templates)
- Use allows use of the project in a job template (applicable to projects, inventories, and credentials)
- Update allows updating of project, inventory, or group via the SCM Update (applicable to projects and inventories)
- Ad Hoc allows running of ad hoc commands (applicable to inventories)
Tip
Use the Key button to display the help text for each of the roles applicable to the resource selected.
Review your role assignments for each of the Tower objects by clicking on their respective buttons in the expanded section 2 of the Add Permissions Wizard.
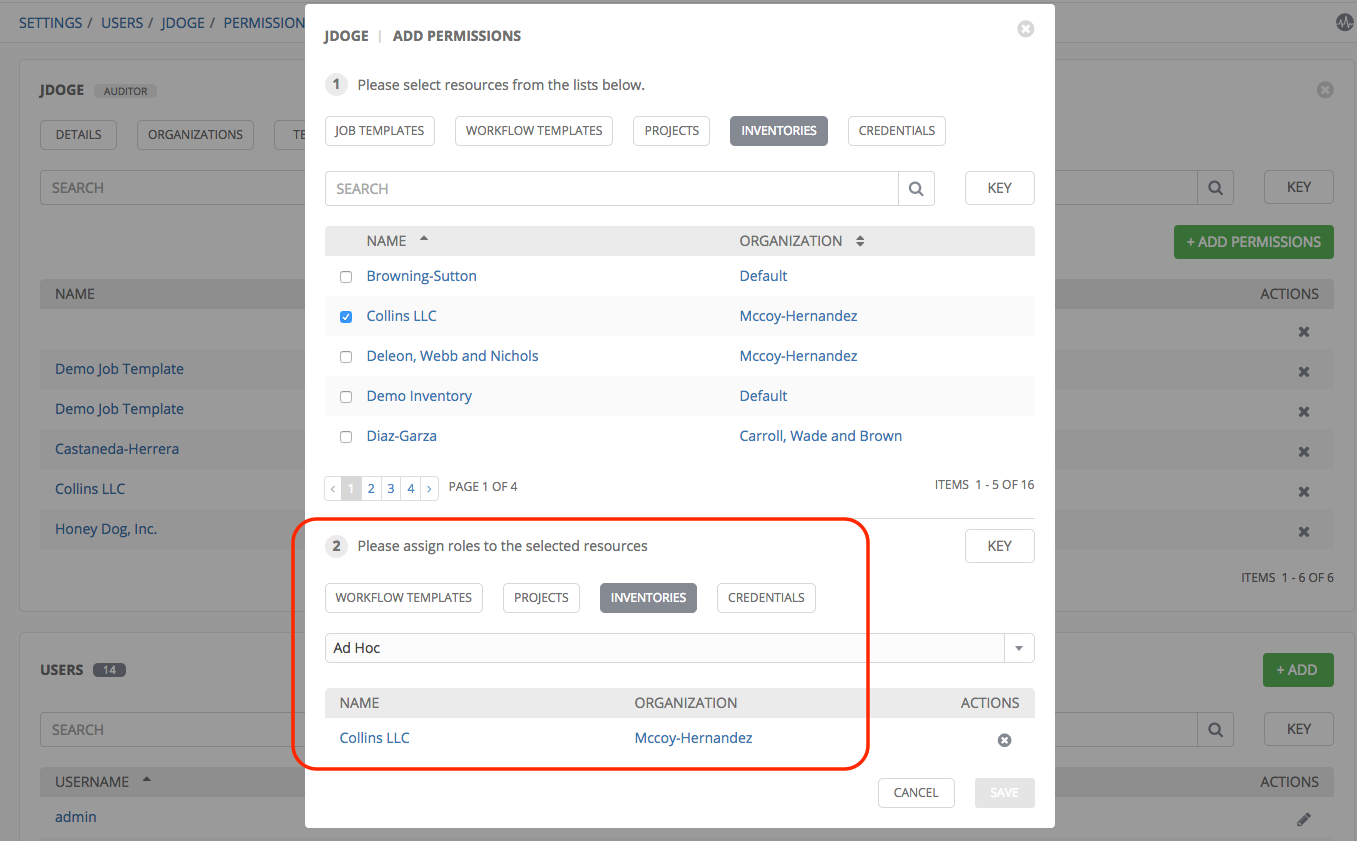
Click Save when done, and the Add Permissions Wizard closes to display the updated profile for the user with the roles assigned for each selected resource.
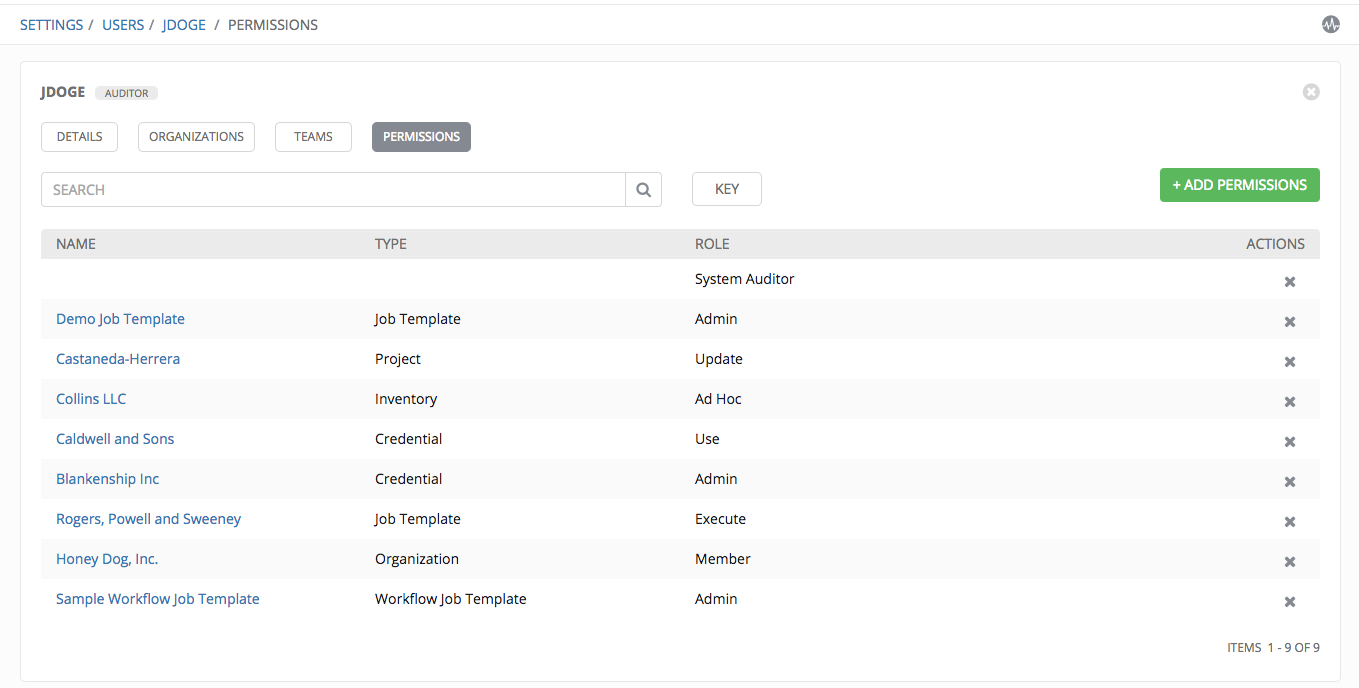
To remove Permissions for a particular User, click the Disassociate (
 ) button under Actions. This launches a Remove Role dialog, asking you to confirm the disassociation.
Note
You can also add teams or individual users and assign them permissions at the object level (projects, inventories, job templates, and workflow templates) as well. Ansible Tower release 3.1 introduces the ability to batch assign permissions. This feature reduces the time for an organization to onboard many users at one time. For more details, refer to their respective chapters in the Ansible Tower User Guide v3.2.1.
