7. Organizations
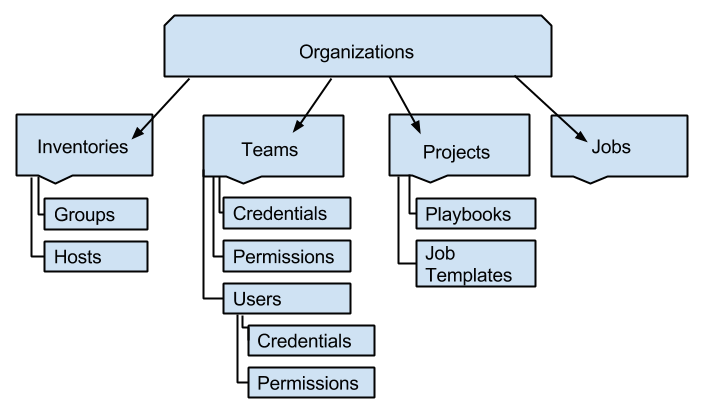
An Organization is a logical collection of Users, Teams, Projects, and Inventories, and is the highest level in the Tower object hierarchy.
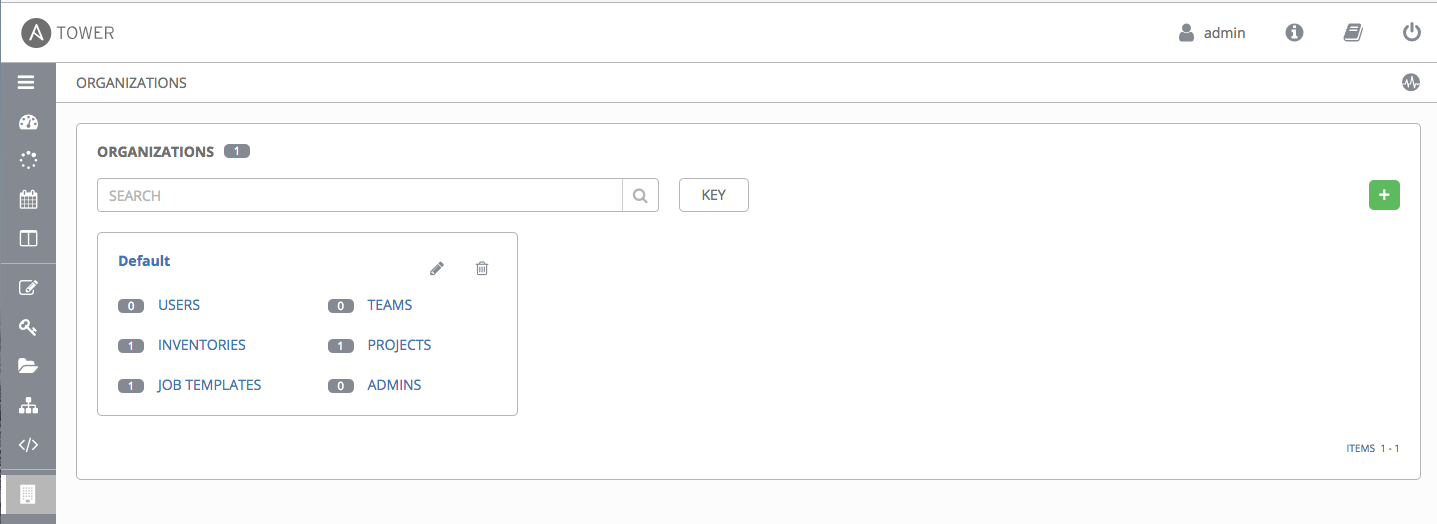
Access the Organizations page by clicking the Organizations (![]() ) icon from the left navigation bar. The Organizations page displays all of the existing organizations for your installation of Tower. Organizations can be searched by Name or Description. Modify and remove organizations using the Edit and Delete buttons.
) icon from the left navigation bar. The Organizations page displays all of the existing organizations for your installation of Tower. Organizations can be searched by Name or Description. Modify and remove organizations using the Edit and Delete buttons.
Note
Tower creates a default organization automatically. Users of Tower with a Self-Support level license (formerly called Basic) only have the default organization available and should not delete it. Users of older versions of Tower (prior to 2.2) will not see this default organization.
7.1. Creating a New Organization
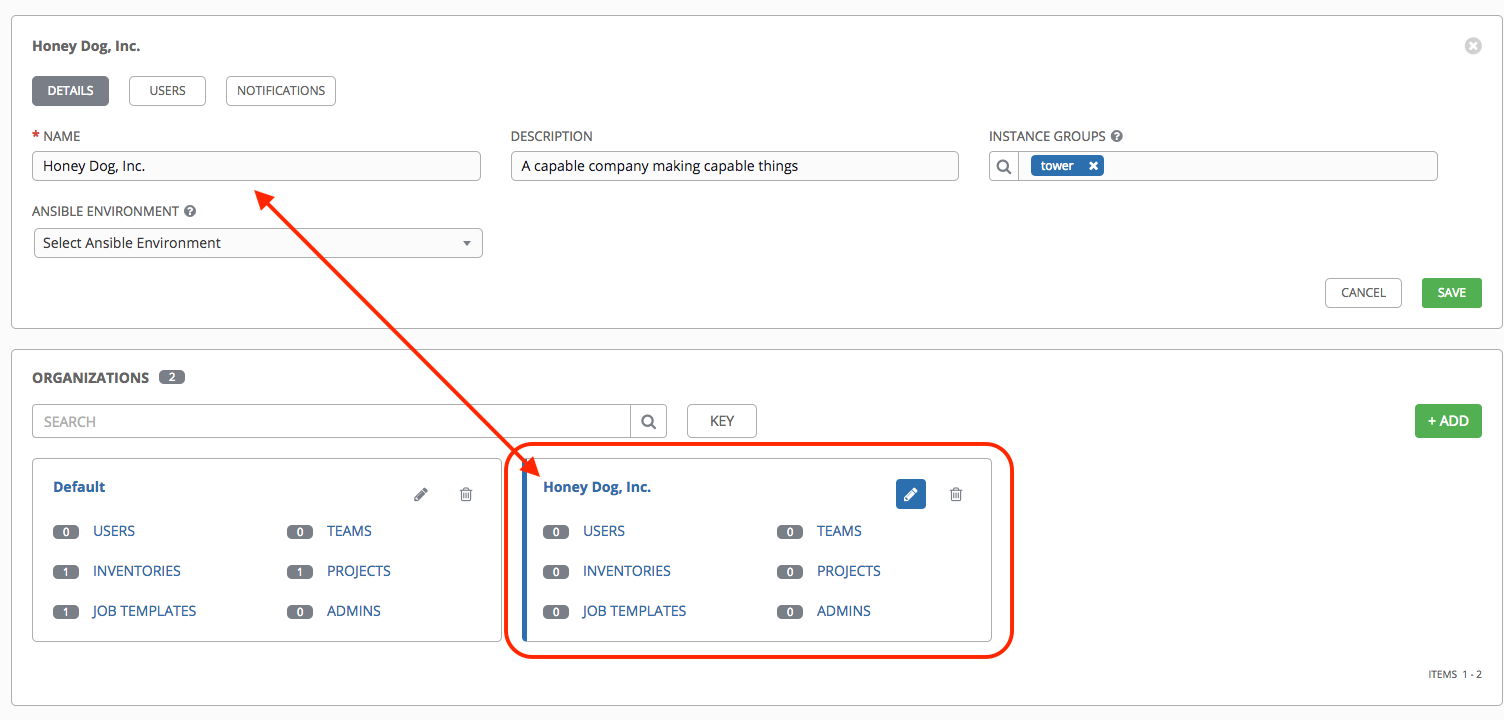
“Enterprise: Standard” and “Enterprise: Premium” Tower licenses allow you to create a new Organization by selecting the  button.
Note
If you are using Ansible Tower with a Self-Support level license (formerly called Basic), you must use the default Organization. Do not delete it and try to add a new Organization, or you will break your Tower setup. Only two Tower license types (Enterprise: Standard or Enterprise: Premium) have the ability to add new Organizations beyond the default.

An organization has several attributes that may be configured:
Enter the Name for your Organization (required).
Enter a Description for the Organization.
Enter an Instance Group on which to run this organization.
Select from the drop-down menu list a custom virtual Ansible Environment on which to run this organization.
Click Save to finish creating the Organization.
Once created, Tower displays the Organization details, and allows for the managing of users and administrators for the Organization.
7.1.1. Organizations - Users
Clicking on Users (beside Details when viewing your organization), displays all the Users associated with this Organization. A User is someone with access to Tower with associated roles and Credentials.

As you can manage the user membership for this Organization here, you can manage user membership on a per-user basis from the Users page by clicking the Users (![]() ) icon from the left navigation bar. The user list from the Organizations view may be sorted by username. Use the Tower Search to search for users by various attributes. Click Key for using the search, or refer to the Search chapter for more information.
) icon from the left navigation bar. The user list from the Organizations view may be sorted by username. Use the Tower Search to search for users by various attributes. Click Key for using the search, or refer to the Search chapter for more information.
Clicking on a user brings up that user’s details, allowing you to review, grant, edit, and remove associated permissions for that user. For more information, refer to Users.
7.1.1.1. Add a User
In order to add a user to an organization, the user must already be created in Tower. Refer to Create a User to create a user. To add existing users to the Organization:
Click the
 button.
Select one or more users from the list of available users by clicking the checkbox next to the user(s). Doing so expands the lower part of the Wizard to assign roles to each user.
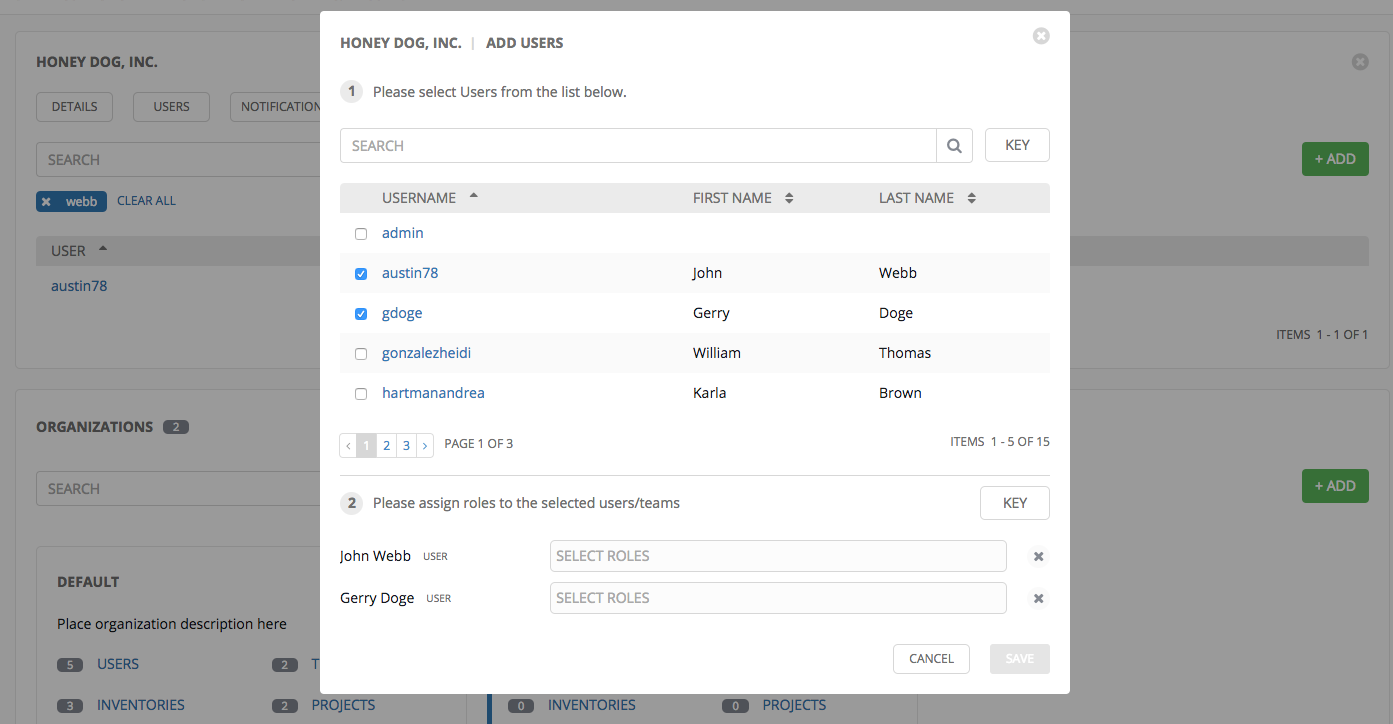
For each user, click from the drop-down menu to select one or more roles for that user.
Note
For help on what the roles mean, click the Key button. For more information, refer to the Roles section of this guide.
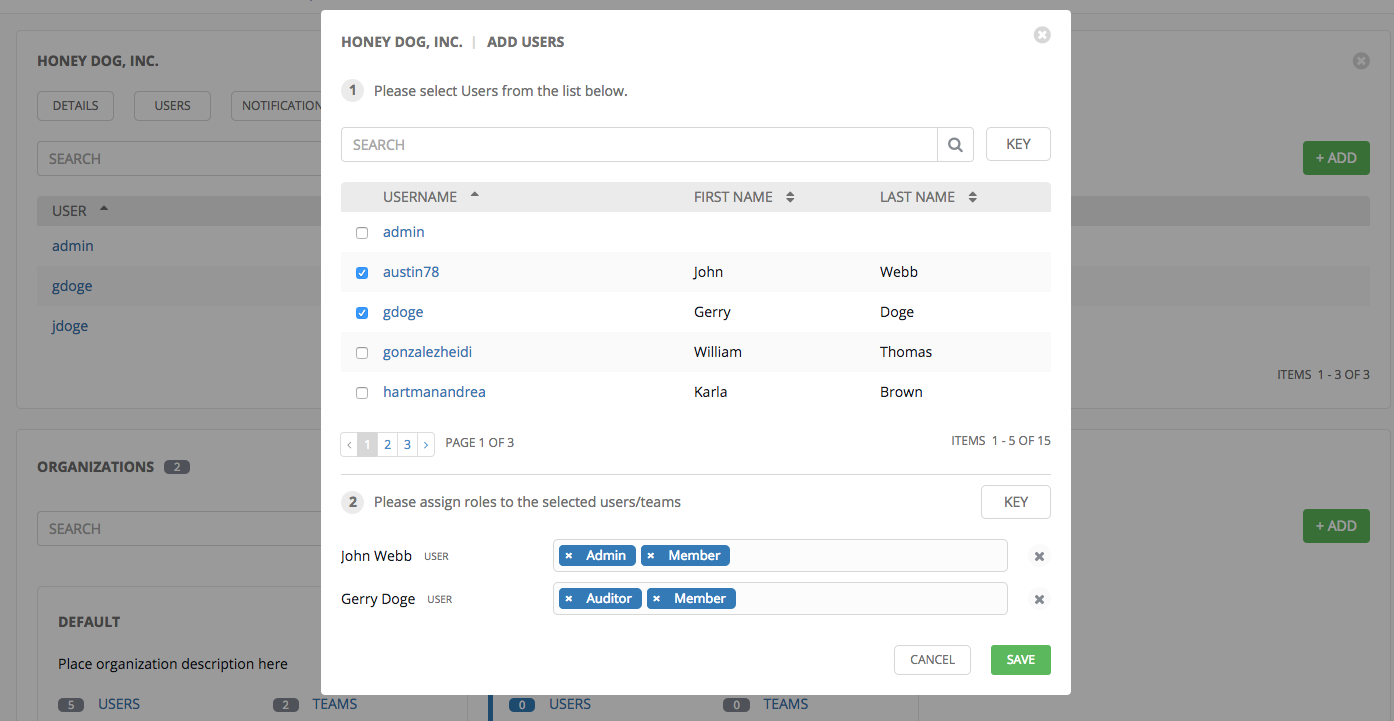
In this example, two users have been selected and each have been granted certain roles within this organization.
Click the Save button when done.
7.1.2. Organizations - Notifications
Clicking on Notifications (beside Users when viewing your organization), allows you to easily manage notifications for this organization.

To create a new notification, click the NOTIFICATIONS link from the upper-right side of the notifications list view.
Note
If no notifications have been set up, click the NOTIFICATIONS link from above or inside the gray box to add a new notification:

Supported notification sources include Slack, Email, SMS (via Twilio), HipChat, and more. Refer to Notifications for more information.

7.1.3. Organization - Summary
An at-a-glance view of various resources associated with an organization displays at the bottom of each Organization view, called the Organization Summary.
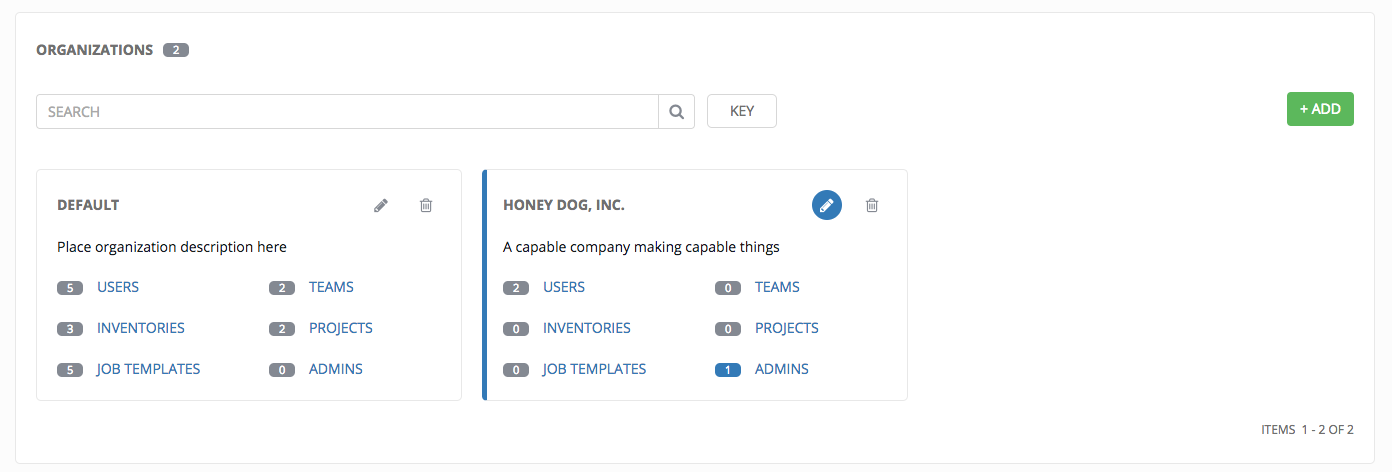
Click on each of the categories to view a list of resources associated with them. Some allow resources to be added, edited, or deleted, such as Users and Admins, while others require editing from another area of the user interface.
From the summary, you can edit the details of an organization ( ) or delete it altogether (
 ).
).
Note
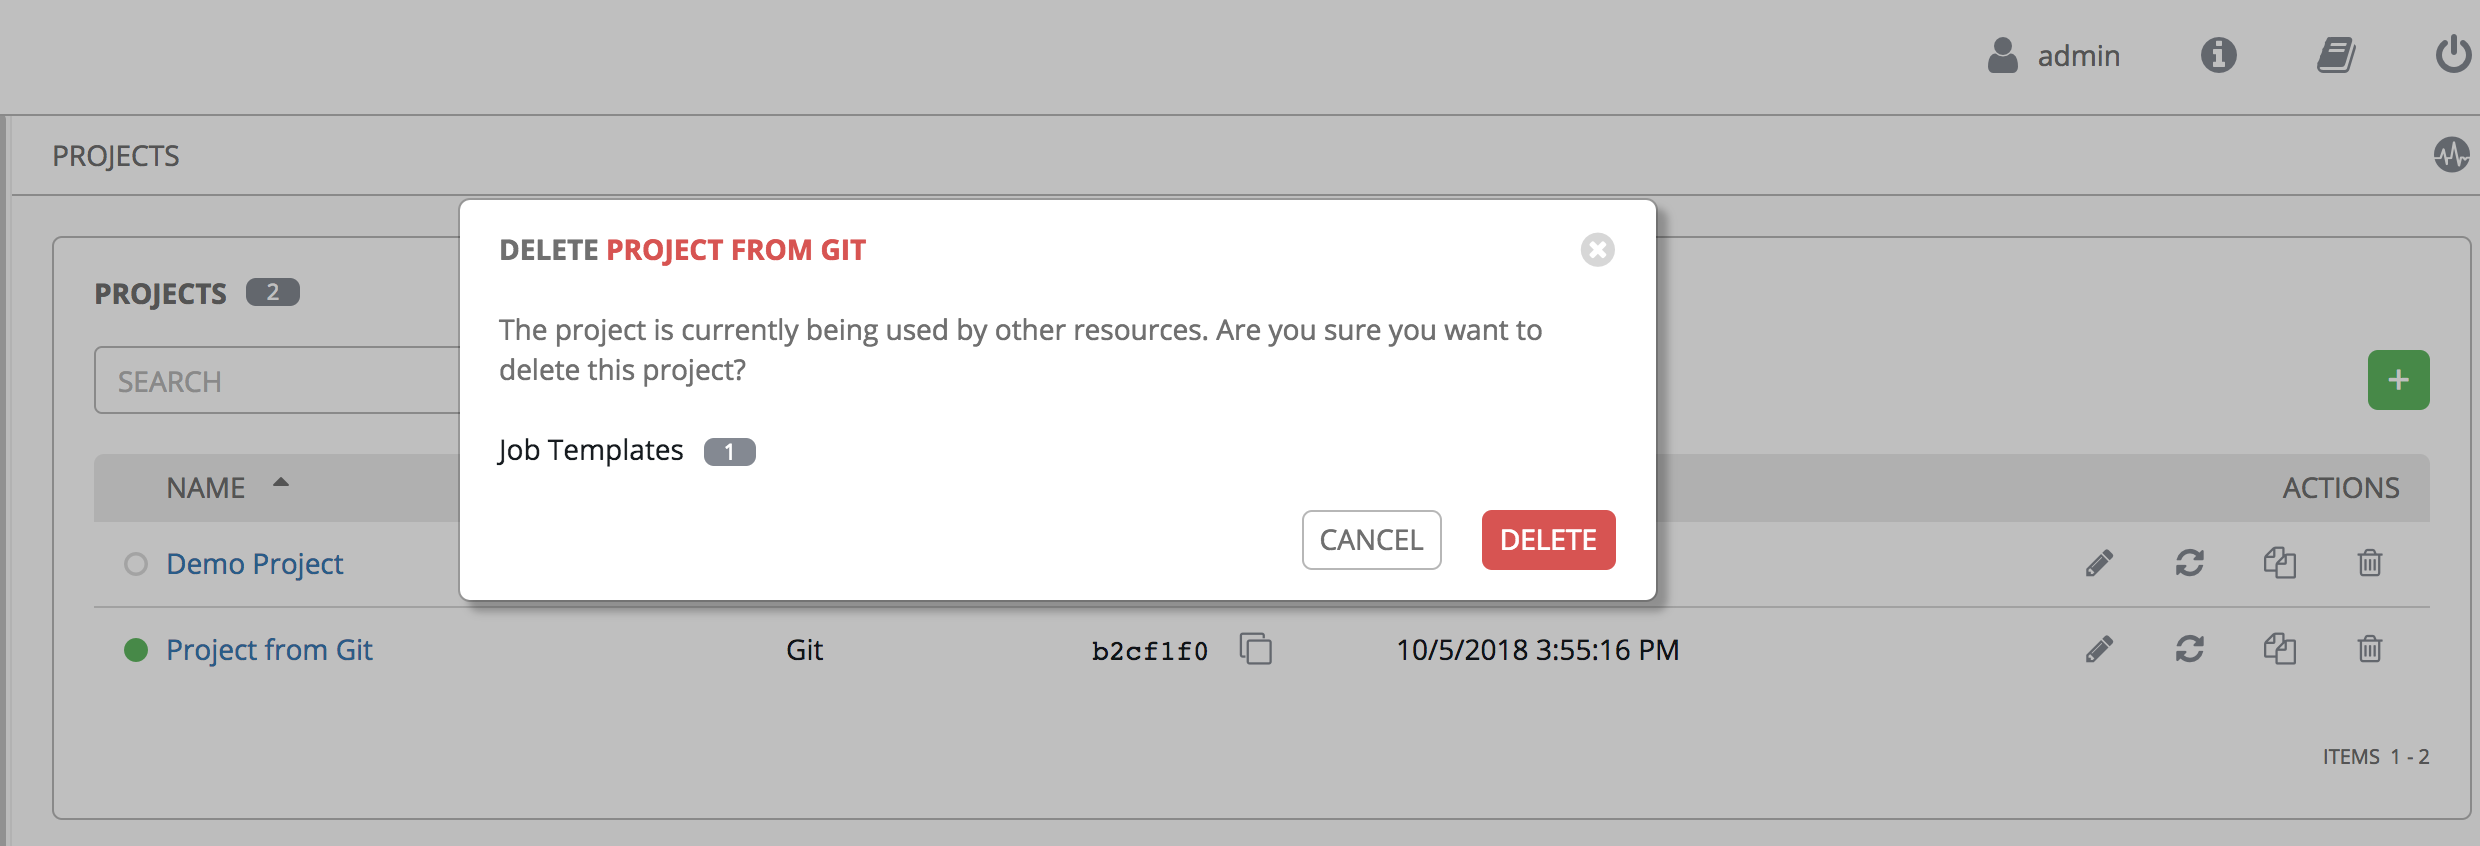
If deleting items that are used by other work items, a message opens listing the items are affected by the deletion and prompts you to confirm the deletion. Some screens will contain items that are invalid or previously deleted, so they will fail to run. Below is an example of such a message:
