4. Management Jobs
Management Jobs assist in the cleaning of old data, old system tracking information, old job histories, and old activity streams from Tower. You can use this if you have specific retention policies or need to decrease the storage used by your Tower database. From the Setup ( ) menu, click on Management Jobs.
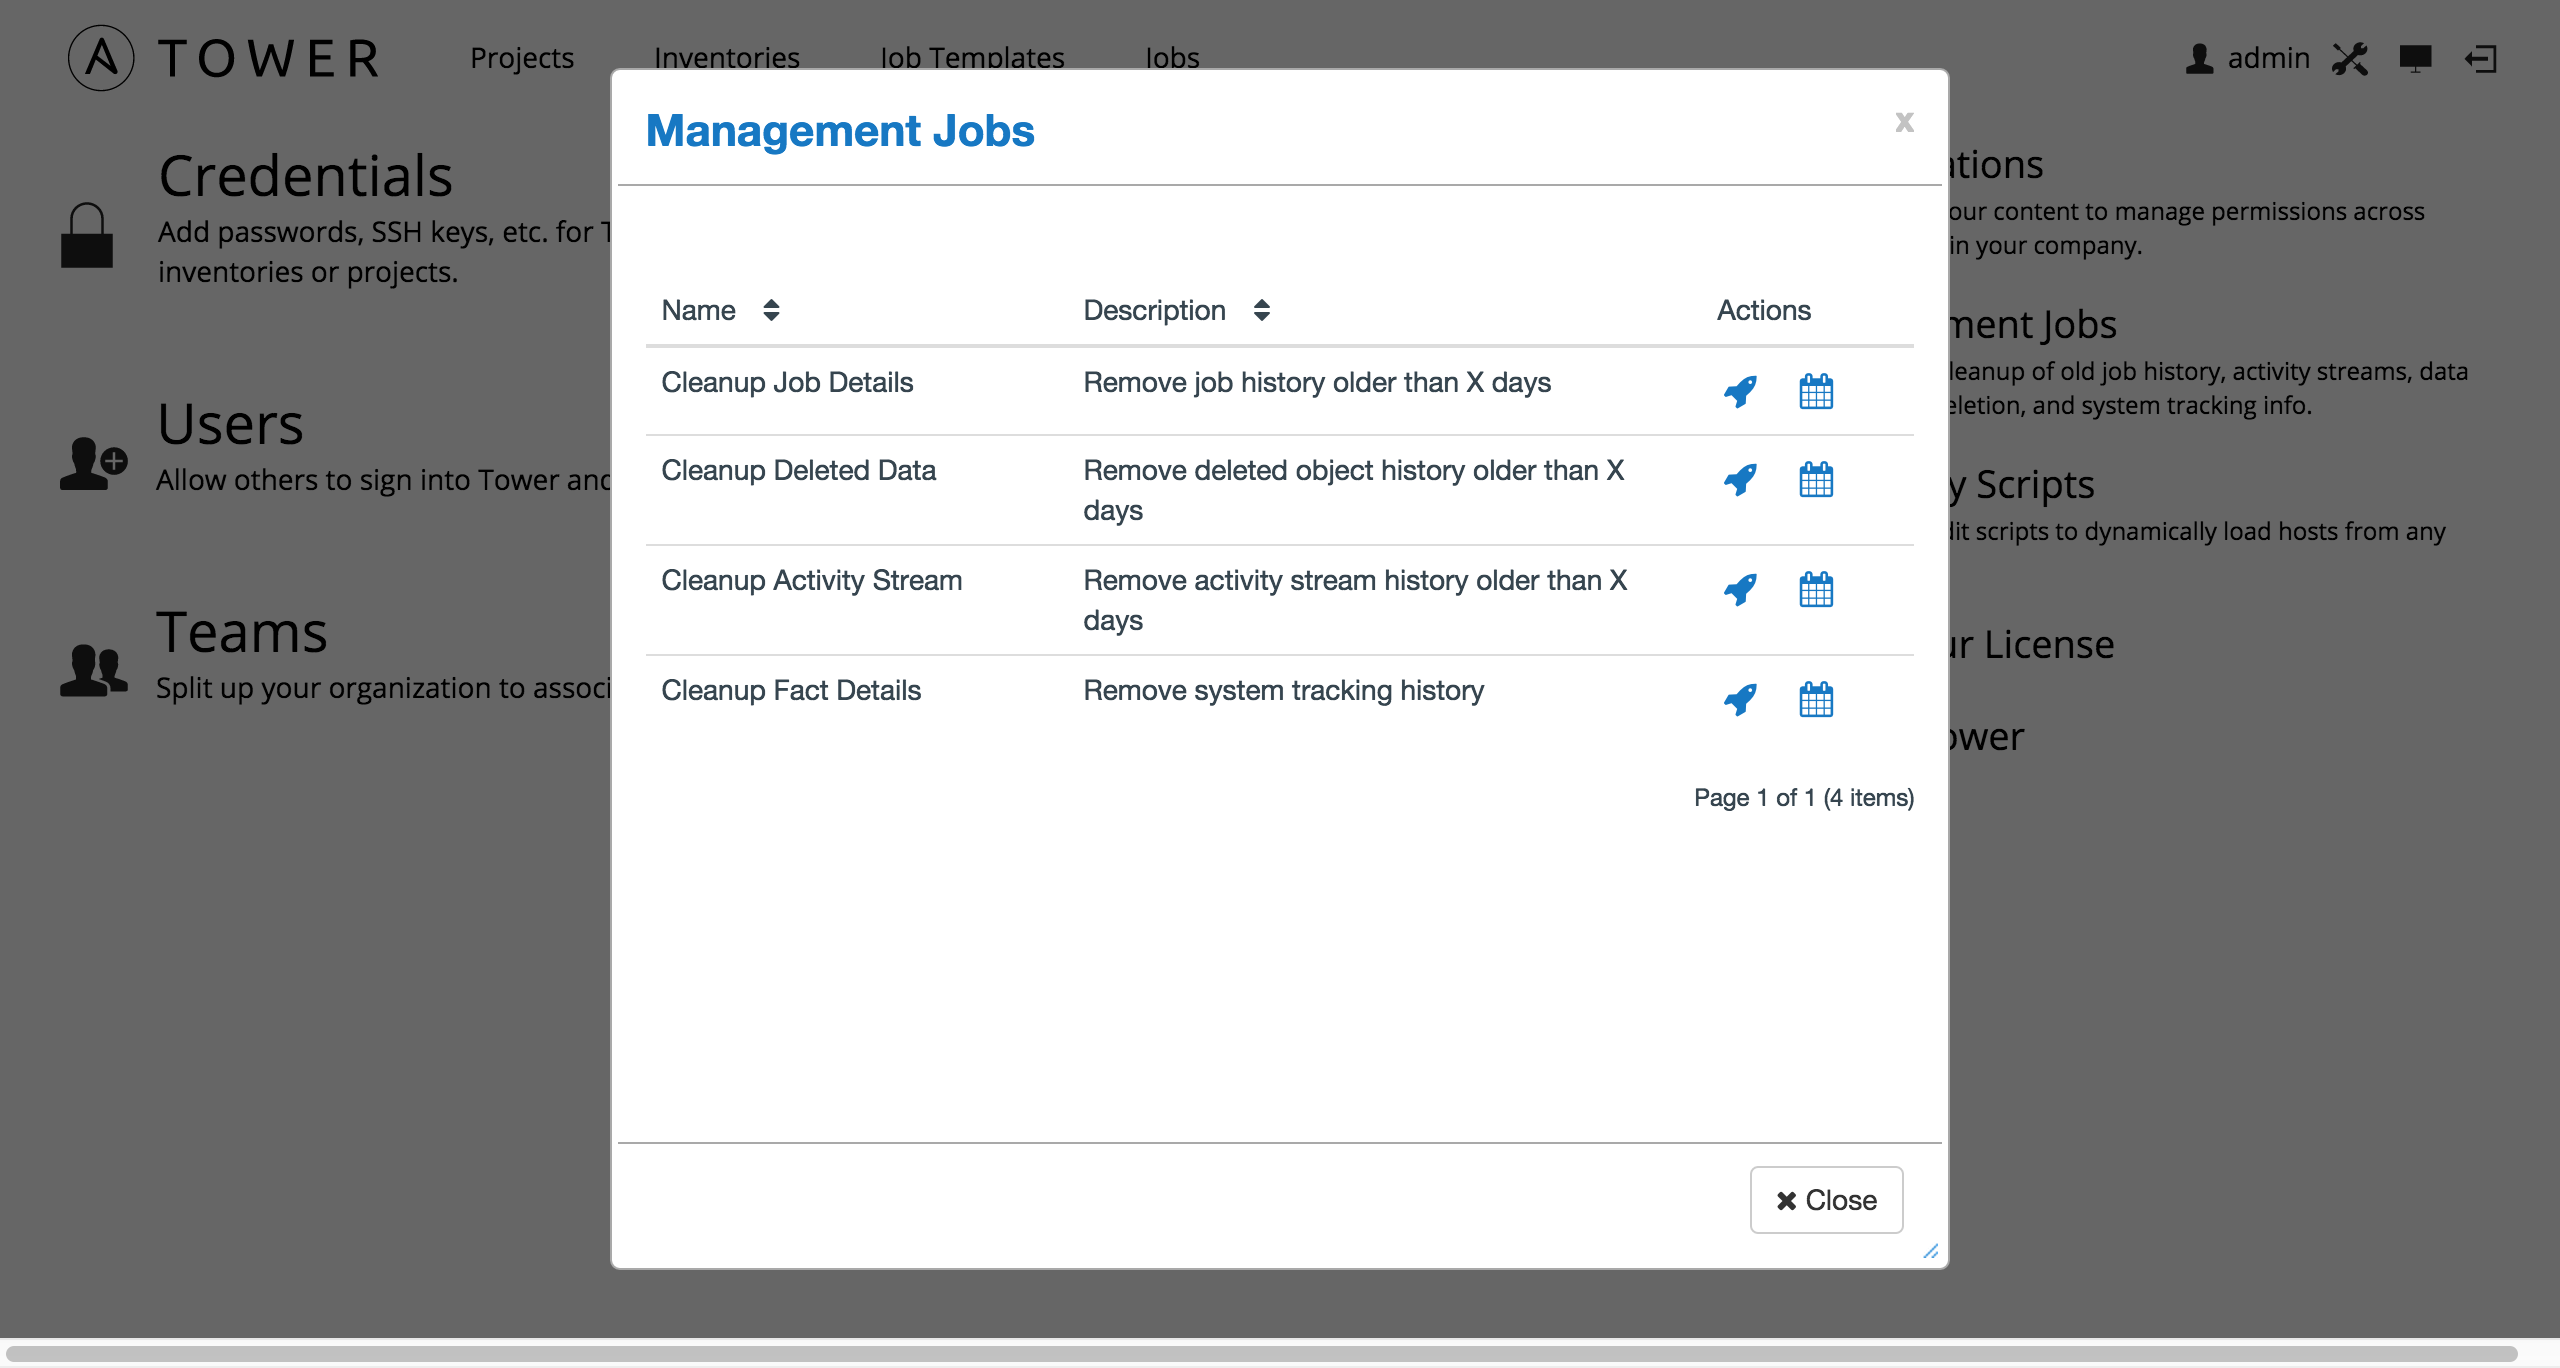
Several job types are available for you to schedule and launch:
- Cleanup Job Details: Remove job history older than a specified number of days
- Cleanup Deleted Data: Remove deleted object history older than a specified number days
- Cleanup Activity Stream: Remove activity stream history older than a specified number of days
- Cleanup Fact Details: Remove system tracking history
4.1. Removing Old Job History
To remove job history older than a specified number of days, click on the  button beside Cleanup Job Details.
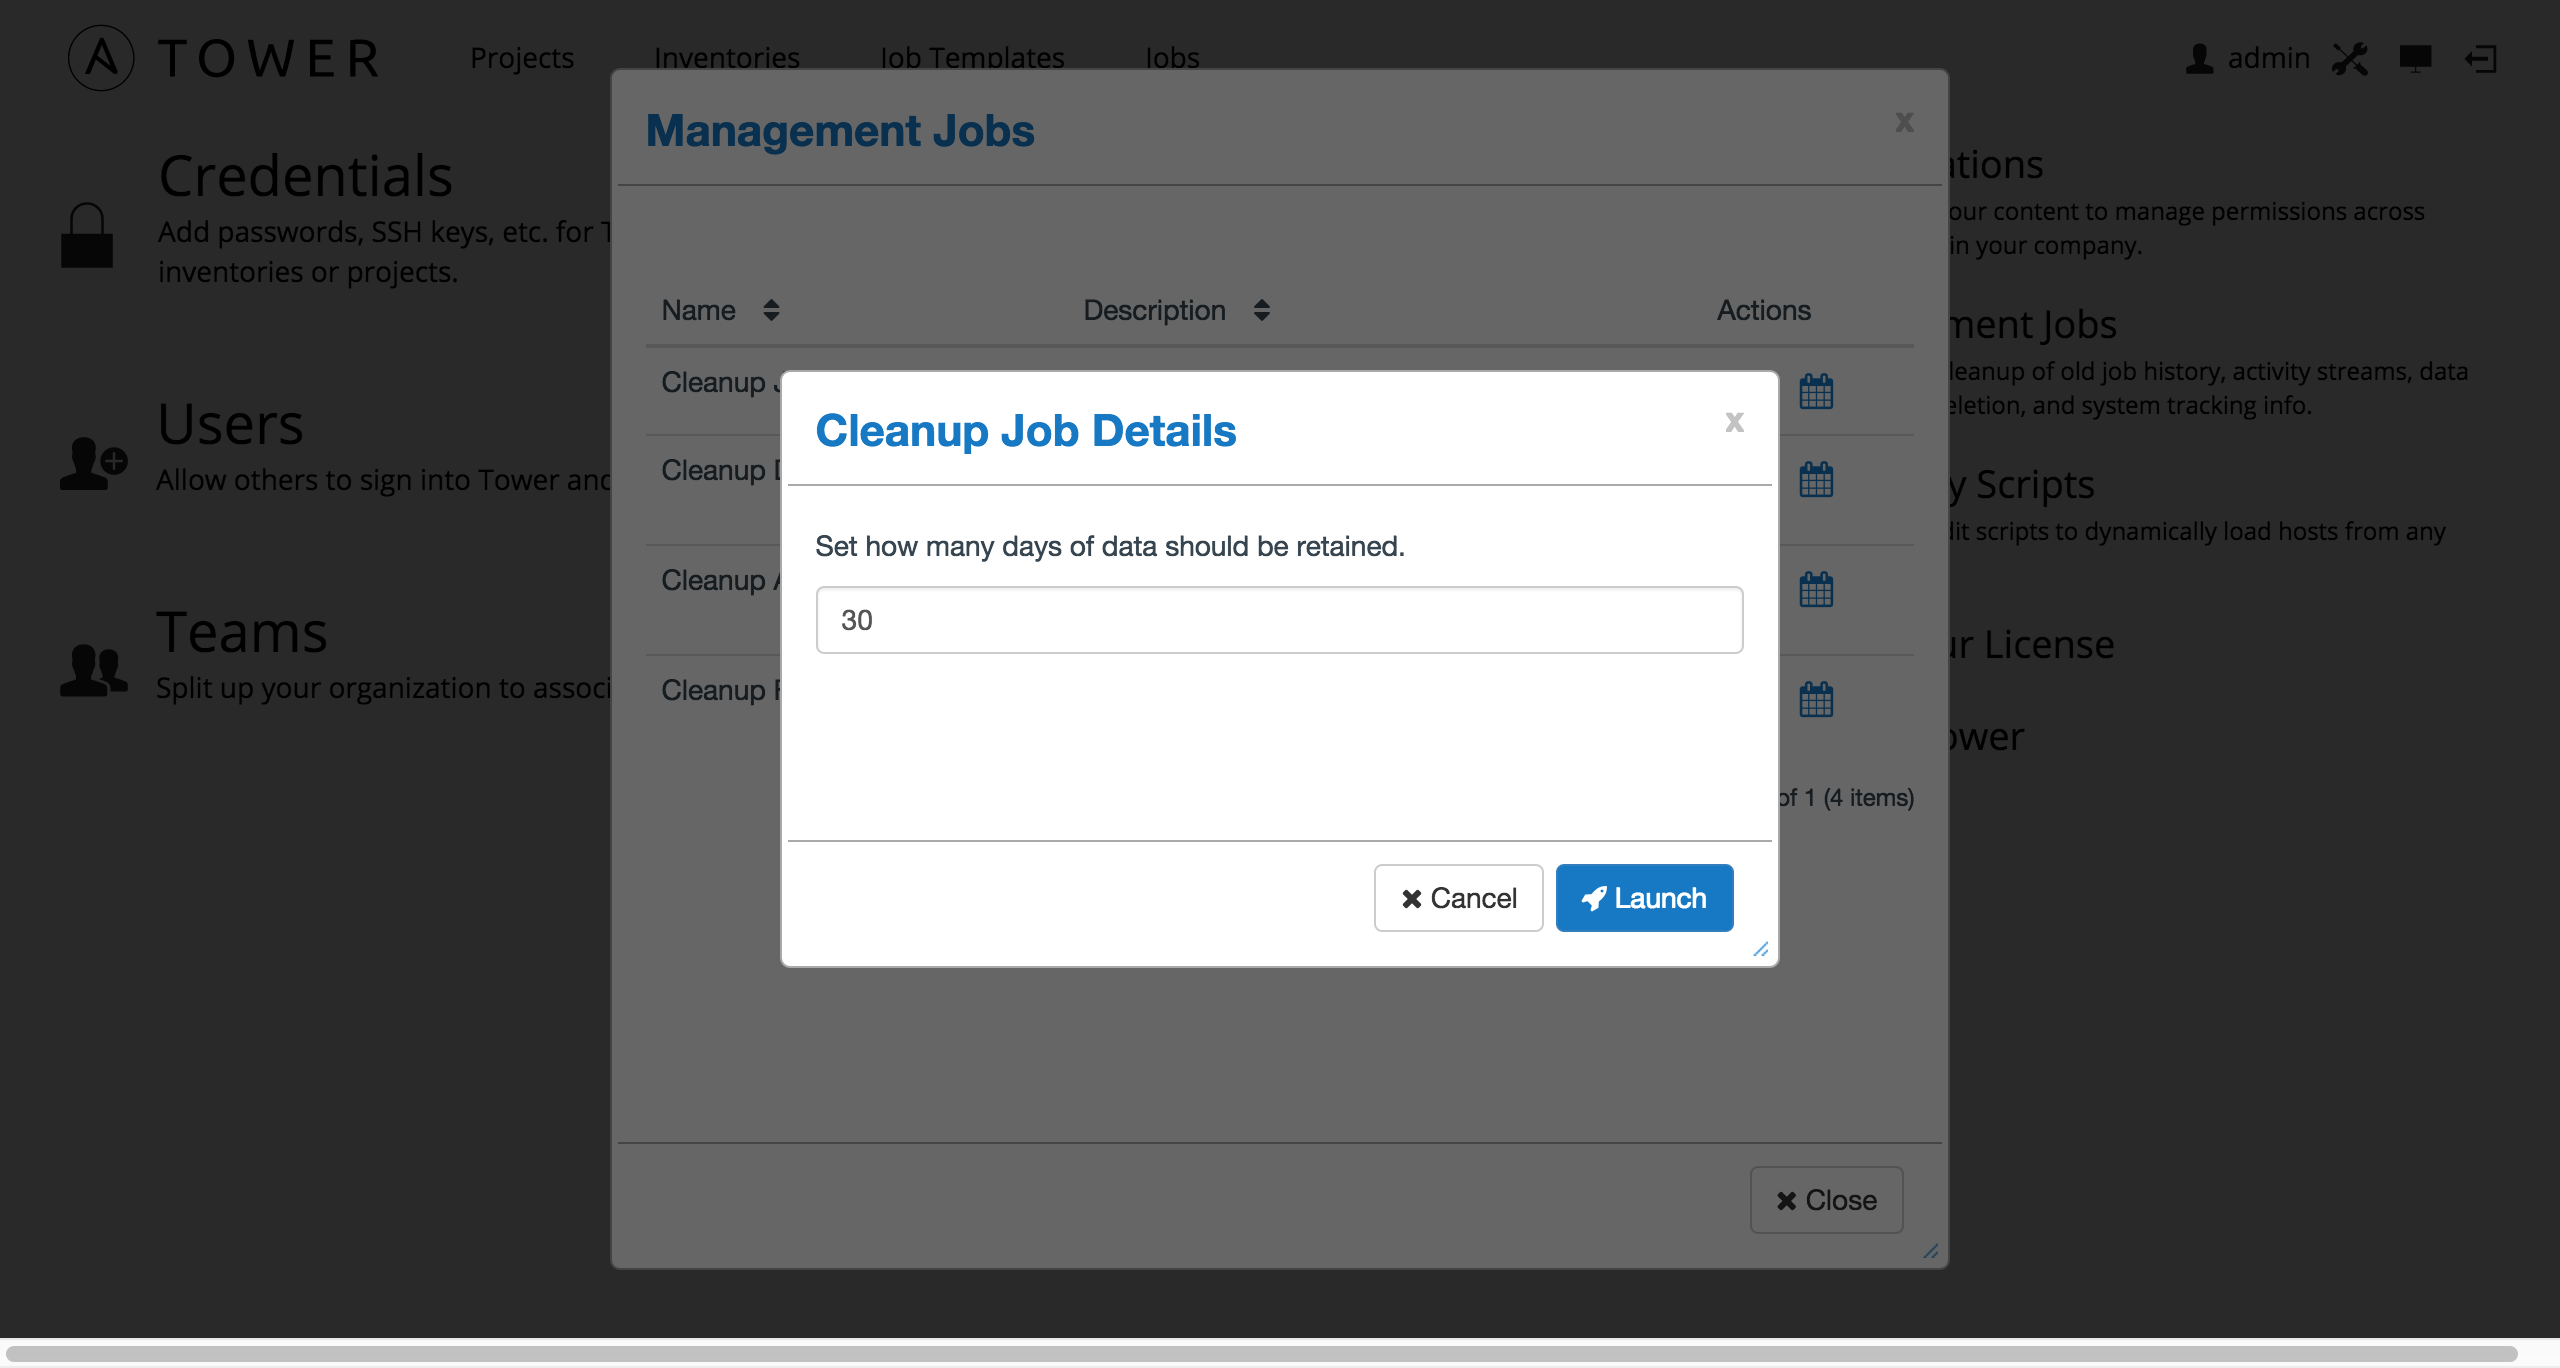
Enter the number of days of data you would like to save and click Launch.
To set a schedule for cleaning up old job history information, click on the  button.
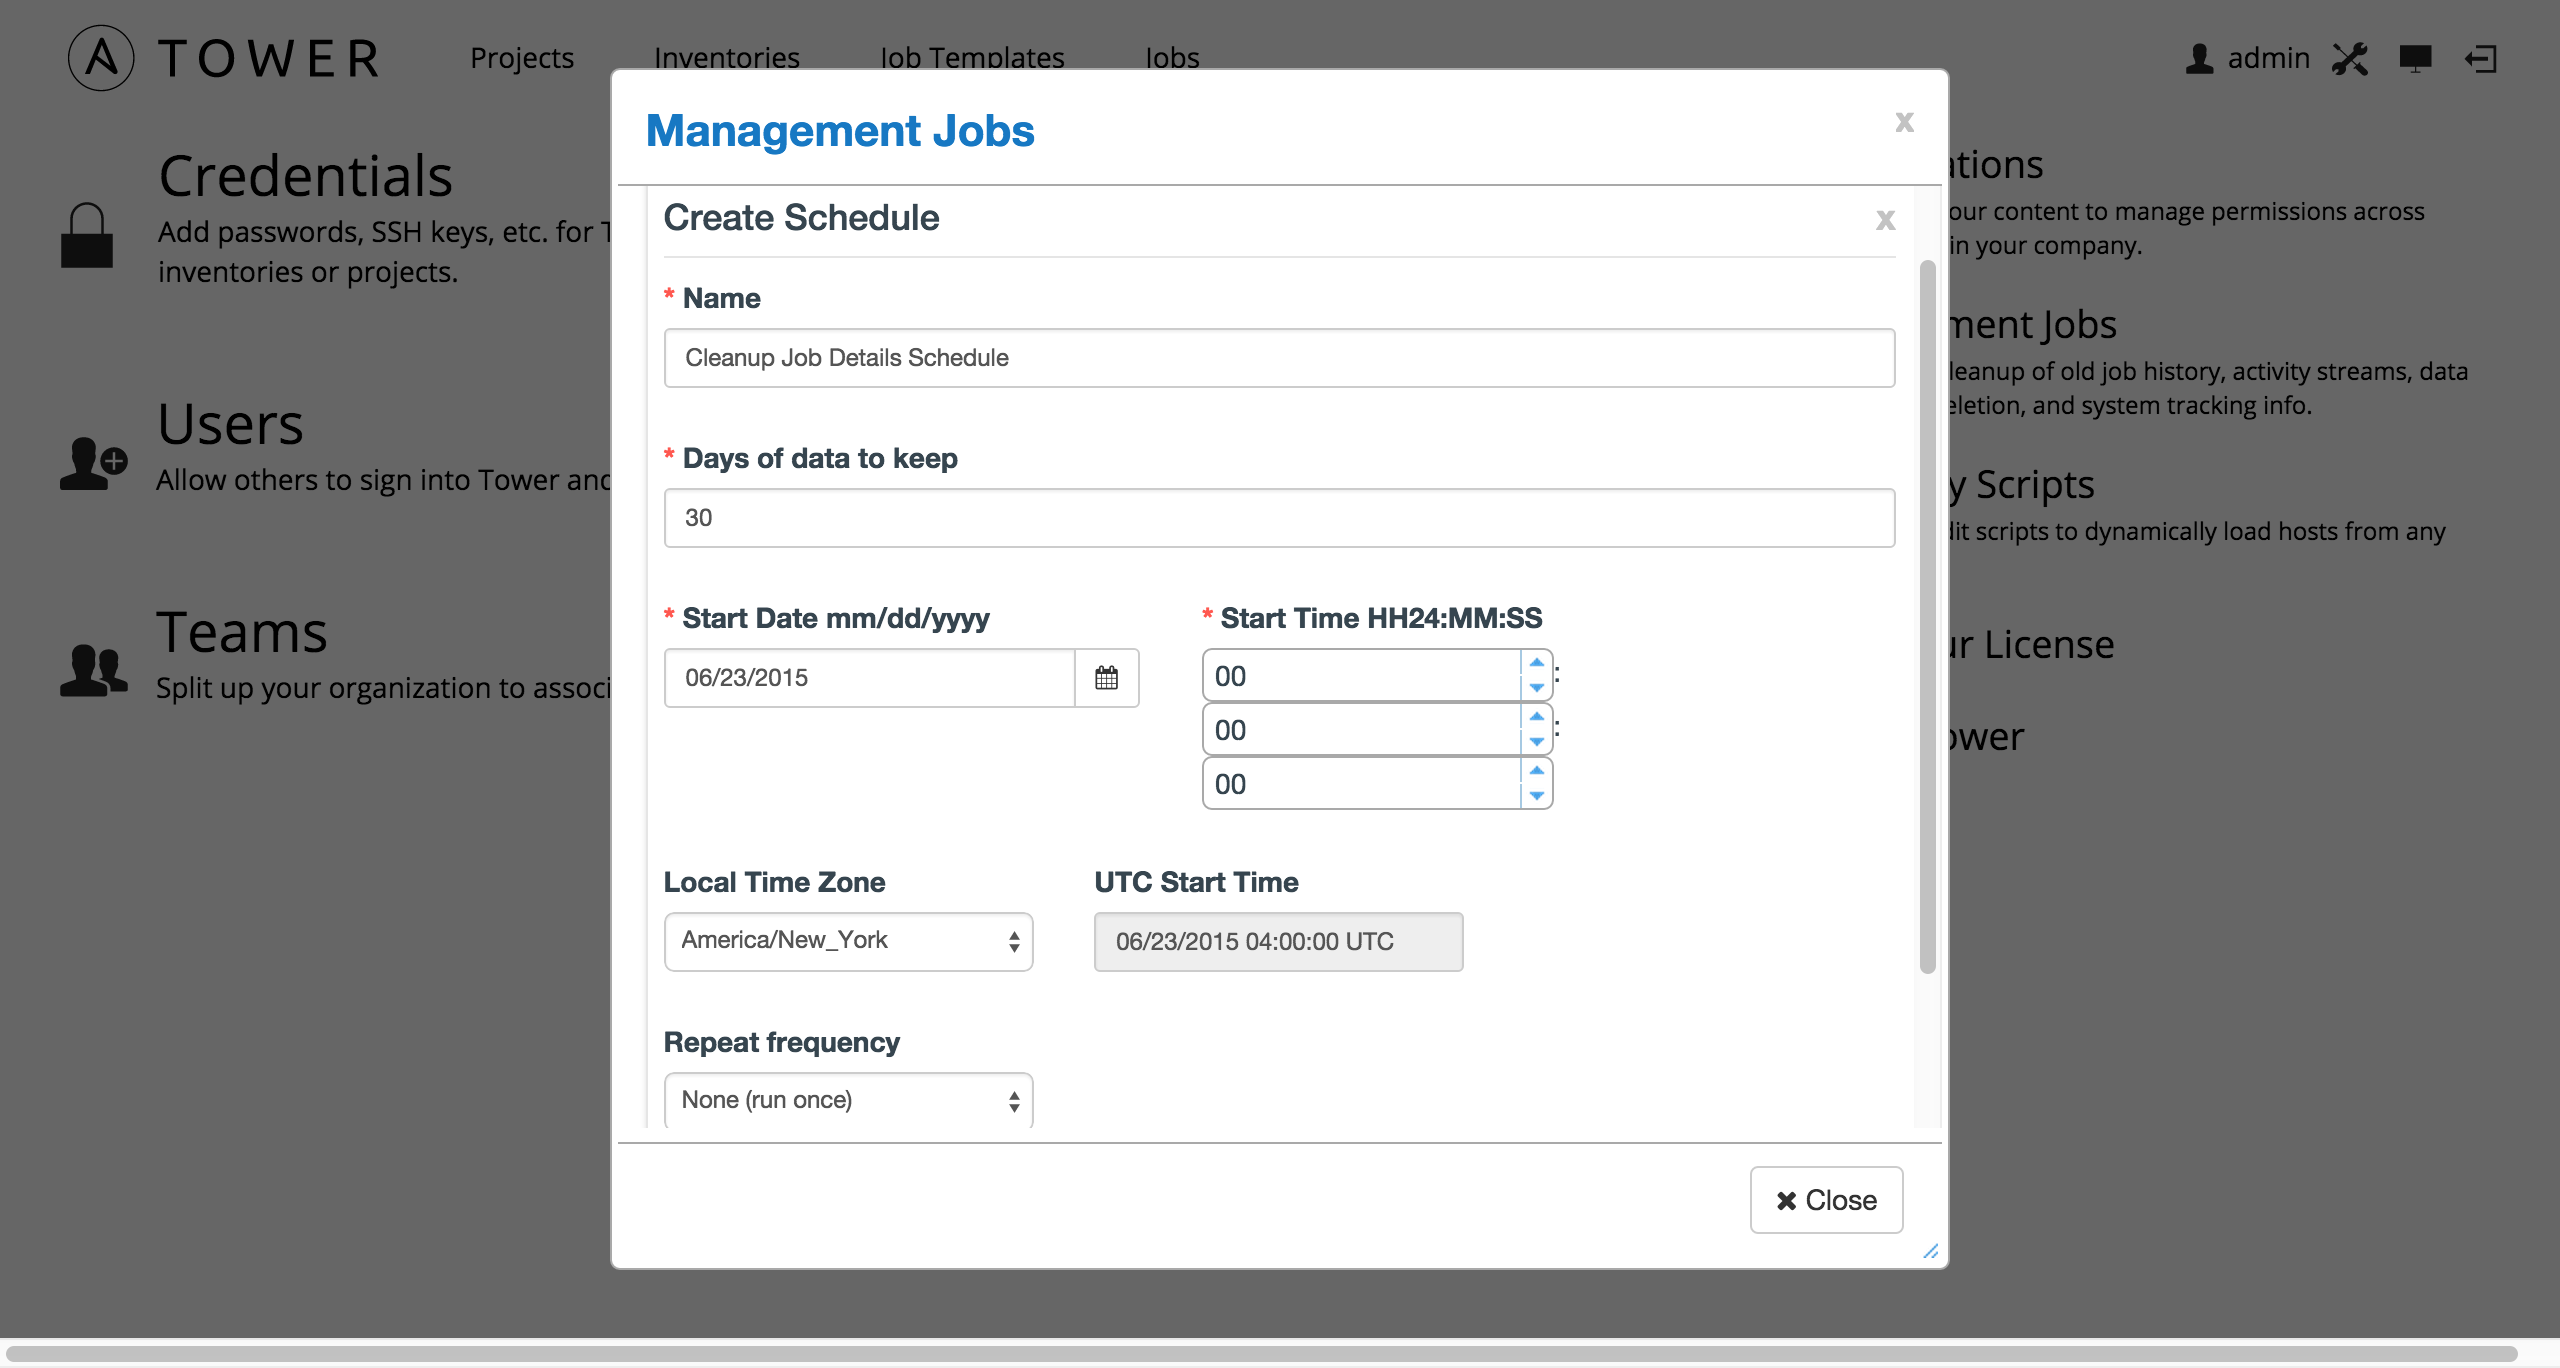
Enter the appropriate details for:
- Name: populated by default to match the management job type and can be left alone
- Days of data to keep: Enter the number of days of data you would like to retain.
- Start Date: Enter the date for which you want data cleanup to start (month/day/year format)
- Start Time: Enter the time to start data cleanup in hours, minutes, and seconds.
- Local Time Zone: Select your preferred time zone.
- UTC Start Time: Review the UTC Start time which is based on the Start Time and Local Time Zone you select.
- Repeat Frequency: Select how often you want the cleanup job to run. You can enter cleanups to occur once or every X minutes, hours, days, weeks, months, or years.
The View Details link at the bottom displays a description of the schedule and a list of the scheduled occurrences in the selected Local Time Zone.
4.2. Removing Data Scheduled for Deletion
To remove object history which has been marked for deletion (much like emptying your trashcan in a desktop environment), click on the  button beside Cleanup Deleted Data.
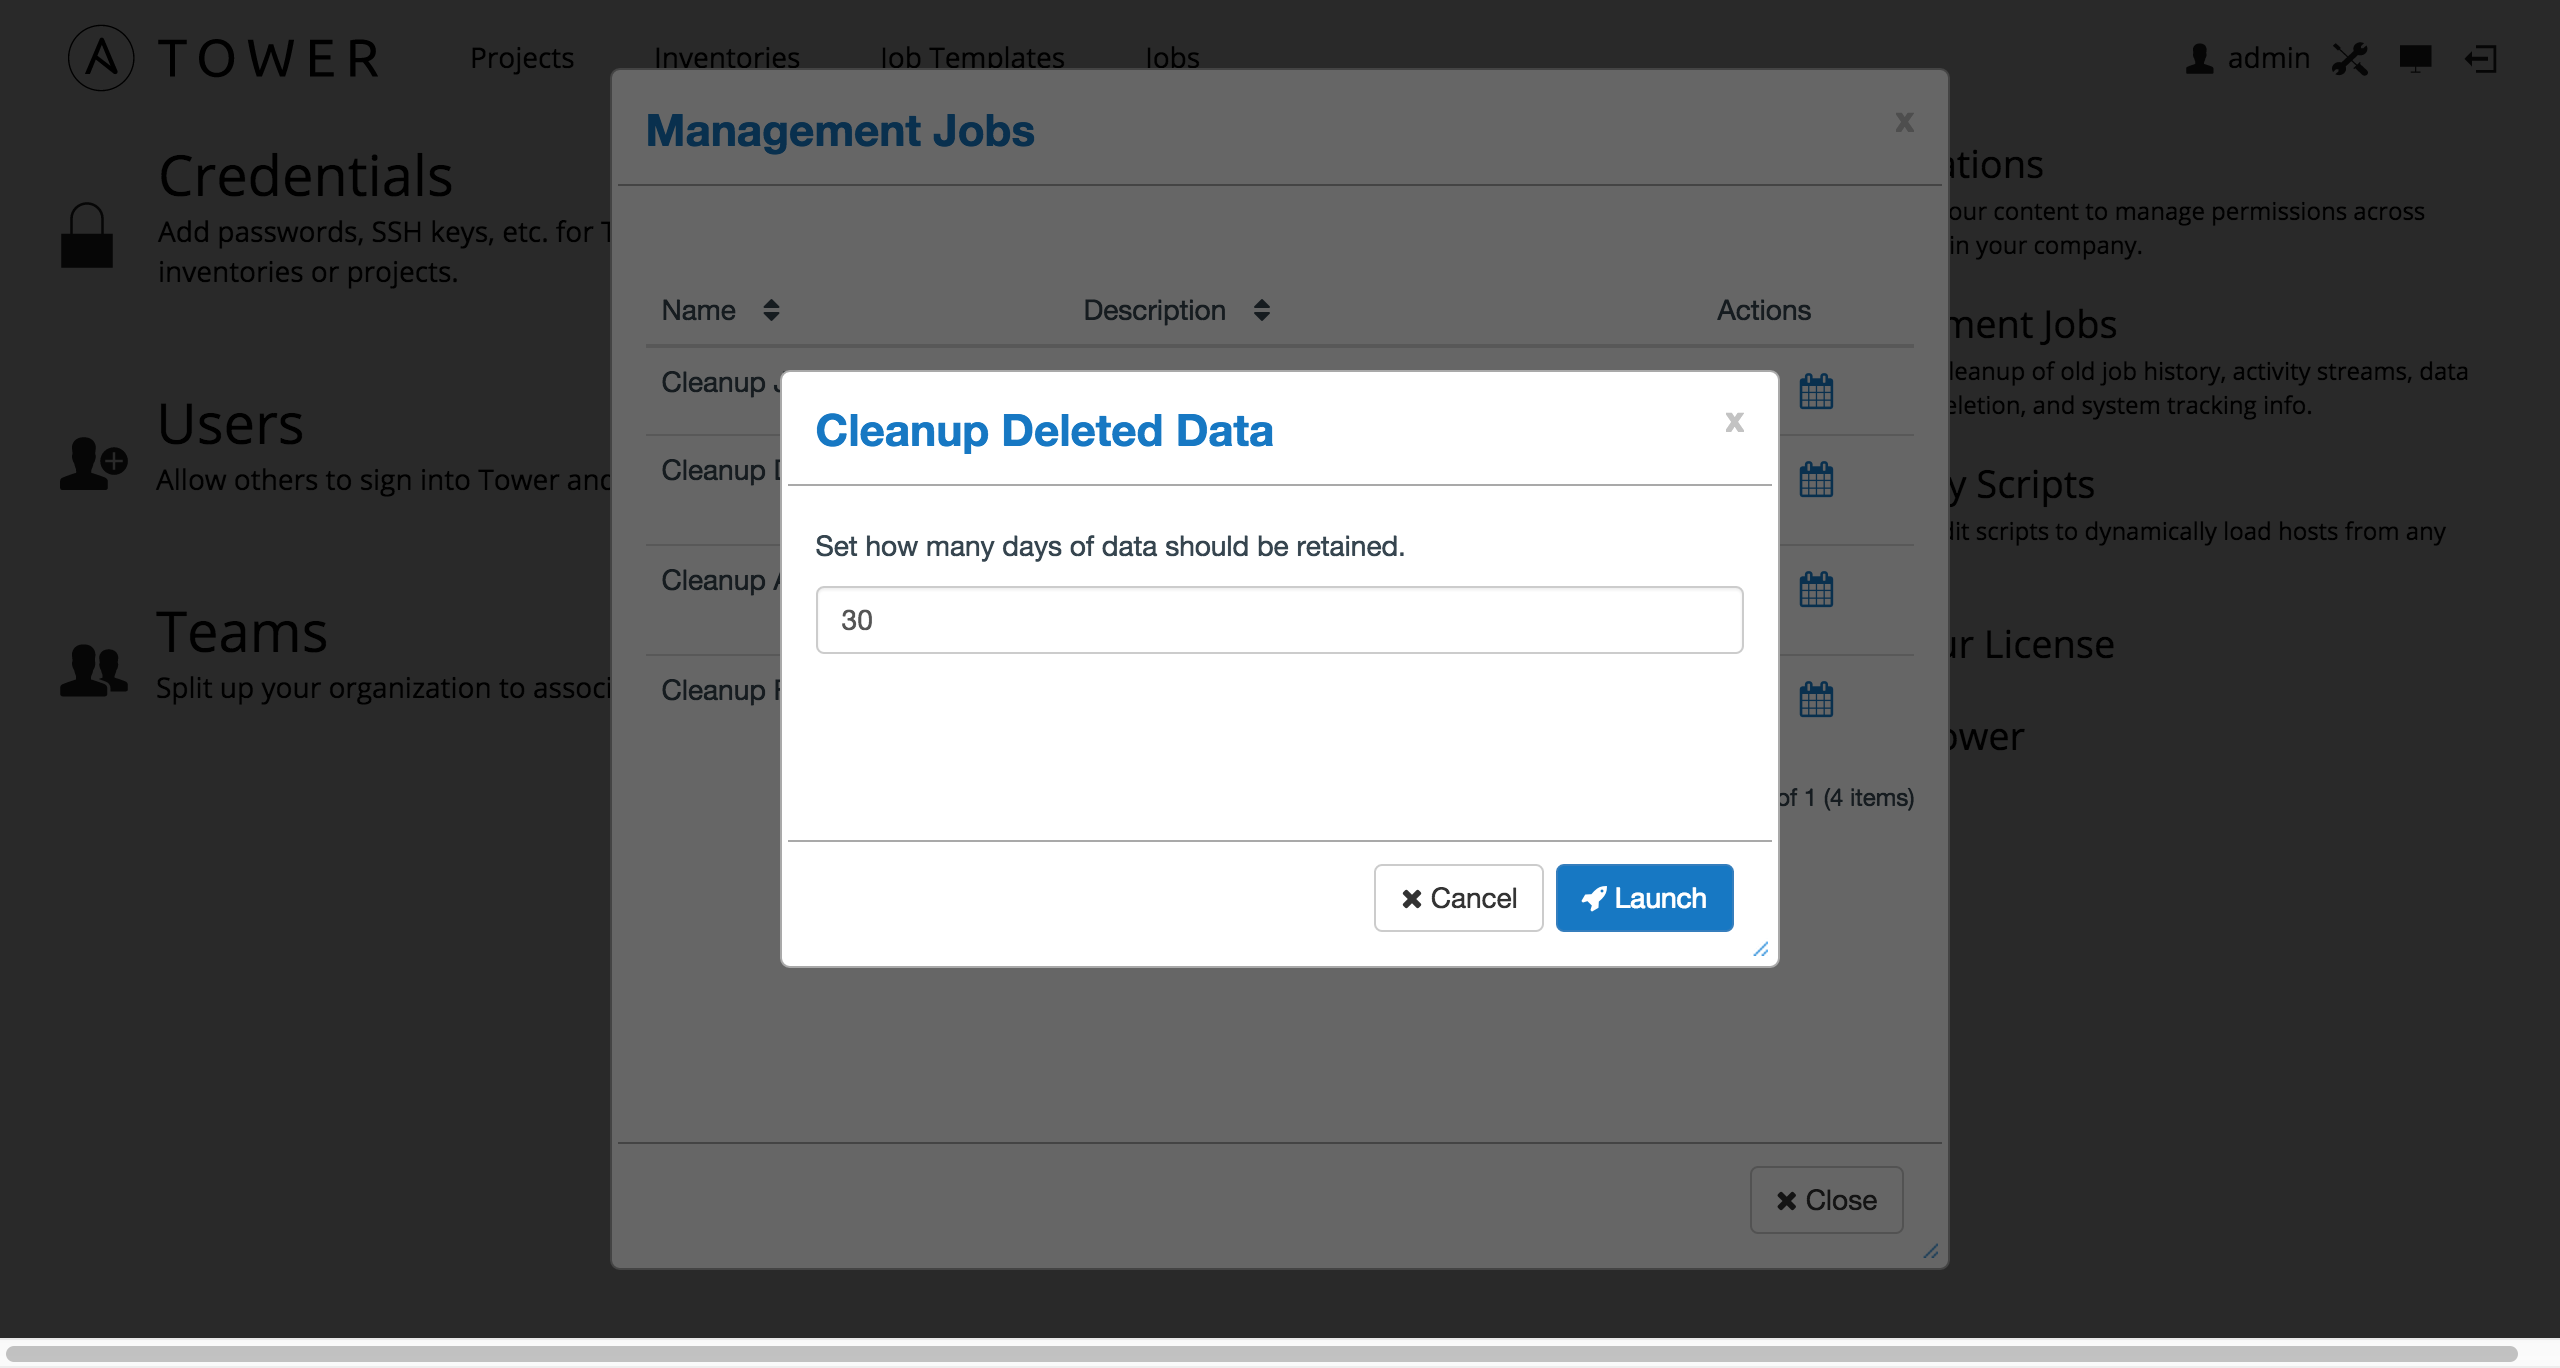
Enter the number of days of data you would like to save and click Launch.
To set a schedule for purging data marked for deletion, click on the  button.
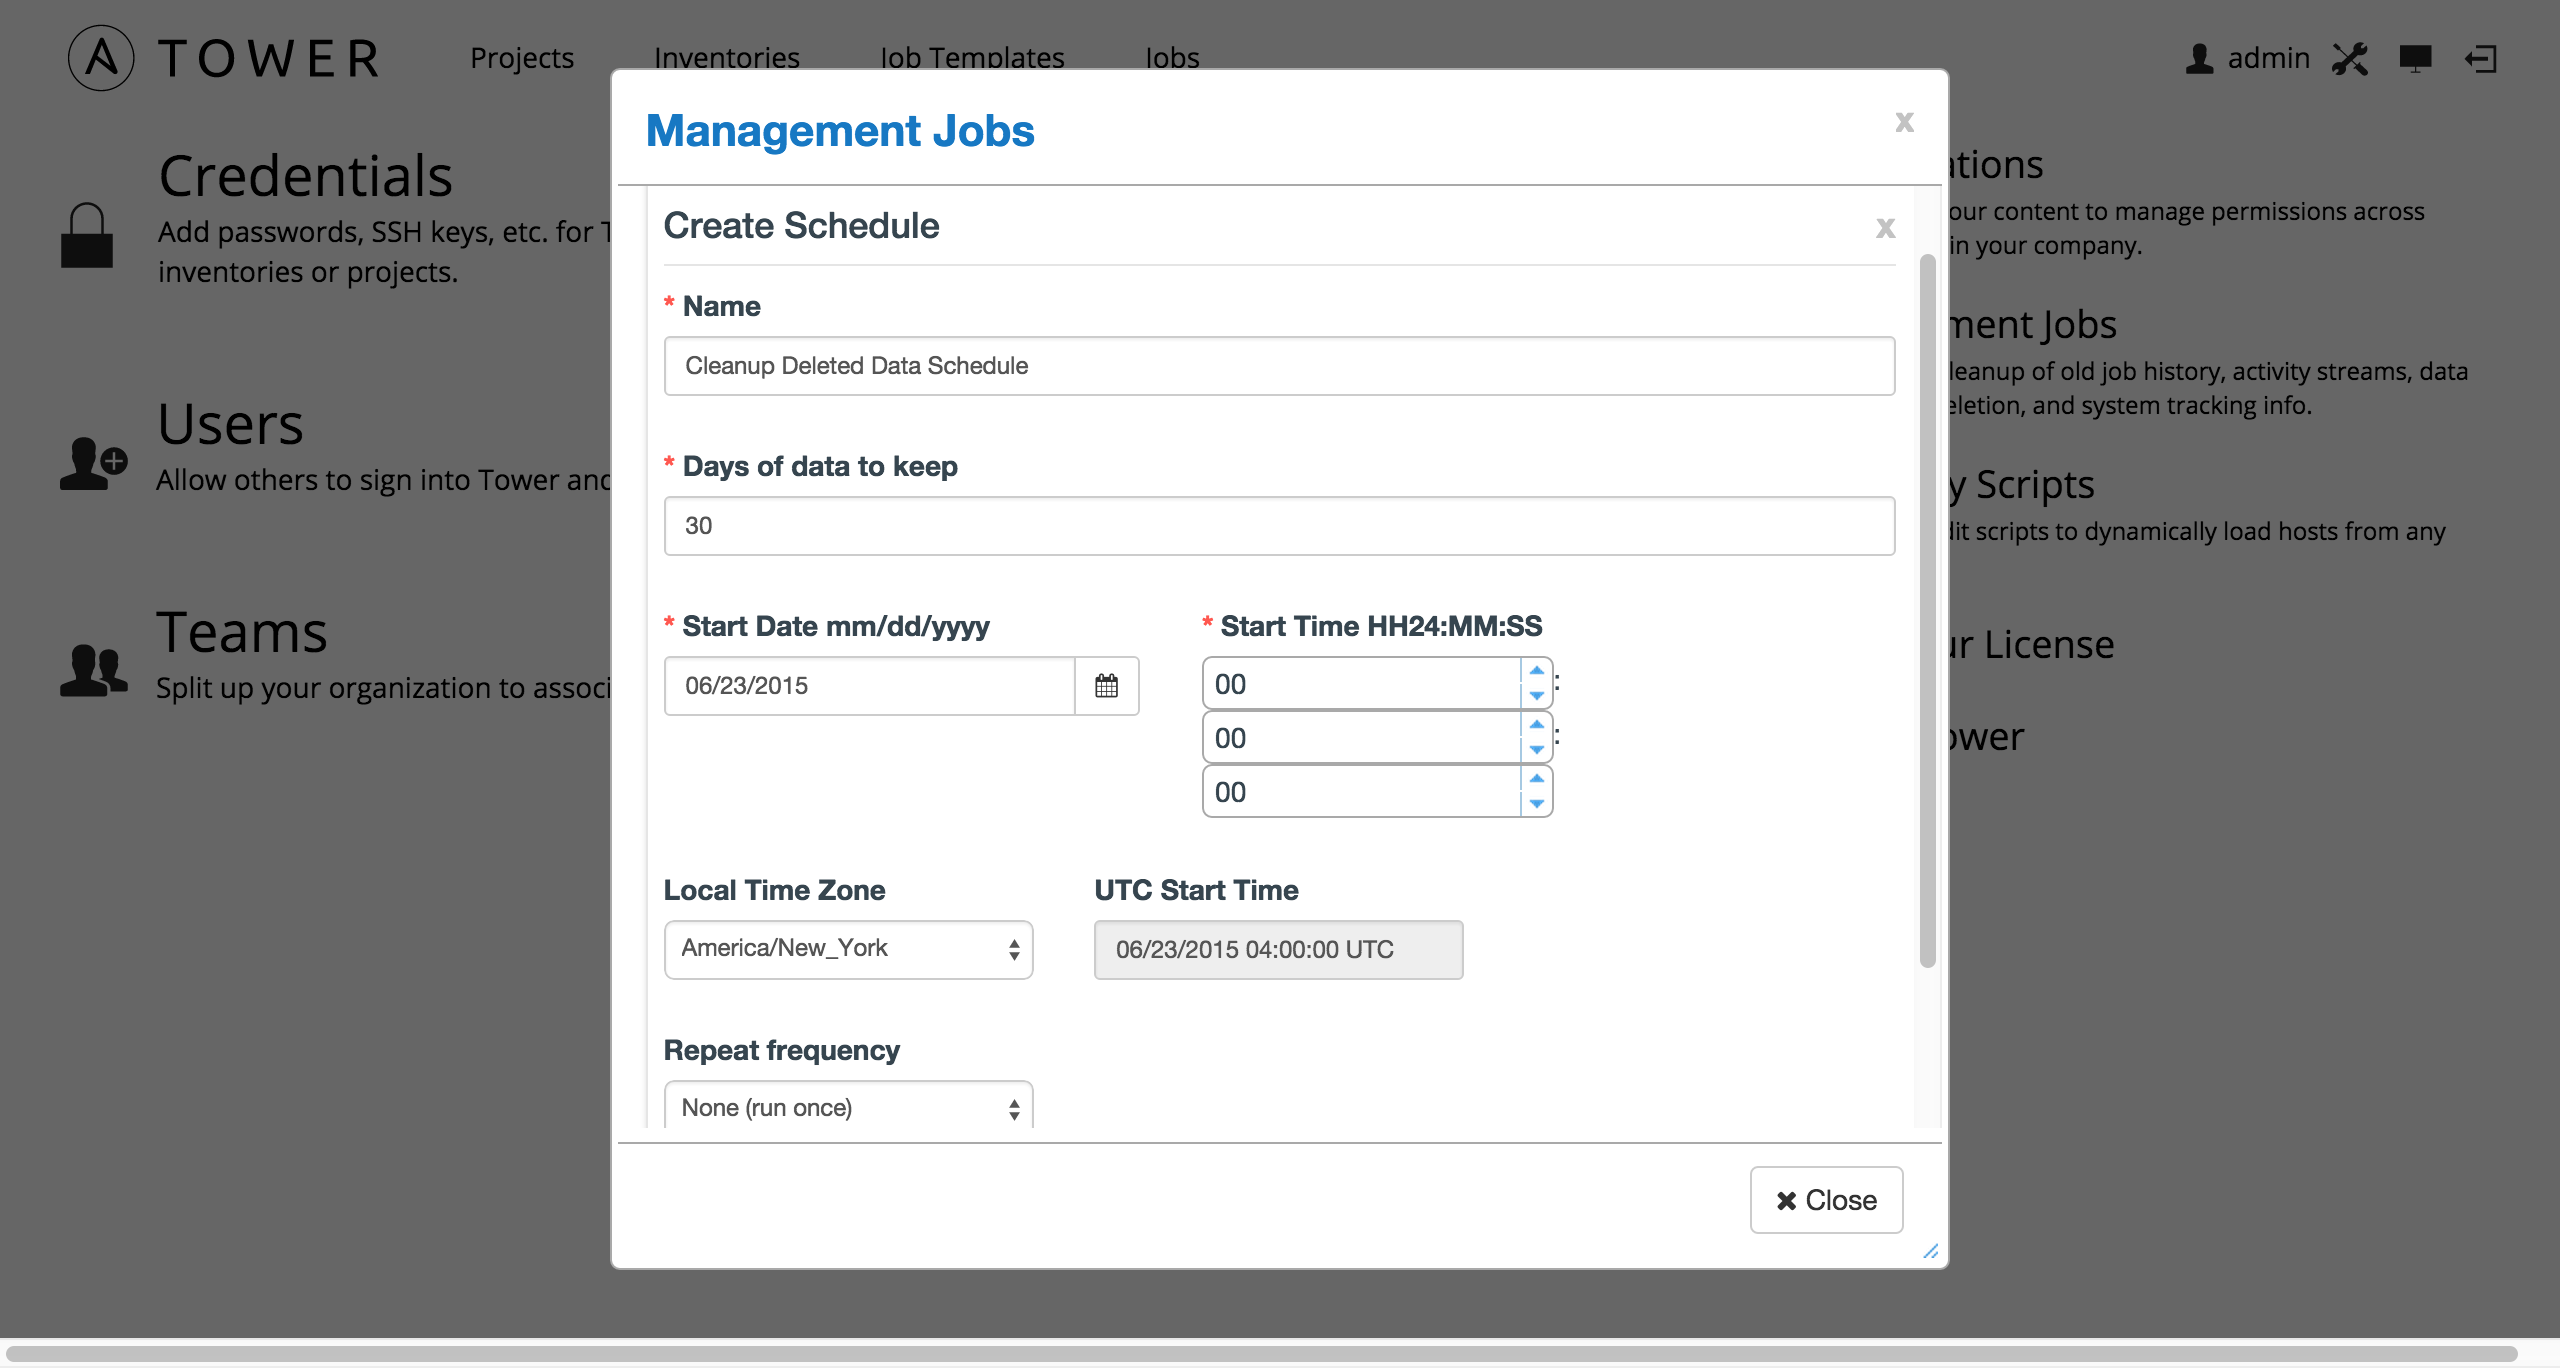
Enter the appropriate details for:
- Name: populated by default to match the management job type and can be left alone
- Days of data to keep: Enter the number of days of data you would like to retain.
- Start Date: Enter the date for which you want data cleanup to start (month/day/year format)
- Start Time: Enter the time to start data cleanup in hours, minutes, and seconds.
- Local Time Zone: Select your preferred time zone.
- UTC Start Time: Review the UTC Start time which is based on the Start Time and Local Time Zone you select.
- Repeat Frequency: Select how often you want the cleanup job to run. You can enter cleanups to occur once or every X minutes, hours, days, weeks, months, or years.
The View Details link at the bottom displays a description of the schedule and a list of the scheduled occurrences in the selected Local Time Zone.
4.3. Removing Old Activity Stream Data
To remove older activity stream data, click on the  button beside Cleanup Activity Stream.
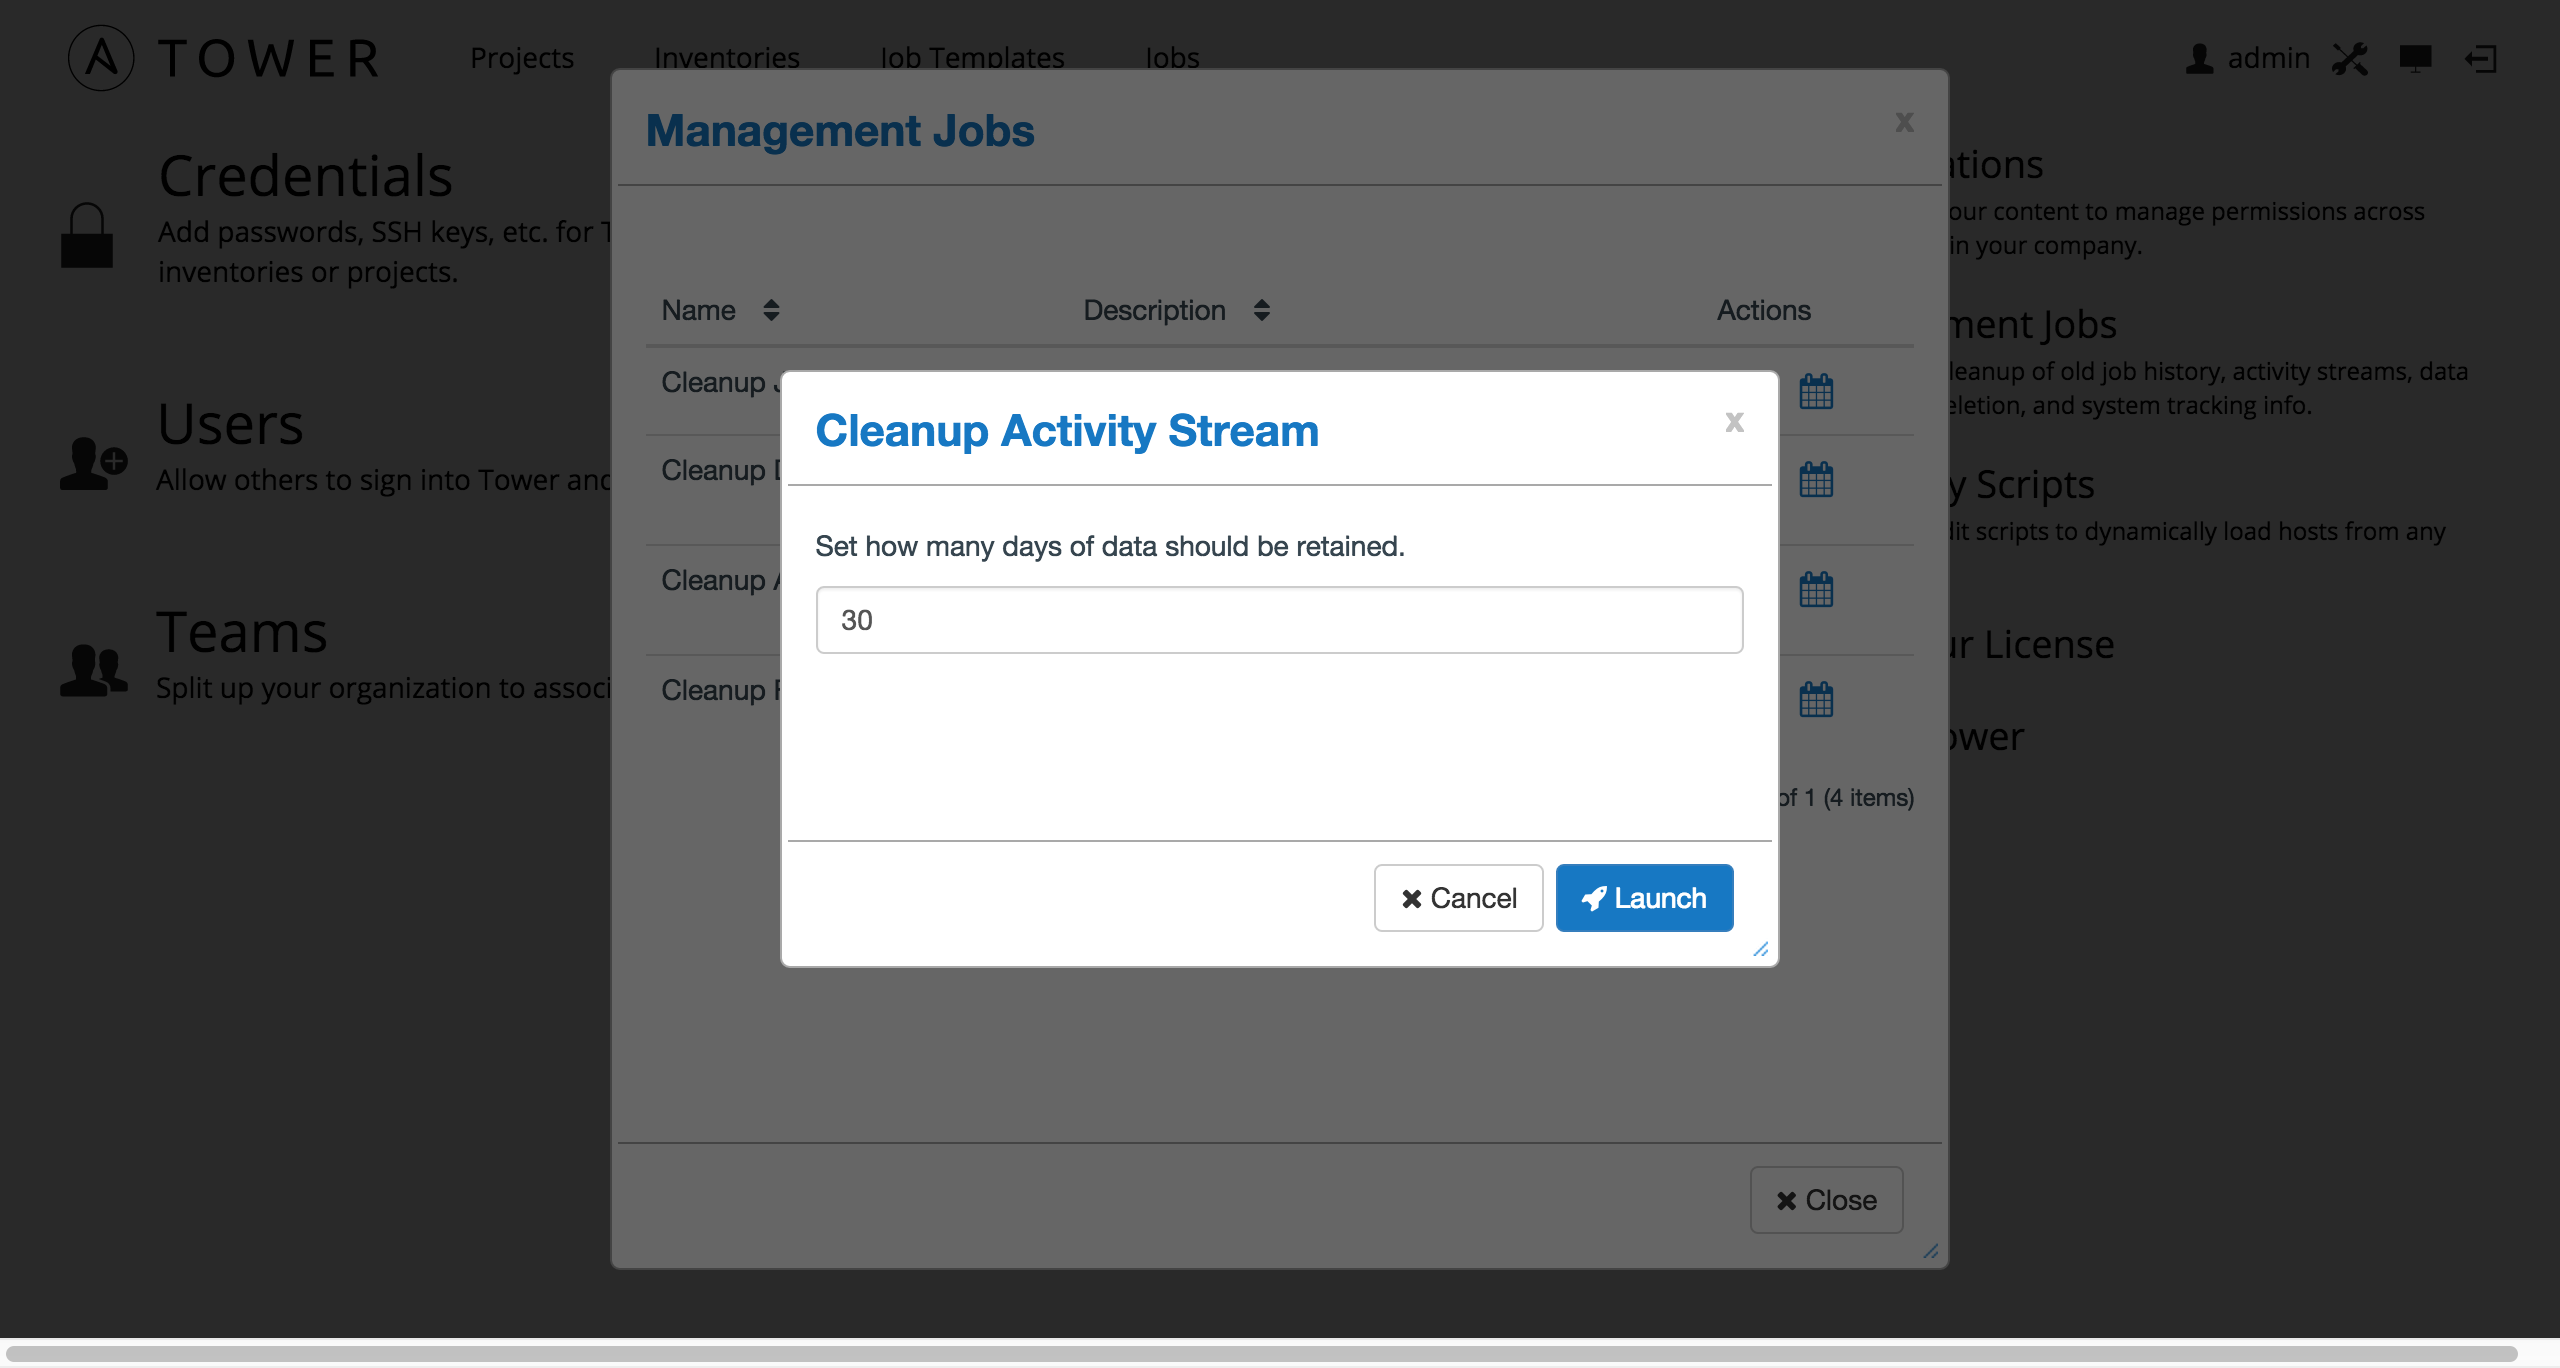
Enter the number of days of data you would like to save and click Launch.
To set a schedule for purging data marked for deletion, click on the  button.
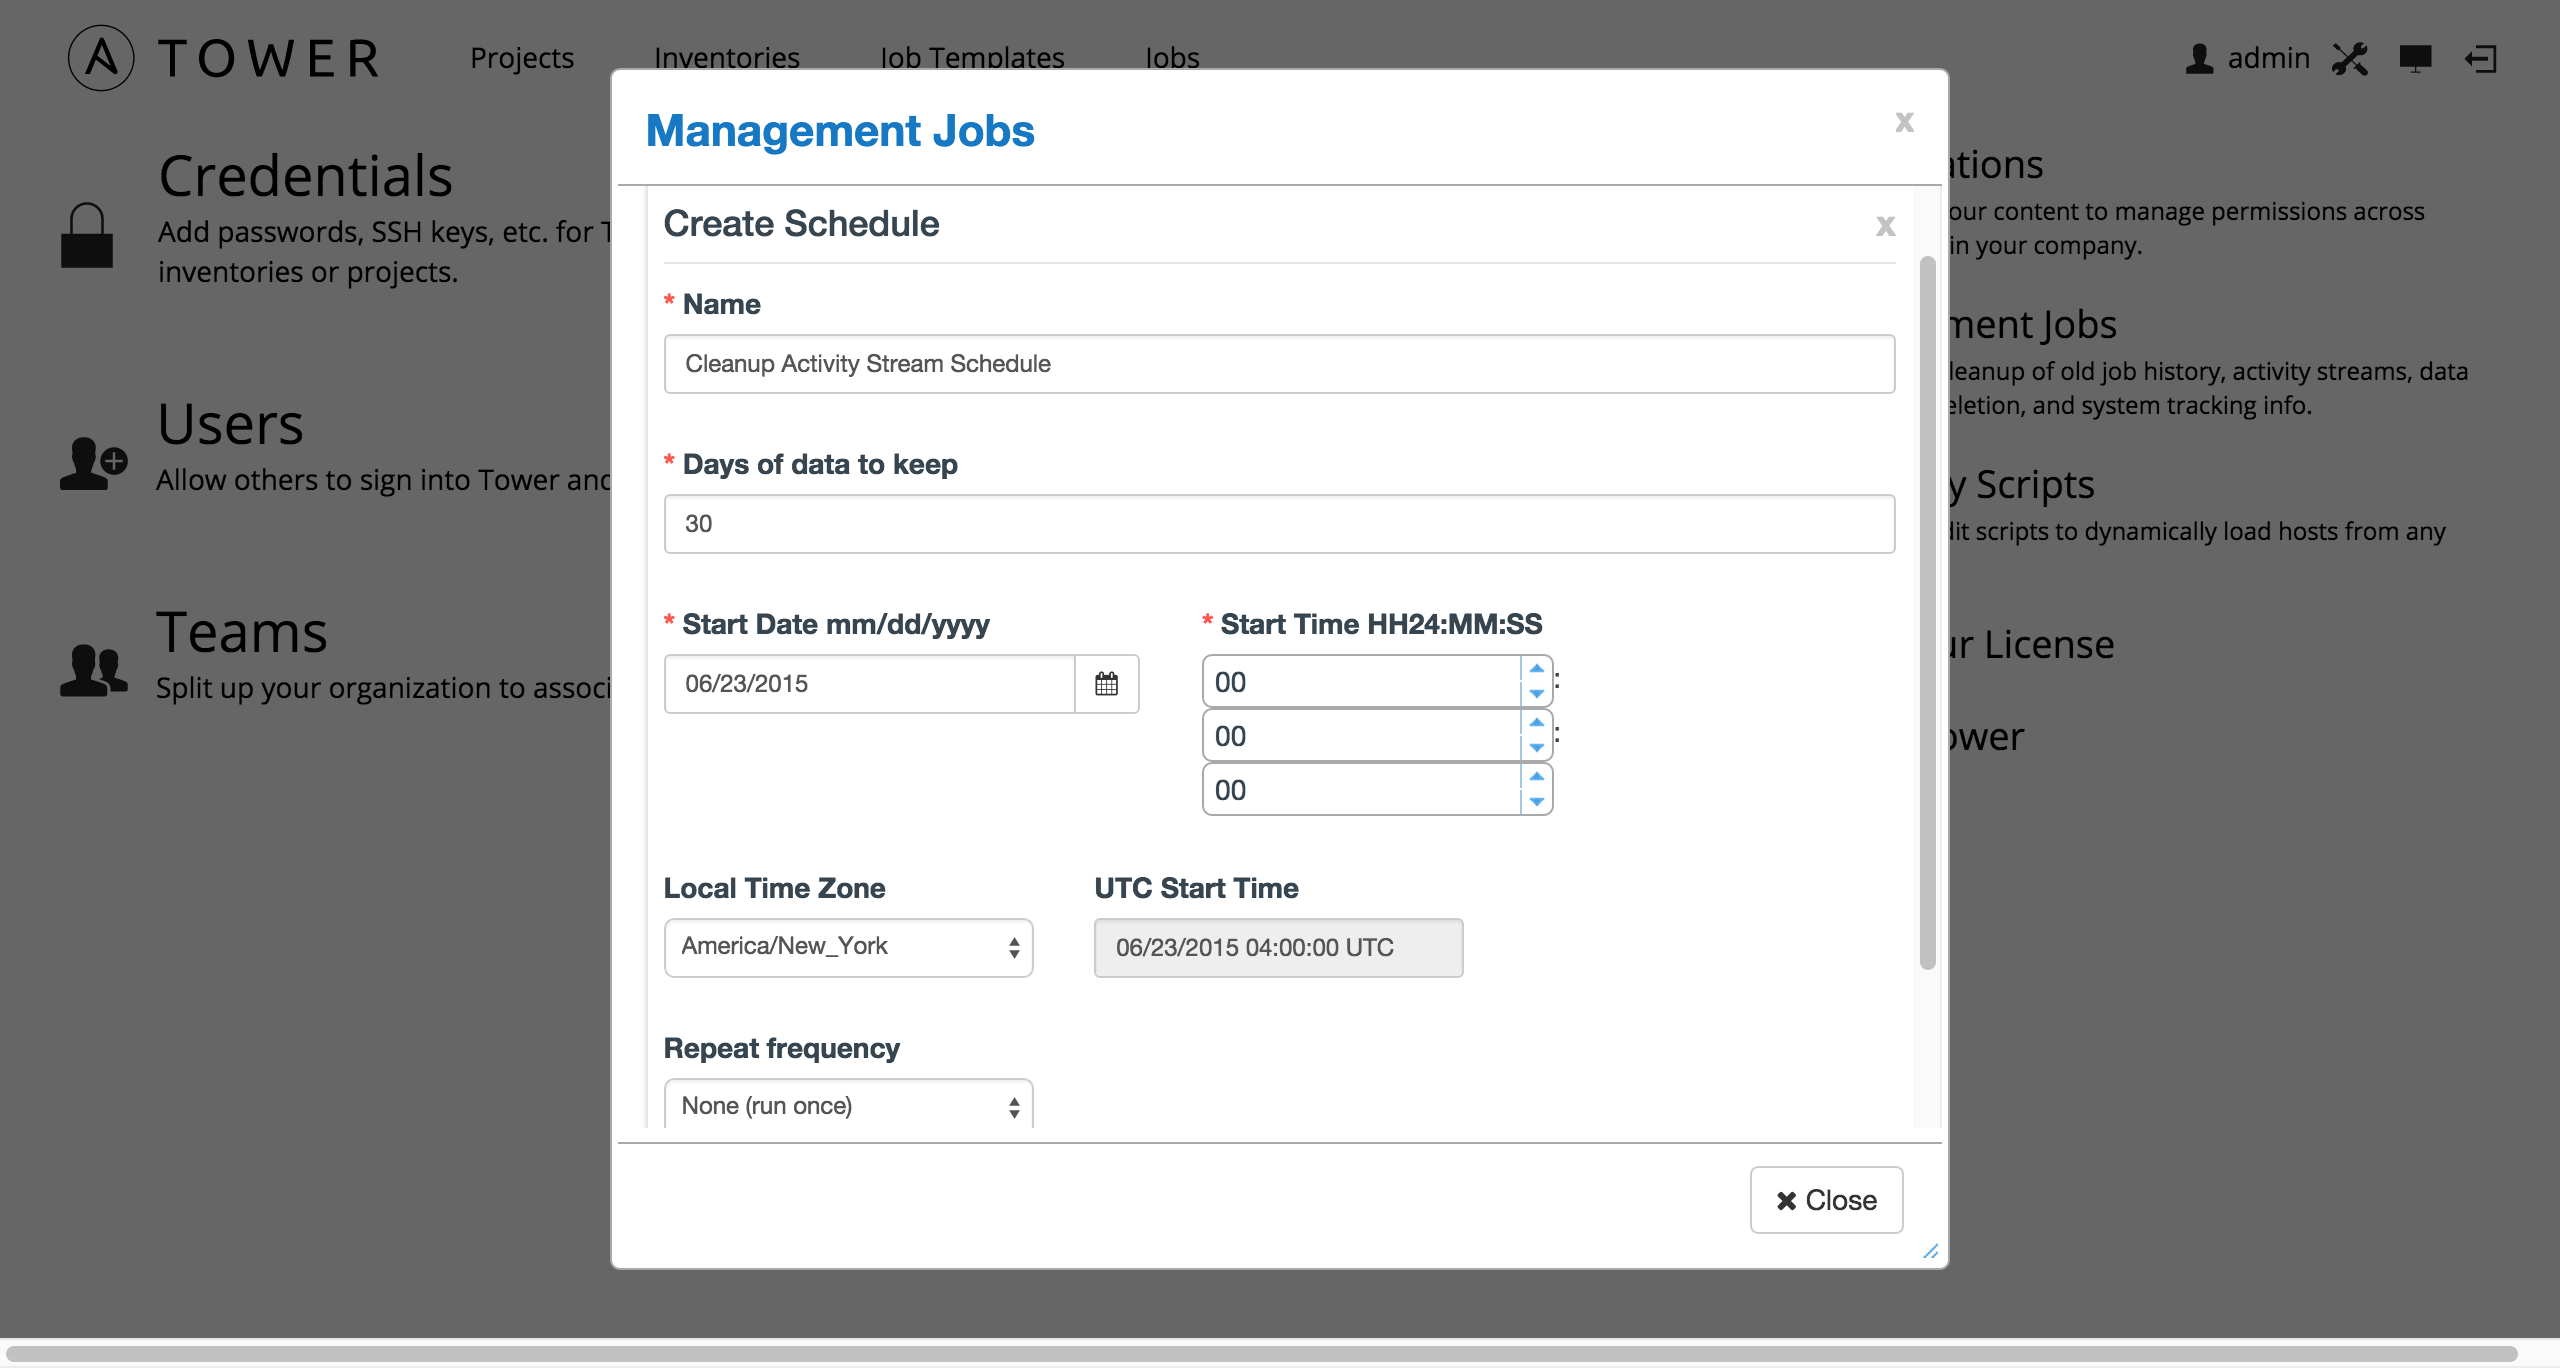
Enter the appropriate details for:
- Name: populated by default to match the management job type and can be left alone
- Days of data to keep: Enter the number of days of data you would like to retain.
- Start Date: Enter the date for which you want data cleanup to start (month/day/year format)
- Start Time: Enter the time to start data cleanup in hours, minutes, and seconds.
- Local Time Zone: Select your preferred time zone.
- UTC Start Time: Review the UTC Start time which is based on the Start Time and Local Time Zone you select.
- Repeat Frequency: Select how often you want the cleanup job to run. You can enter cleanups to occur once or every X minutes, hours, days, weeks, months, or years.
The View Details link at the bottom displays a description of the schedule and a list of the scheduled occurrences in the selected Local Time Zone.
4.4. Removing Old System Tracking Data
To remove system tracking data, click on the  button beside Cleanup Fact Details.
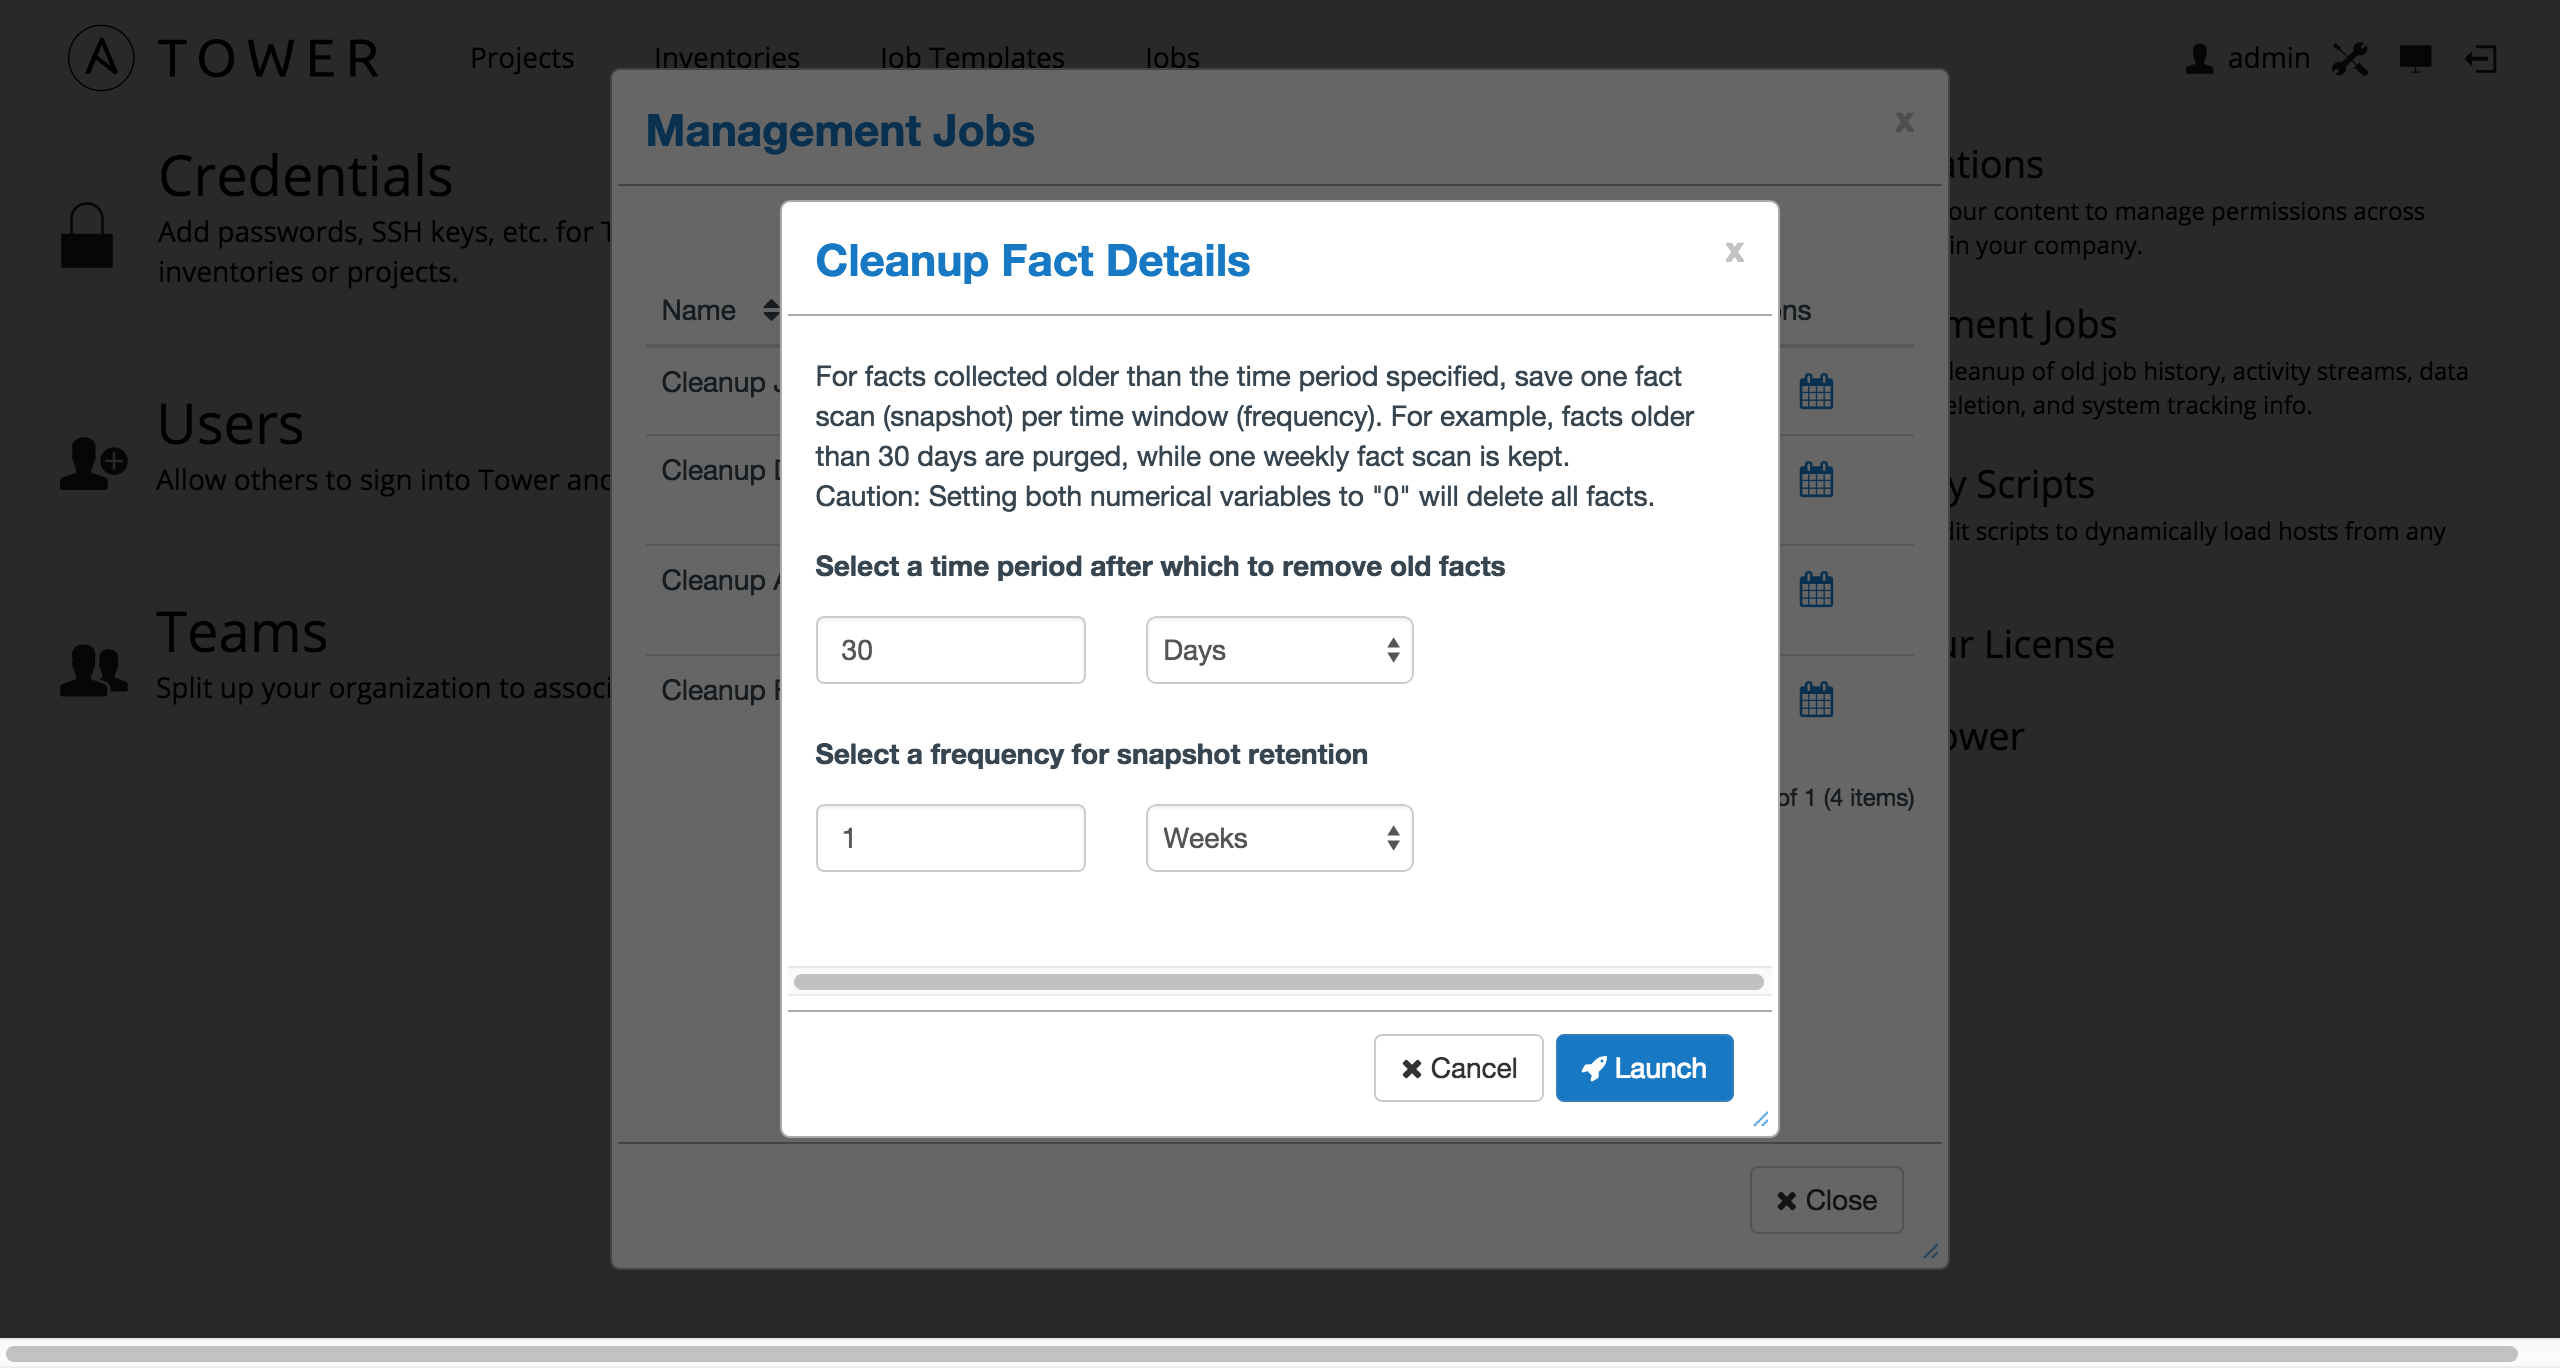
Select the time period after which you want to remove old data as well as the frequency for snapshot retention.
For facts collected older than the time period specified, you can choose to save one fact scan (or snapshot) per period of time(frequency). For example, facts older than 30 days could be purged, while one weekly fact scan is retained.
Warning
Setting both numerical variables to “0” will delete all facts.
To help clarify this purge and retention schedule, consider the following timeline:
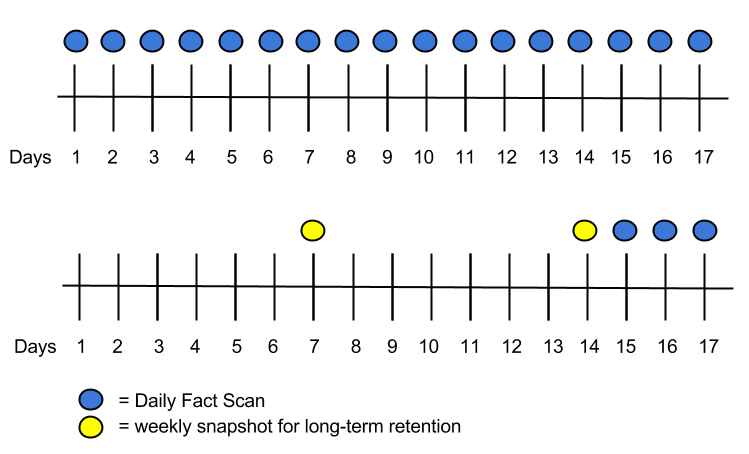
For this timeline example, consider that you have been running Tower for 17 days (since Jan 1st) and have collected 17 days of fact scans . On Jan 17, you decide to remove all fact scans older than 3 days while keeping a weekly snapshot. The most recent scan and a scan from one week earlier remains, along with the most recent data to be kept.
To set a schedule for cleaning up system tracking information, click on the  button.
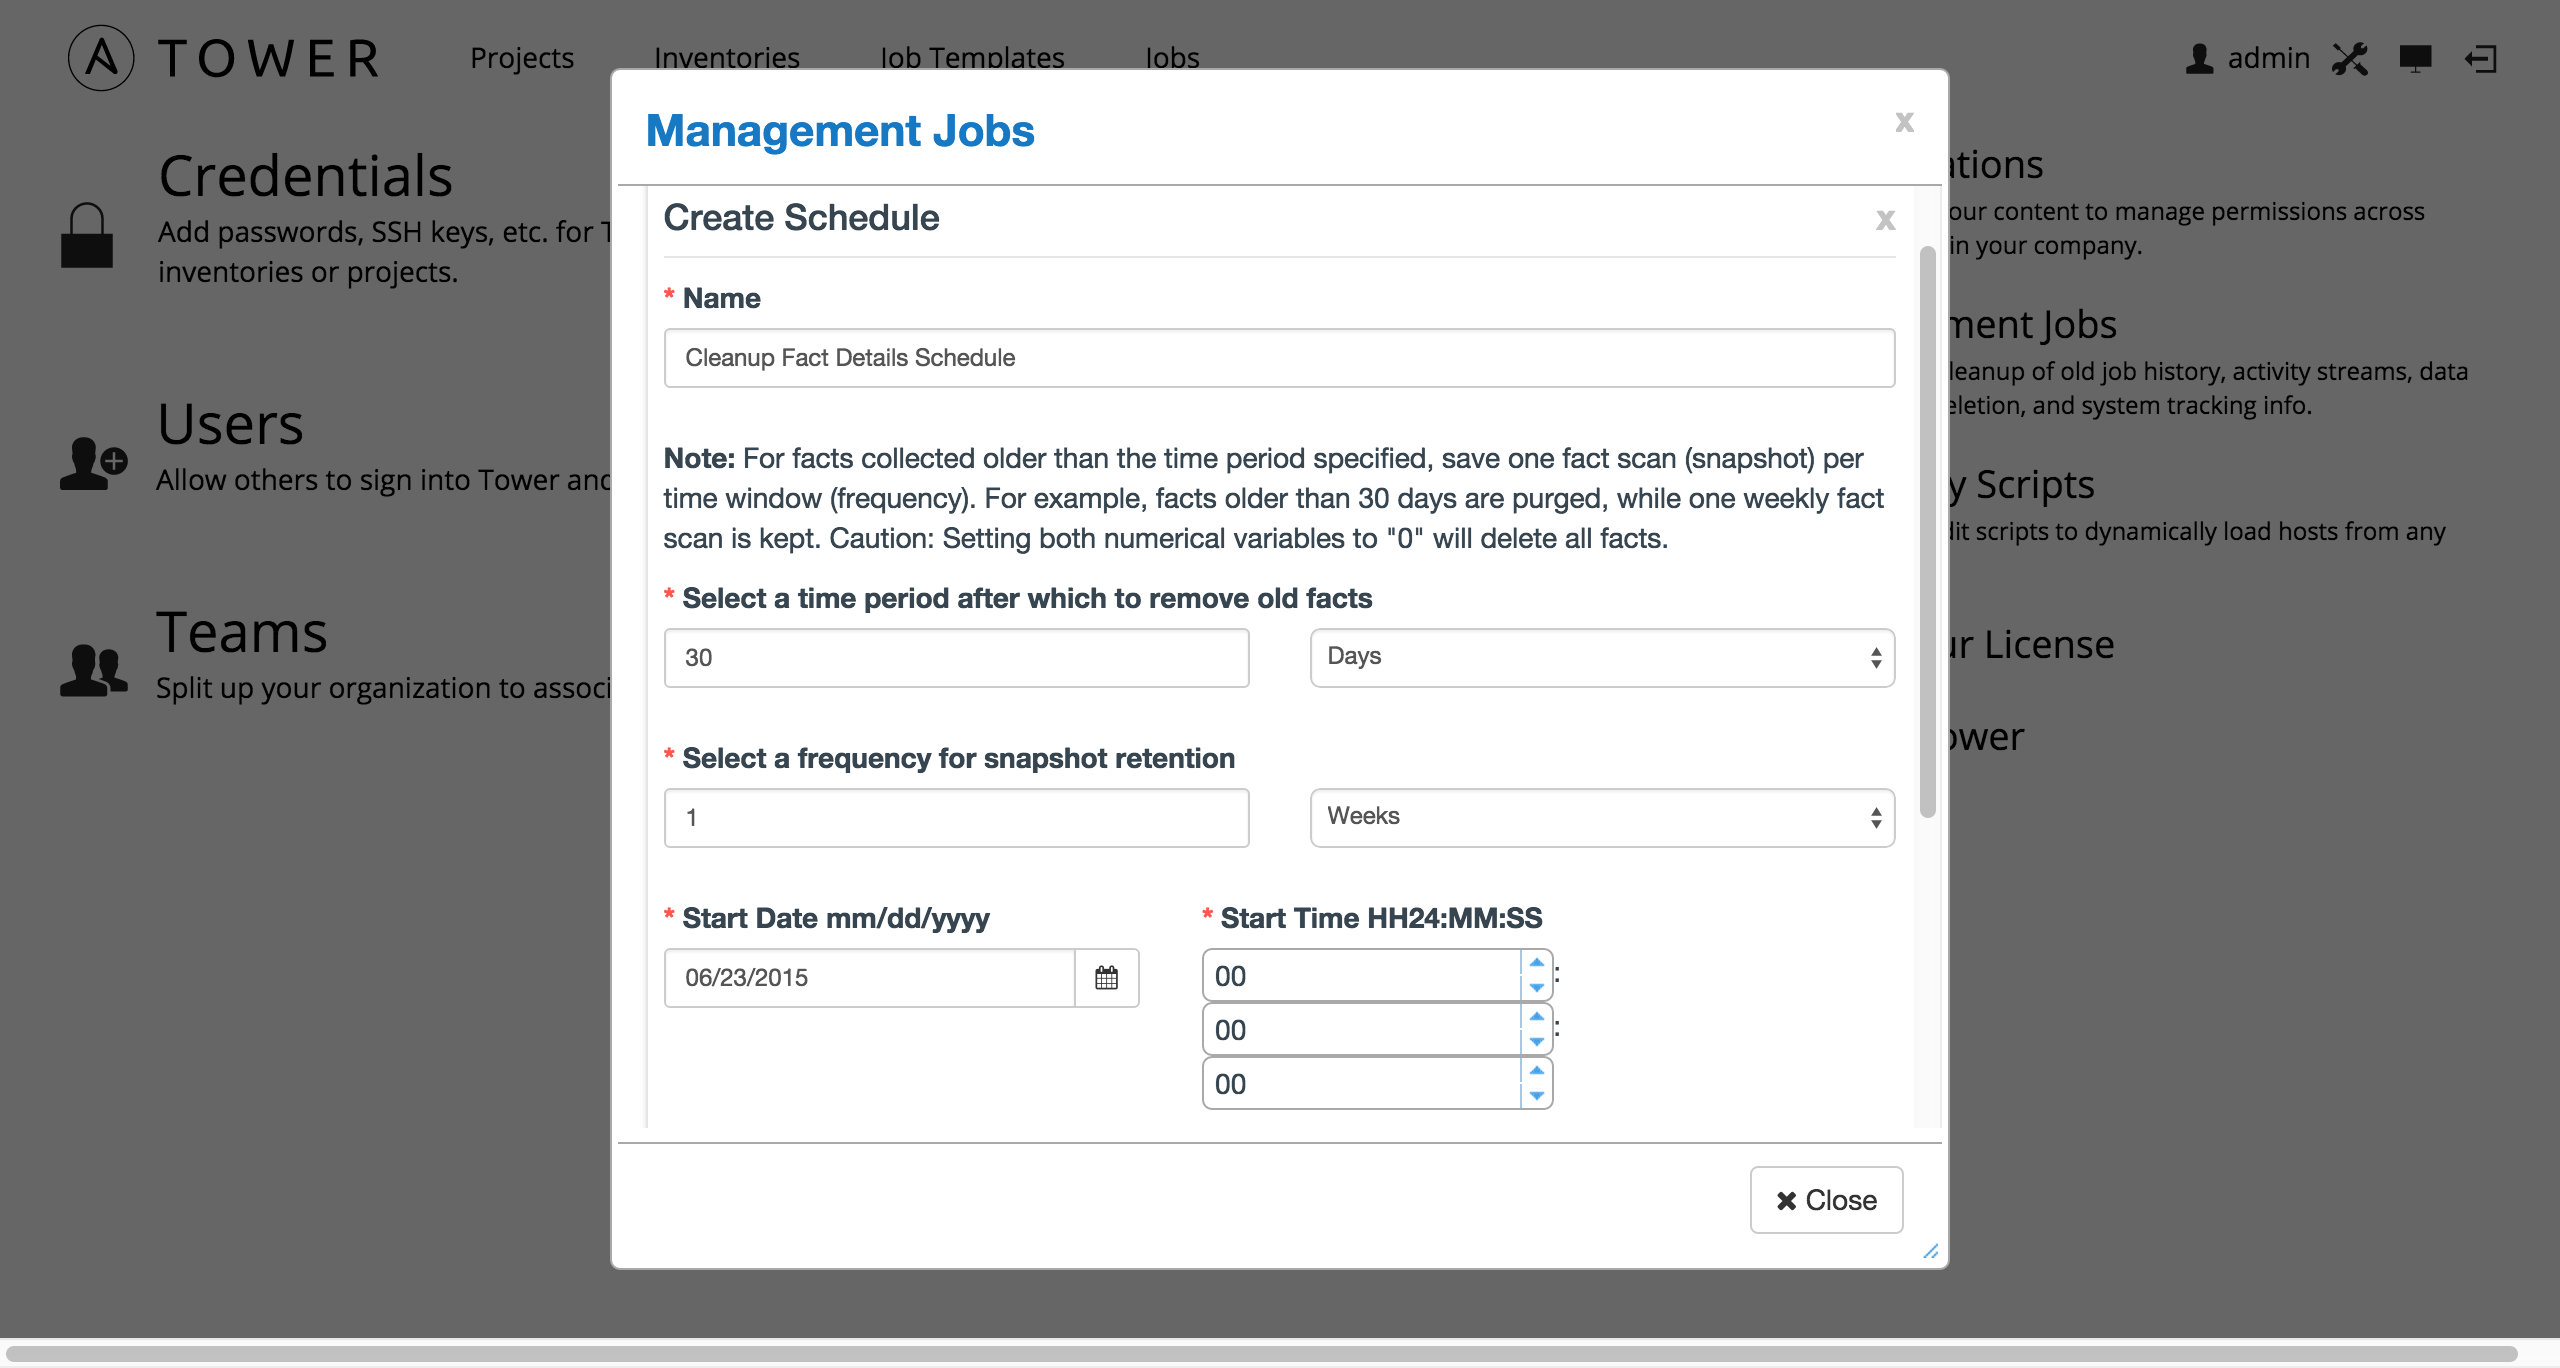
Enter the appropriate details for:
- Name: populated by default to match the management job type and can be left alone
- Select a time period after which to remove old facts: Select the number of days/weeks/years, after which old data will be removed.
- Select a frequency for snapshot retention: Select how often (days/weeks/years) to keep snapshots of your data.
- Start Date: Enter the date for which you want data cleanup to start (month/day/year format)
- Start Time: Enter the time to start data cleanup in hours, minutes, and seconds.
- Local Time Zone: Select your preferred time zone.
- UTC Start Time: Review the UTC Start time which is based on the Start Time and Local Time Zone you select.
- Repeat Frequency: Select how often you want the cleanup job to run. You can enter cleanups to occur once or every X minutes, hours, days, weeks, months, or years.
The View Details link at the bottom displays a description of the schedule and a list of the scheduled occurrences in the selected Local Time Zone.


