25. 使用 Webhook
Webhook 提供了通过 Web 在应用程序间执行指定命令的功能。automation controller 目前提供与 GitHub 和 GitLab 的 webhook 集成。这个部分介绍了通过各自服务设置 webhook 的步骤。
webhook 的 GitHub 和 GitLab 的 post-status-back 功能仅用于在特定 CI 事件下工作。接收另一类事件会导致在服务日志中出现类似以下的消息:
awx.main.models.mixins Webhook event did not have a status API endpoint associated, skipping.
25.1. GitHub webhook 设置
Automation controller 可根据触发的 webhook 事件运行作业。作业状态信息(待定、错误、成功)只能针对拉取请求事件发回。如果您确定不希望 automation controller 将作业状态回发到 webhook 服务,请跳过第 1-2 步并直接进入 step 3。
(可选)生成用于 automation controller 的个人访问令牌 (PAT)。
在 GitHub 帐户的配置集设置中,点击 Settings。
At the very bottom of the settings, click <> Developer Settings.
在 Developer settings 中,点击 Personal access tokens。
在 Personal access tokens 屏幕中点击 Generate new token。
提示时,请输入您的 GitHub 帐户密码以继续。
在 Note 字段中,输入有关此 PAT 用途的简要描述。
在 Scope 字段中,自动化 webhook 只需要范围访问权限,但邀请例外。有关其他范围的信息,请点击表上方的链接来访问文档。

点击 Generate Token 按钮。
生成令牌后,请确保复制 PAT,因为它将在稍后的步骤中被使用。您将无法在 GitHub 中再次访问这个令牌。
使用 PAT 创建 GitHub 凭证(可选):
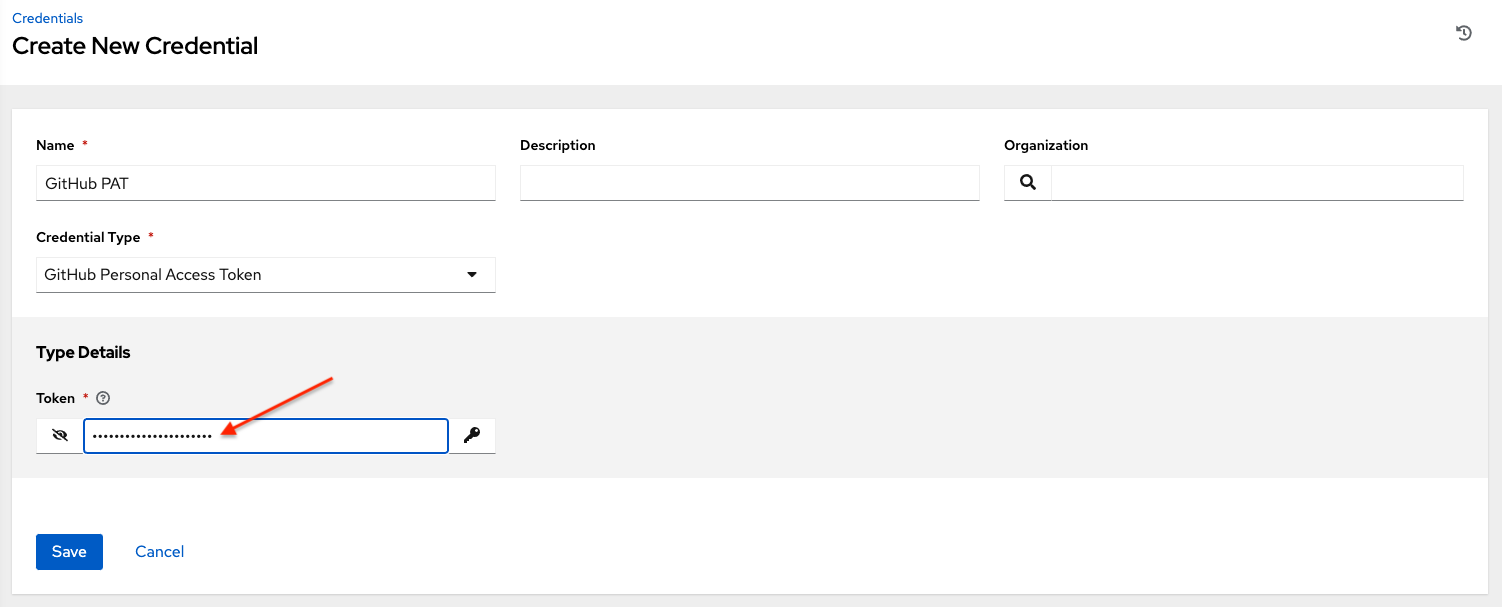
进入您的实例,并使用上面生成的令牌 create a new credential for the GitHub PAT。
记下此凭证的名称,因为它将用于回发到 GitHub 的作业模板。

进入您要启用 webhook 的作业模板,然后选择 webhook 服务和您在上一步中创建的凭证。

点击 Save。现在,您的作业模板已设置为可以回发到 GitHub。某个示例可能类似如下:

进入您要配置 webhook 的特定 GitHub 存储库,并点击 Settings。

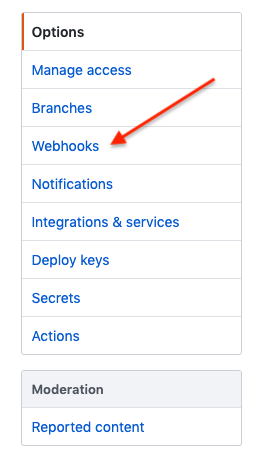
在 Options 下,点击 Webhooks。

在 Webhooks 页面中,点击 Add webhook。
要完成 Add Webhook 页面,您需要:ref:`enable webhooks in a job template <ug_jt_enable_webhooks>`(或者在:ref:`workflow job template <ug_wfjt_enable_webhooks>`中),这会为您提供以下信息:
从作业模板中复制 Webhook URL 的内容,并将它粘贴到 Payload URL 字段中。GitHub 使用这个地址来发送结果。
将 Content type 设置为 application/json。
从上面的作业模板中复制 Webhook Key 的内容,并将它粘贴到 Secret 字段中。
将 Enable SSL verification 保留为选中状态。

接下来,您必须选择要触发 webhook 的事件类型。任何这样的事件都会触发作业或工作流。为了使作业状态(待定、错误、成功)可以返回 GitHub,您必须在单独的 events 部分中选择 Pull requests。

将 Active 保留为选中状态,并点击 Add Webhook。

配置了 webhook 后,它会显示在您的存储库的活跃 webhook 列表中,并允许编辑或删除。点击 Webhook 会转到 Manage webhook 屏幕。滚动到屏幕的最底部,查看所有对 webhook 所做的传送尝试,以及它们是成功还是失败。

25.2. GitLab webhook 设置
Automation controller 可根据触发的 webhook 事件运行作业。作业状态信息(待定、错误、成功)只能针对合并(merge)请求事件发回。如果您确定不希望 automation controller 将作业状态回发到 webhook 服务,请跳过第 1-2 步并直接进入 step 3。
(可选)生成个人访问令牌(PAT)。此令牌可让 automation controller 能够在我们基于传入的 webhook 运行作业时回发状态。
在 GitLab 帐户的配置集设置中,点击 Settings。
在侧边栏中,点击 User Settings 下的 Access Tokens。

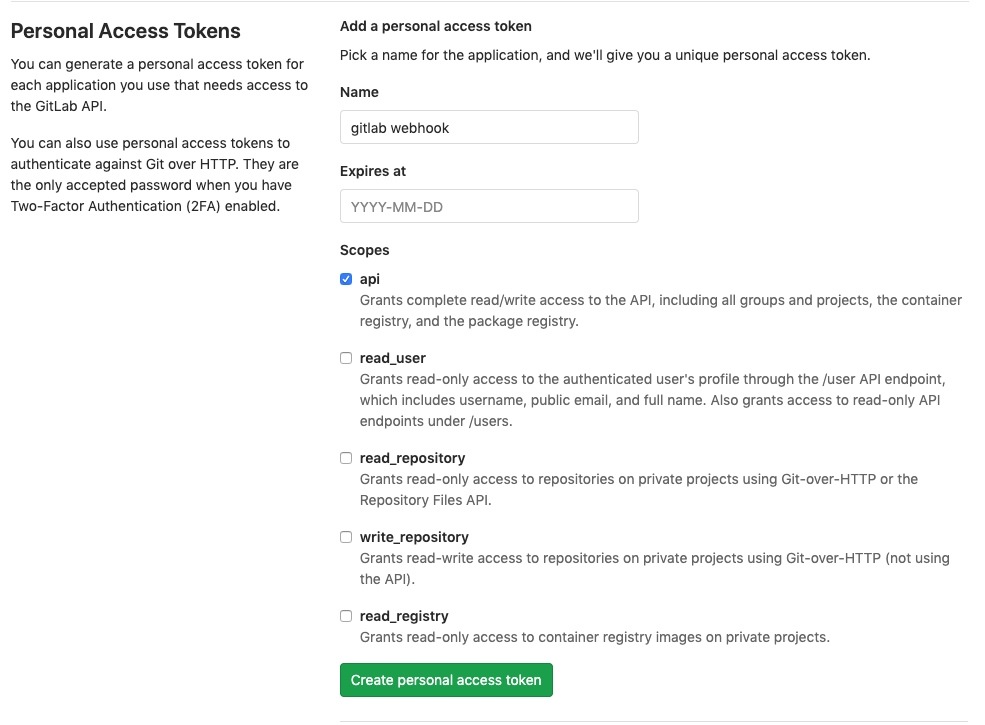
在 Name 字段中,输入有关此 PAT 用途的简要描述。
跳过 Expires at 字段,除非您要为您的 webhook 设置过期日期。
在 Scopes 字段中,选择适用于您的集成的范围。对于 automation controller,API 是必不可少的唯一选择。

点击 Create personal access token 按钮。
生成令牌后,请确保复制 PAT,因为它将在稍后的步骤中被使用。您将无法在 GitLab 中再次访问这个令牌。
使用 PAT 创建 GitLab 凭证(可选):
进入您的实例,并使用上面生成的令牌 create a new credential for the GitLab PAT。
记下此凭证的名称,因为它将用于回发到 GitHub 的作业模板。

进入您要启用 webhook 的作业模板,然后选择 webhook 服务和您在上一步中创建的凭证。

点击 Save。现在,您的作业模板已设置为可以回发到 GitLab。某个示例可能类似如下:

进入您要配置 Webhook 的特定 GitLab 存储库,并点击 Settings > Integrations。

要完成 Integrations 页面,您需要:ref:`enable webhooks in a job template <ug_jt_enable_webhooks>`(或者在:ref:`workflow job template <ug_wfjt_enable_webhooks>`中),这会为您提供以下信息:
从上面的作业模板中复制 Webhook URL 的内容,并将它粘贴到 URL 字段中。GitLab 使用这个地址来发送结果。
从上面的作业模板中复制 Webhook Key 的内容,并将它粘贴到 Secret Token 字段中。
接下来,您必须选择要触发 webhook 的事件类型。任何这样的事件都会触发作业或工作流。为了使作业状态(待定、错误、成功)可以返回到 GitLab,您必须在 Trigger 部分中选择 Merge request events。
将 Enable SSL verification 保留为选中状态。
点击 Add webhook。

配置了 webhook 后,它会显示在您的存储库的项目 Webhook 列表中,并可以测试事件、编辑或删除 webhook。测试 webhook 事件后,会在页面顶部显示结果,无论是成功还是失败。
25.3. 有效负载 (playload) 输出
The entire payload is exposed as an extra variable. To view the payload information, go to the Jobs Detail view of the job template that ran with the webhook enabled. In the Extra Variables field of the Details pane, view the payload output from the tower_webhook_payload variable, as shown in the example below.


