9. Managing Capacity With Instances
Scaling your mesh is only available on Openshift deployments of Ansible Automation Platform and is possible through adding or removing nodes from your cluster dynamically, through the Instances resource of the automation controller User Interface, without running the installation script.
9.1. Prerequisites
Be sure you have the minimum requirements for the RHEL virtual machine before proceeding. Refer to Red Hat Ansible Automation Platform system requirements for details.
RHEL nodes must properly be subscribed to:
RHEL subscription and with baseos and appstream repositories enabled
Ansible Automation Platform subscription and the proper Ansible Automation Platform channel enabled:
ansible-automation-platform-2.4-for-rhel-8-x86_64-rpms for RHEL 8
ansible-automation-platform-2.4-for-rhel-9-x86_64-rpms for RHEL 9
The system that is going to run the
ansible-playbookrequires the collectionansible.receptorto be installed:If machine has access to the internet:
ansible-galaxy install -r requirements.yml
Installing the receptor collection dependency from the
requirements.ymlfile will consistently retrieve the receptor version specified there, as well as any other collection dependencies that may be needed in the future.If machine does not have access to the internet, refer to Downloading a collection from Automation Hub to configure Automation Hub in Ansible Galaxy locally.
If you are using the default execution environment (provided with the controller) to run on remote execution nodes, you must add a pull secret in the controller that contains the credential for pulling the execution environment image. To do this, create a pull secret on the Ansible Automation Controller namespace and configure the
ee_pull_credentials_secretparameter in the Operator:1. Create a secret:
oc create secret generic ee-pull-secret \
 --from-literal=username=<username> \
 --from-literal=password=<password> \
 --from-literal=url=registry.redhat.io
oc edit automationcontrollers <instance name>
2. Add
ee_pull_credentials_secret ee-pull-secretto the spec:spec.ee_pull_credentials_secret=ee-pull-secret
To manage instances from the controller user interface, you must have System Administrator or System Auditor permissions.
9.2. Manage instances
Click Instances from the left side navigation menu to access the Instances list.
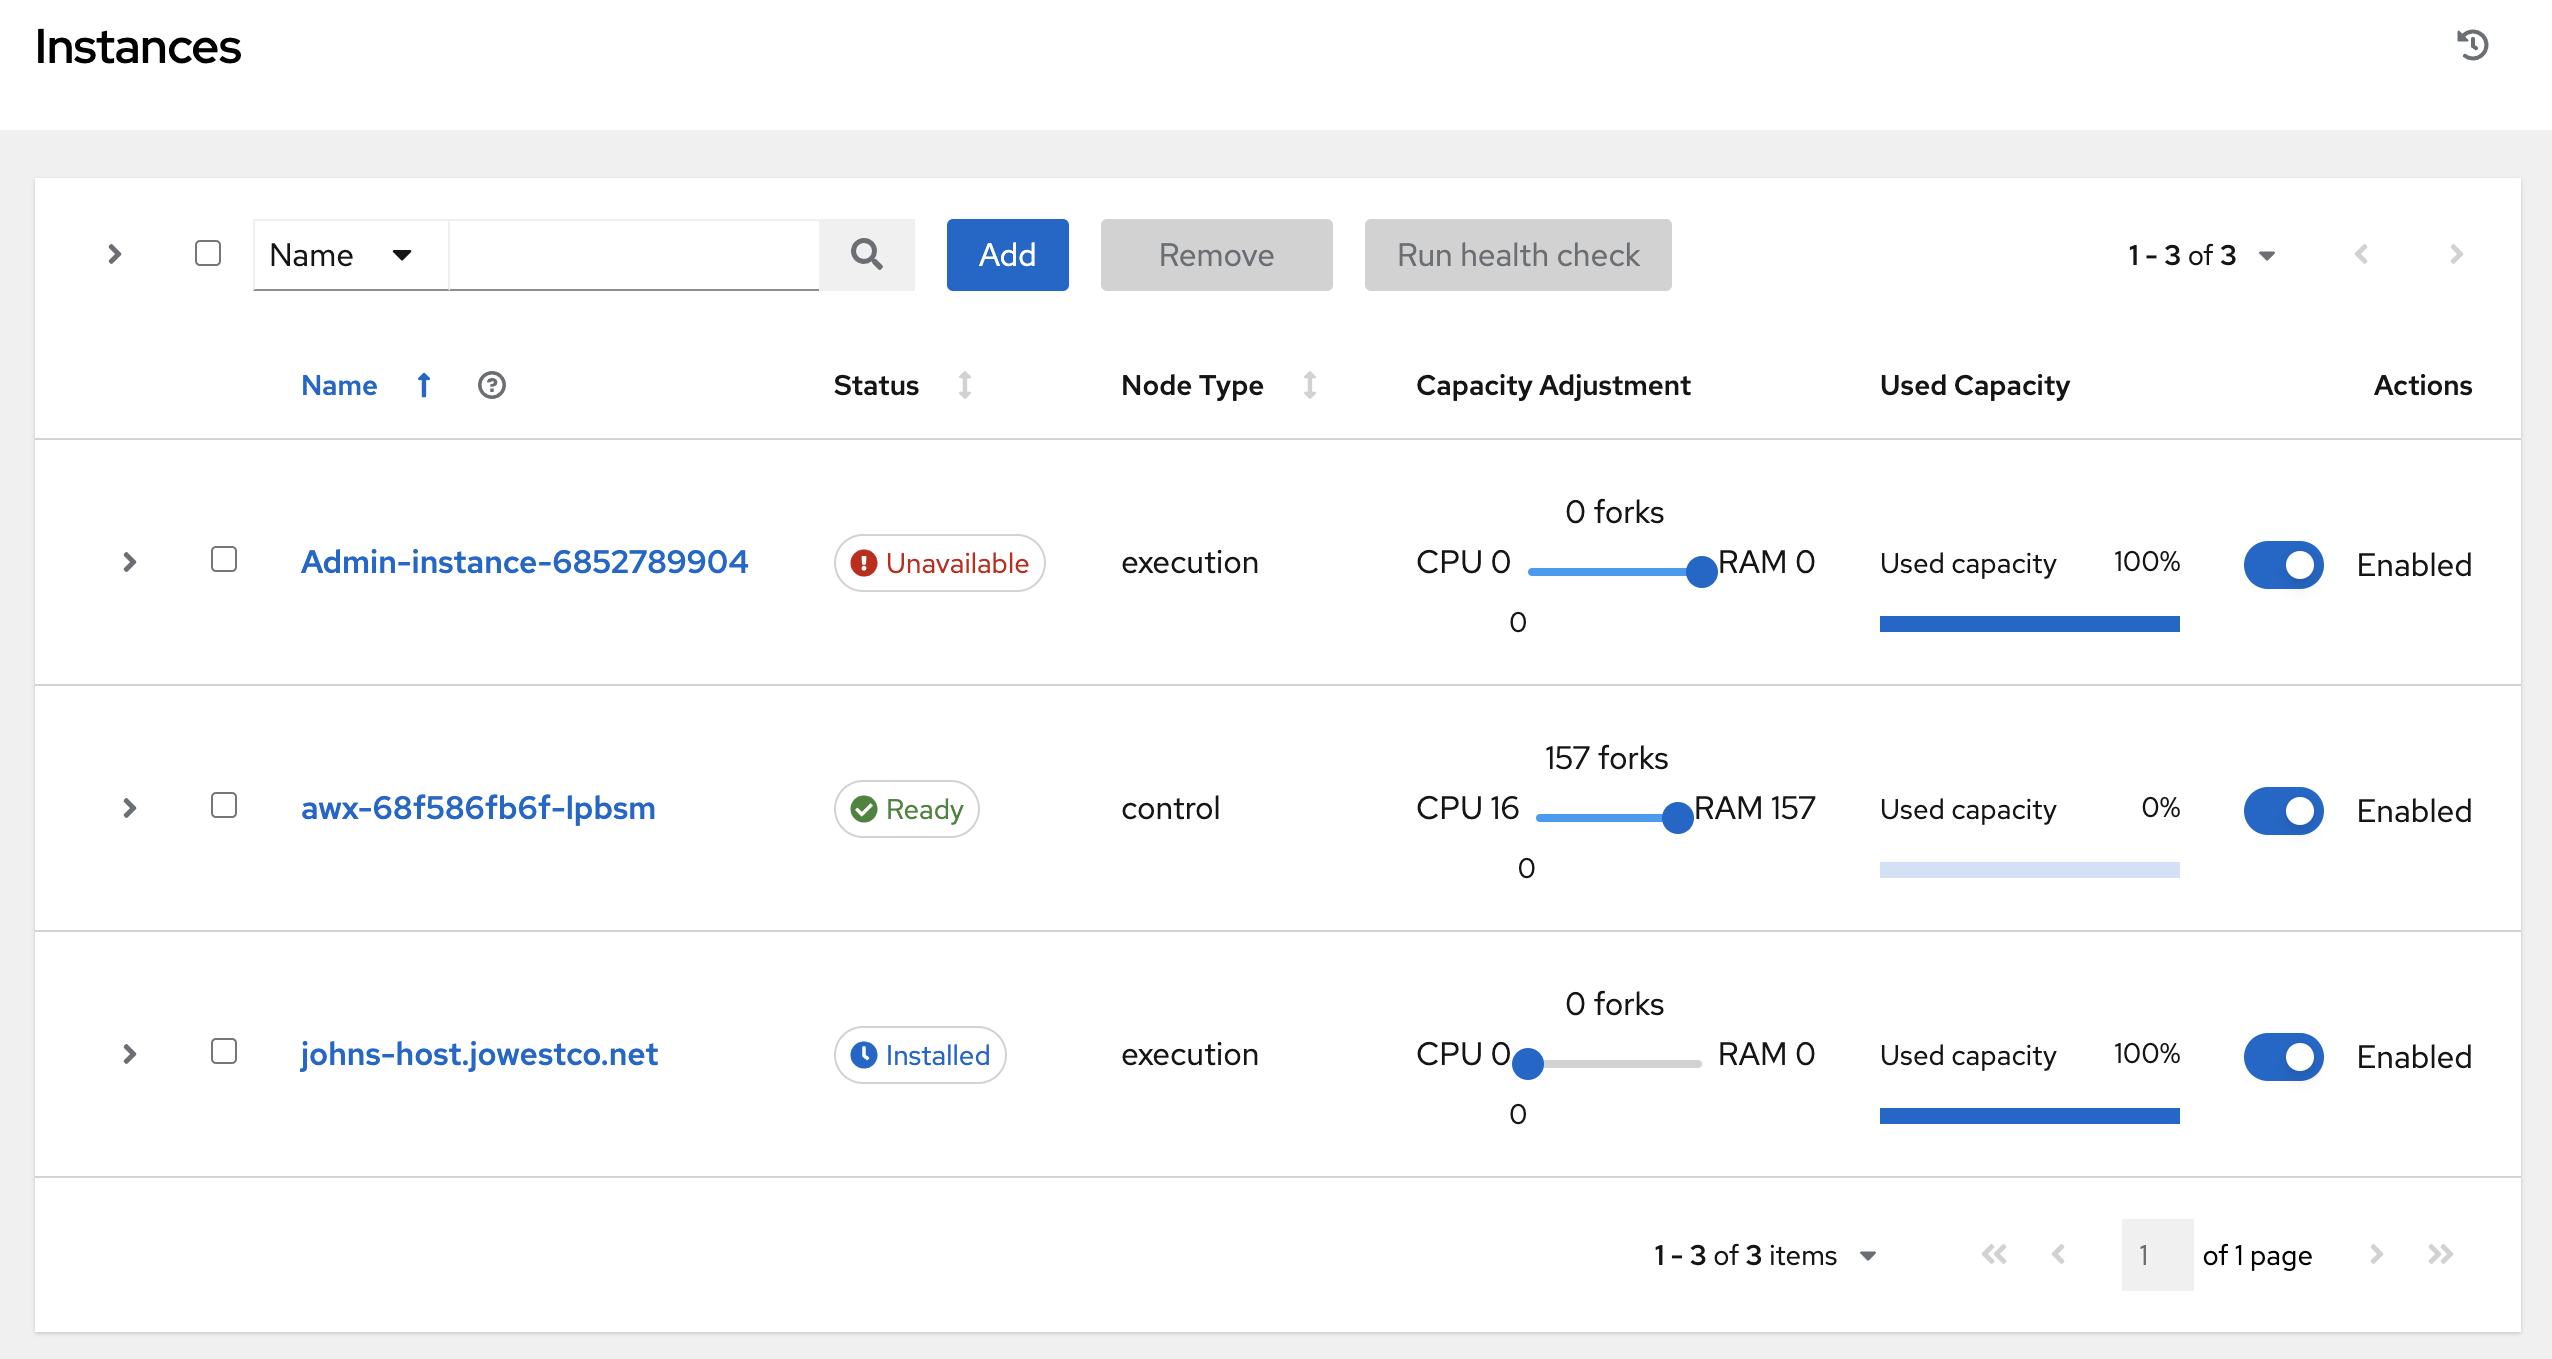
The Instances list displays all the current nodes in your topology, along with relevant details:
Host Name
Status indicates the state of the node:
Installed: a node that has successfully installed and configured, but has not yet passed the periodic health check
Ready: a node that is available to run jobs or route traffic between nodes on the mesh. This replaces the previously “Healthy” node state used in the mesh topology
Provisioning: a node that is in the process of being added to a current mesh, but is awaiting the job to install all of the packages (currently not yet supported and is subject to change in a future release)
Deprovisioning: a node that is in the process of being removed from a current mesh and is finishing up jobs currently running on it
Unavailable: a node that did not pass the most recent health check, indicating connectivity or receptor problems
Provisioning Failure: a node that failed during provisioning (currently not yet supported and is subject to change in a future release)
De-provisioning Failure: a node that failed during deprovisioning (currently not yet supported and is subject to change in a future release)
Node Type specifies whether the node is a control, hybrid, hop, or execution node. See node for further detail.
Capacity Adjustment allows you to adjust the number of forks in your nodes
Used Capacity indicates how much capacity has been used
Actions allow you to enable or disable the instance to control whether jobs can be assigned to it
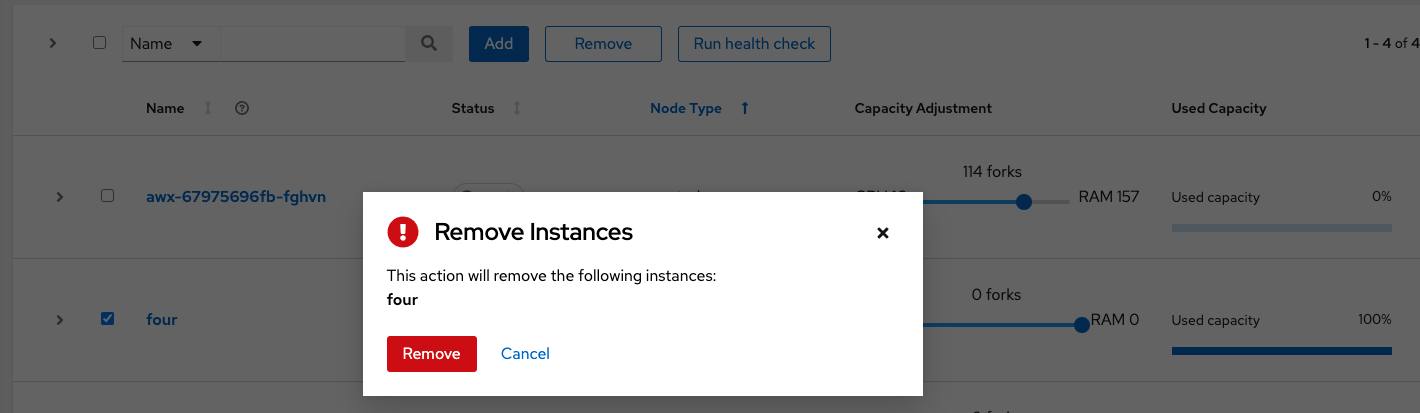
From this page, you can add, remove or run health checks on your nodes. Use the check boxes next to an instance to select it to remove or run a health check against. When a button is grayed-out, you do not have permission for that particular action. Contact your Administrator to grant you the required level of access. If you are able to remove an instance, you will receive a prompt for confirmation, like the one below:
注釈
You can still remove an instance even if it is active and jobs are running on it. The controller will attempt to wait for any jobs running on this node to complete before actually removing it.
Click Remove to confirm.
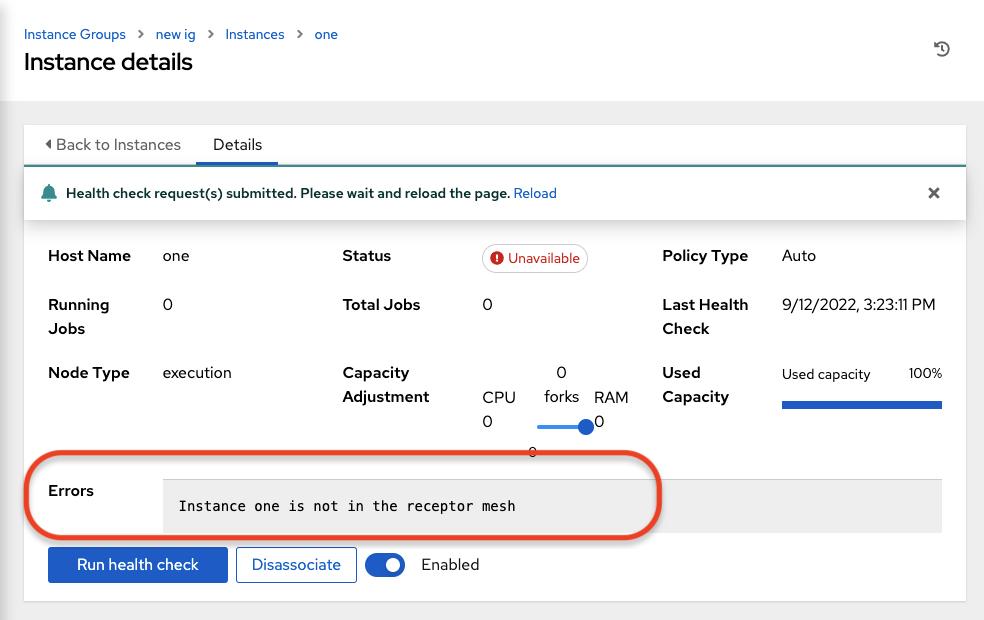
If running a health check on an instance, at the top of the Details page, a message displays that the health check is in progress.
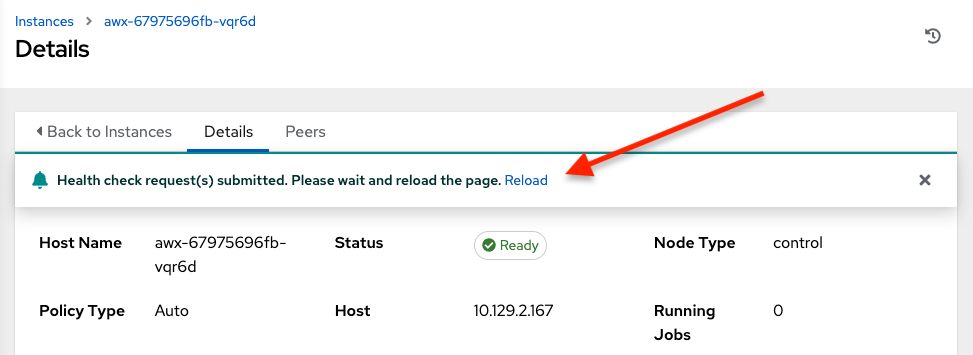
Click Reload to refresh the instance status.
注釈
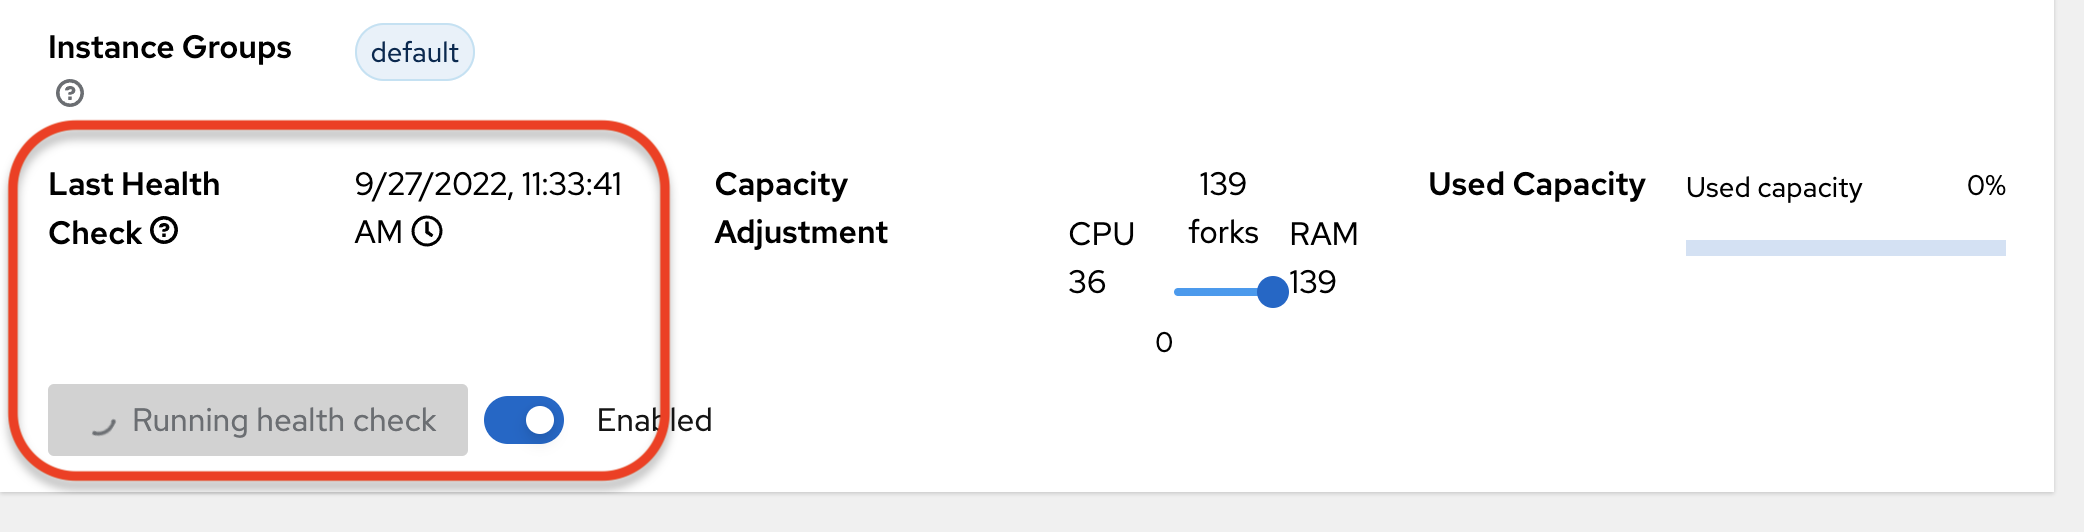
Health checks are ran asynchronously, and may take up to a minute for the instance status to update, even with a refresh. The status may or may not change after the health check. At the bottom of the Details page, a timer/clock icon displays next to the last known health check date and time stamp if the health check task is currently running.
The example health check shows the status updates with an error on node 'one':
9.3. Add an instance
One of the ways to expand capacity is to create an instance, which serves as a node in your topology.
Click Instances from the left side navigation menu.
In the Instances list view, click the Add button and the Create new Instance window opens.
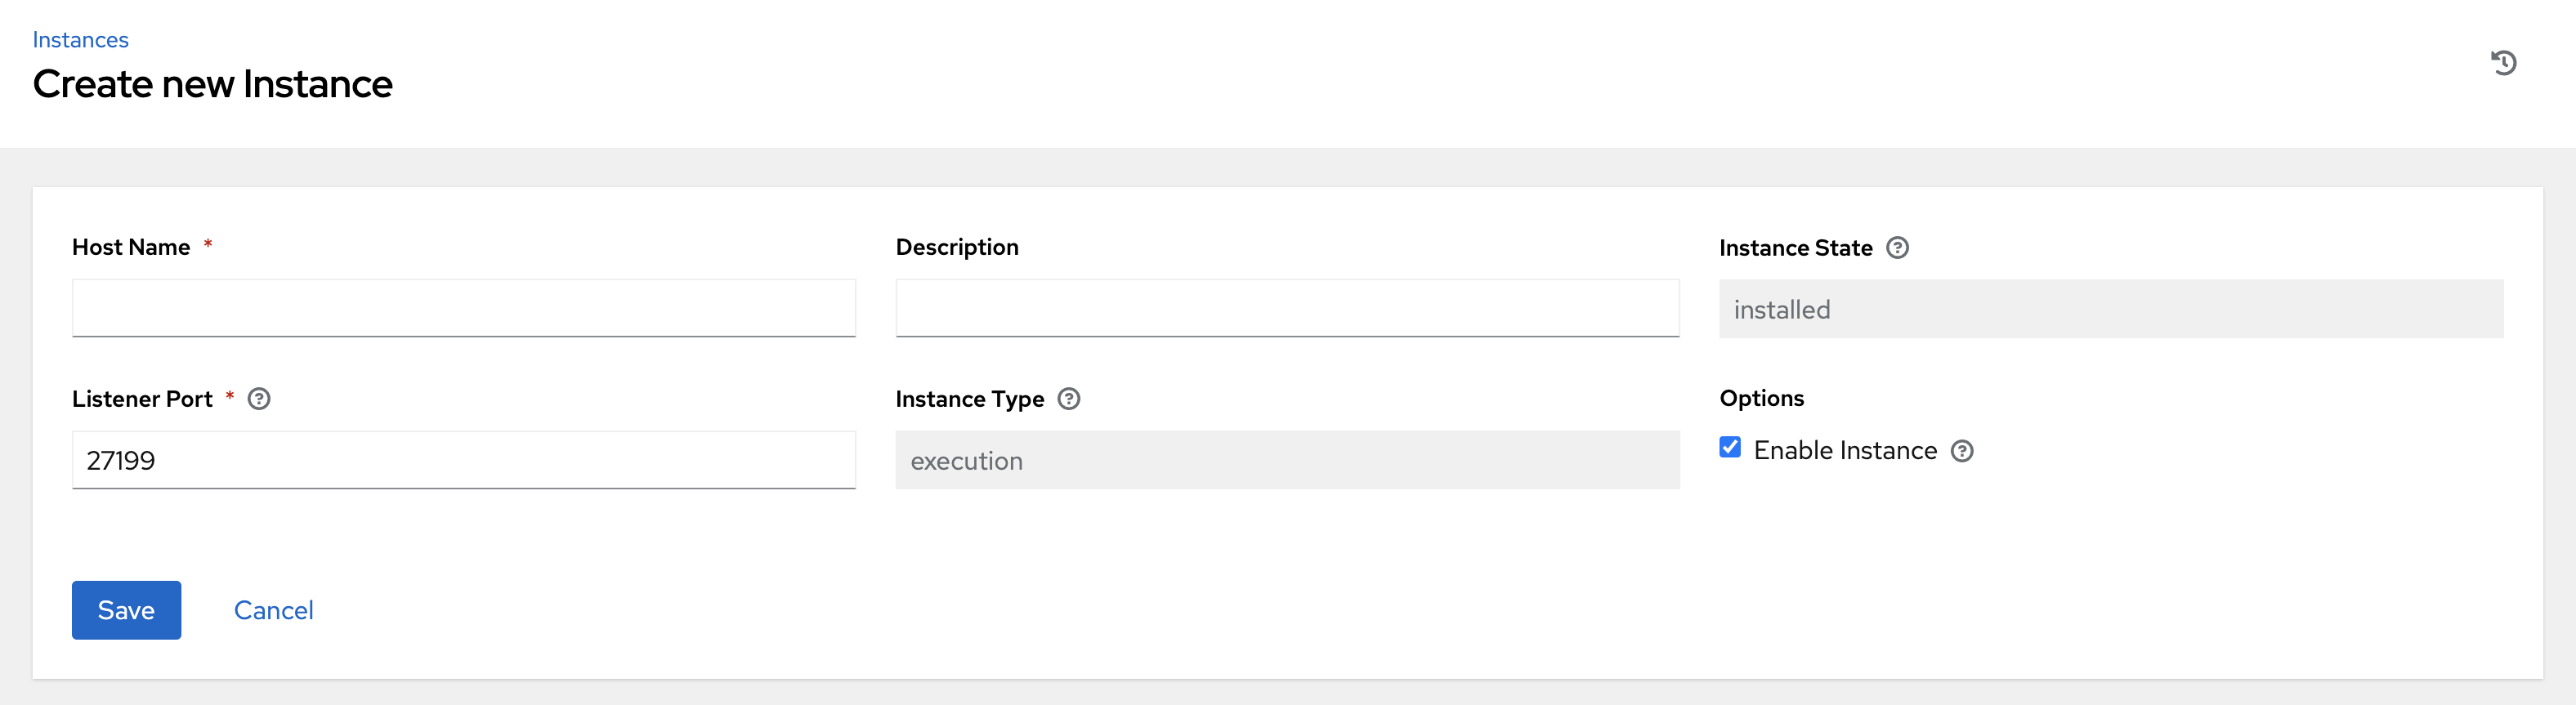
An instance has several attributes that may be configured:
Enter a fully qualified domain name (ping-able DNS) or IP address for your instance in the Host Name field (required). This field is equivalent to
hostnamein the API.Optionally enter a Description for the instance
The Instance State field is auto-populated, indicating that it is being installed, and cannot be modified
The Listener Port is pre-populated with the most optimal port, however you can change the port to one that is more appropriate for your configuration. This field is equivalent to
listener_portin the API.The Instance Type field is auto-populated and cannot be modified. Only execution nodes can be created at this time.
Check the Enable Instance box to make it available for jobs to run on it
Once the attributes are configured, click Save to proceed.
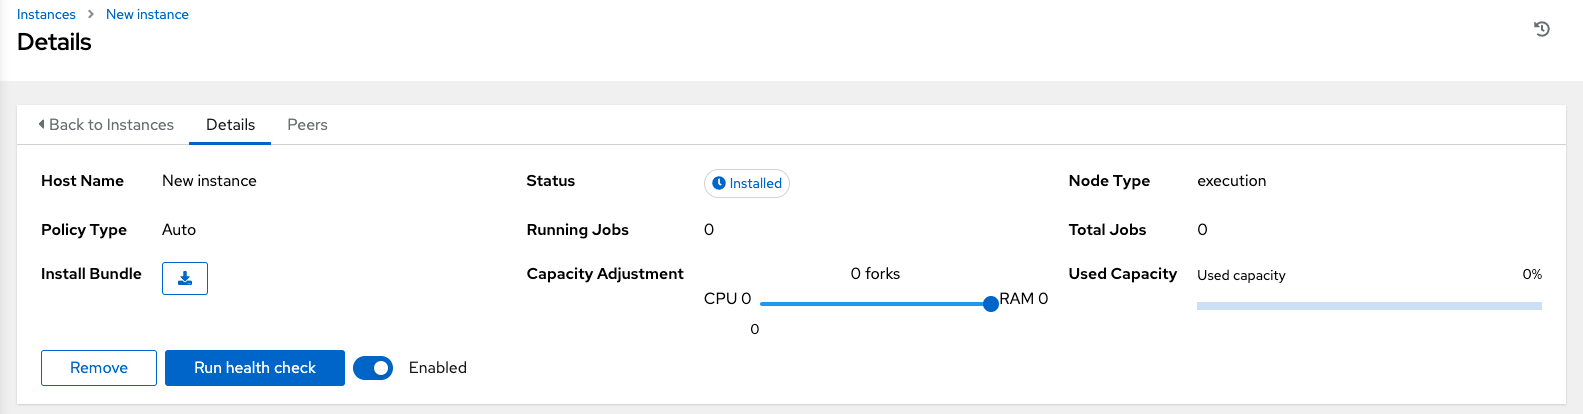
Upon successful creation, the Details of the created instance opens.
注釈
The proceeding steps 4-8 are intended to be ran from any computer that has SSH access to the newly created instance. It should not be ran from a machine that is part of the AAP deployment.
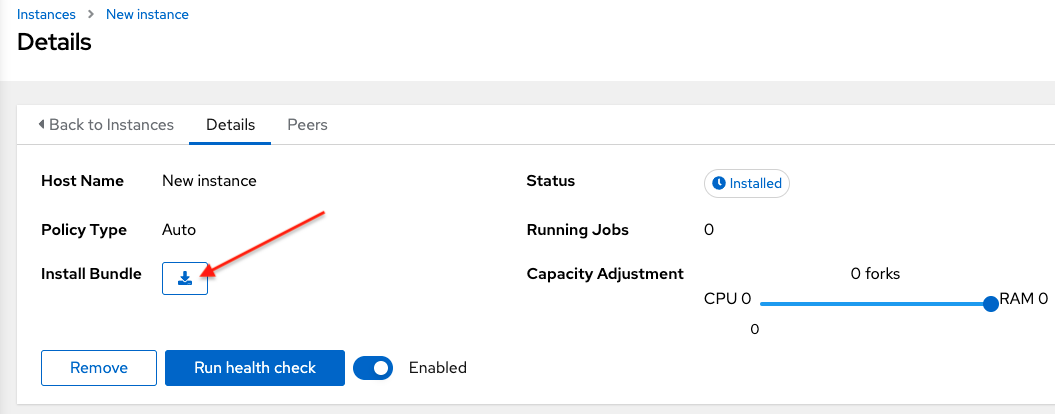
Click the download button next to the Install Bundle field to download the tarball that includes this new instance and the files relevant to install the node into the mesh.
Extract the downloaded
tar.gzfile from the location you downloaded it. The install bundle contains yaml files, certificates, and keys that will be used in the installation process.Before running the
ansible-playbookcommand, edit the following fields in theinventory.ymlfile:
ansible_userwith the username running the installationansible_ssh_private_key_fileto contain the filename of the private key used to connect to the instance
---
all:
  hosts:
    remote-execution:
      ansible_host: 18.206.206.34
      ansible_user: <username> # user provided
      ansible_ssh_private_key_file: ~/.ssh/id_rsa
The content of the inventory.yml file serves as a template and contains variables for roles that are applied during the installation and configuration of a receptor node in a mesh topology. You may modify some of the other fields, or replace the file in its entirety for advanced scenarios. Refer to Role Variables for more information on each variable.
Save the file to continue.
Run the following command on the machine you want to update your mesh:
ansible-playbook -i inventory.yml install_receptor.yml
To view other instances within the same topology, click the Peers tab associated with the control node.
注釈
You will only be able to view peers of the control plane nodes at this time, which are the execution nodes. Since you are limited to creating execution nodes in this release, you will be unable to create or view peers of execution nodes.

You may run a health check by selecting the node and clicking the Run health check button from its Details page.
To view a graphical representation of your updated topology, refer to the Topology Viewer section of this guide.