10. Tower Configuration
In Ansible Tower version 3.1.0, you can configure various Tower settings within the Tower user interface, in the following tabs:
- Authentication: Enable simplified login for your Tower applications.
- Jobs: Update settings pertaining to Jobs within Tower.
- System: Define system-level features and functions.
- User Interface: Set the level of data collection for use in usability analytics.
Each tab contains fields with a Reset button, allowing you to revert any value entered back to the default value. Reset All allows you to revert all the values in the Edit Tower Configuration to their factory default values.
Save applies changes you make, but it does not exit the edit dialog. Click ( ) to return to the Settings Menu screen.
10.1. Authentication
Through the Tower user interface, you can set up a simplified login through various authentication types: GitHub, Google, LDAP, RADIUS, and SAML. After you create and register your developer application with the appropriate service, you can set up authorizations for them. Since configuration files are now saved to the postgres DB in Ansible Tower 3.1 instead of flat files, setting up authorizations in the Ansible Tower User Interface is the recommended method.
- From the Settings () Menu screen, click Configure Tower.
- The Authentication tab displays initially by default. Select the appropriate authentication type from the drop-down list.
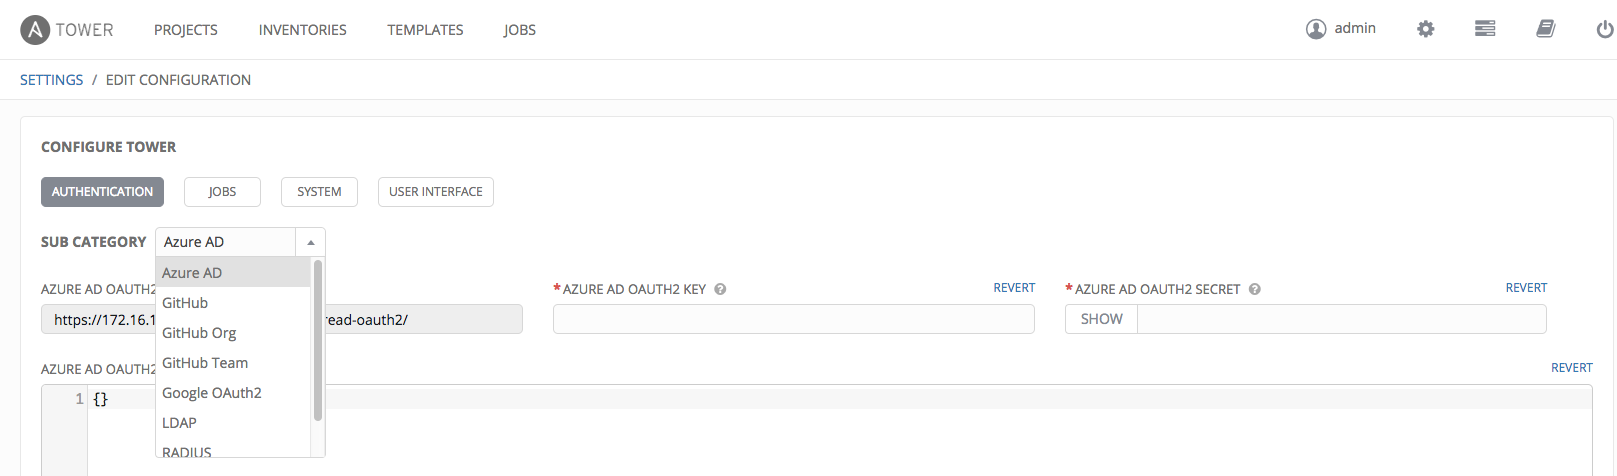
Different authentication types require you to enter different information. Be sure to include all the information as required.
Note
For more detail about each authentication type, refer to the Setting Up Authentication section of the Administration Guide.
- Click Save to apply the settings or Cancel to abandon the changes.
10.2. Jobs
The Jobs tab allows you to configure the types of modules that are allowed to be used by Tower’s Ad Hoc Commands feature, set limits on the number of jobs that can be scheduled, define their output size, and other details pertaining to working with Jobs in Tower.
- From the Settings () Menu screen, click on Configure Tower.
- Select the Jobs tab.
- Set the configurable options from the fields provided.

- Click Save to apply the settings or Cancel to abandon the changes.
10.3. System
The System tab allows you to define the base URL for the Tower host, configure alerts, enable activity capturing, control visibility of users, enable certain Tower features and functionality through a license file, and configure logging aggregation options.
- From the Settings () Menu screen, click on Configure Tower.
- Select the System tab.
- Select an option from the Sub Category drop-down menu list:
- Misc. System: define the base URL for the Tower host, enable tower administration alerts, and allow all users to be visible to organization administrators.
- Activity Stream: enable or disable activity stream.
- Logging: configure logging options based on the type you choose:
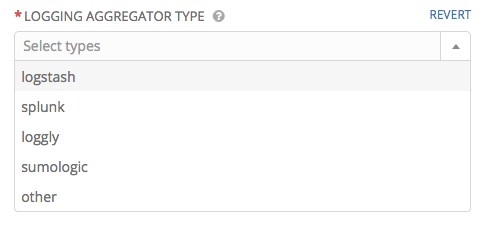
For more information about each of the logging aggregation types, refer to the Tower Logging and Aggregation section of the Administration Guide.
- Set the configurable options from the fields provided. Click the tooltip
 icon next to the field that you need additional information or details about.
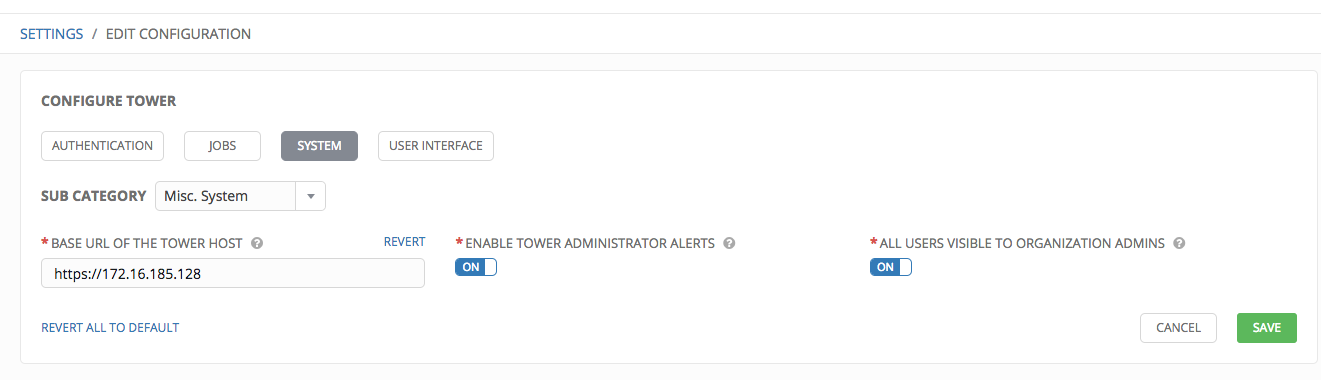
- Click Save to apply the settings or Cancel to abandon the changes.
10.4. User Interface
The User Interface tab allows you to set Tower analytics settings, as well as configure custom logos and login messages.
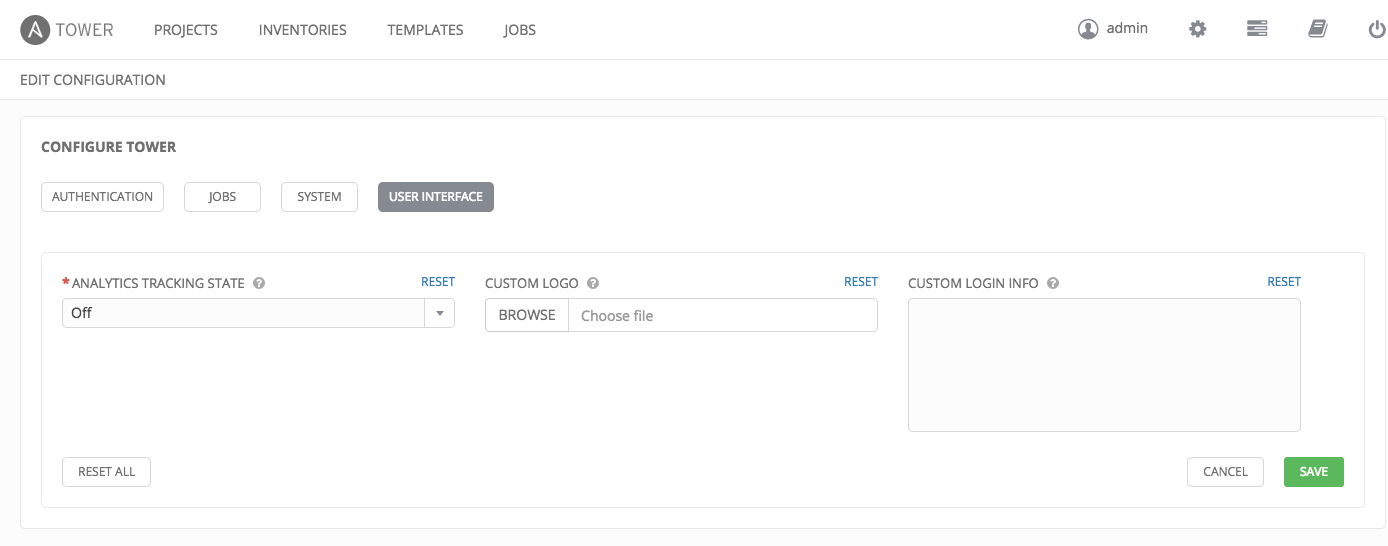
Ansible Tower collects user data automatically to help improve the Tower product. You can control the way Tower collects data by setting your participation level in the User Interface tab.
- From the Settings () Menu screen, click on Configure Tower.
- Select the User Interface tab.
- Select the desired level of data collection from the Analystics Tracking State drop-down list:
- Off: Prevents any data collection.
- Anonymous: Enables data collection without your specific user data.
- Detailed: Enables data collection including your specific user data.
- Click Save to apply the settings or Cancel to abandon the changes.
You can also add a custom logo by uploading an image and supply a custom login message from this screen.
Refer to the tooltips ( ) for acceptable formats.