7. Organizations
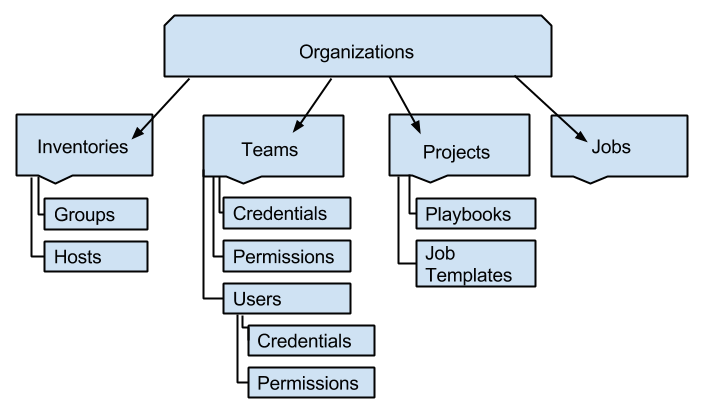
An Organization is a logical collection of Users, Teams, Projects, and Inventories, and is the highest level in the Tower object hierarchy.
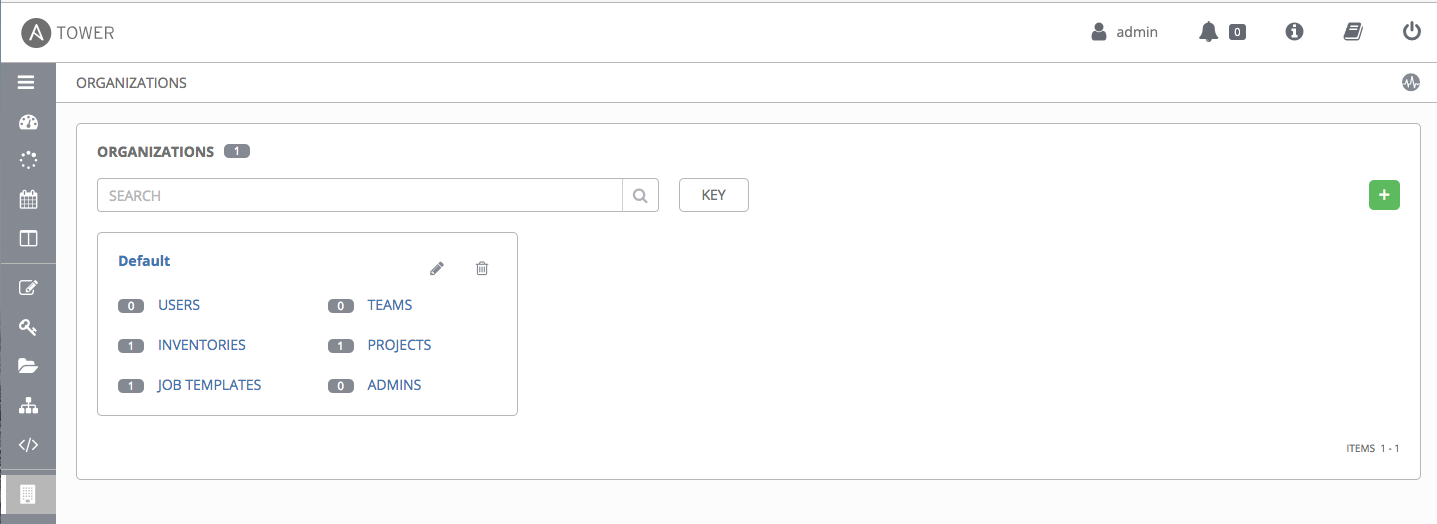
Access the Organizations page by clicking the Organizations (![]() ) icon from the left navigation bar. The Organizations page displays all of the existing organizations for your installation of Tower. Organizations can be searched by Name or Description. Modify and remove organizations using the Edit and Delete buttons.
) icon from the left navigation bar. The Organizations page displays all of the existing organizations for your installation of Tower. Organizations can be searched by Name or Description. Modify and remove organizations using the Edit and Delete buttons.
Note
Tower creates a default organization automatically. Users of Tower with a Self-Support level license only have the default organization available and should not delete it.
7.1. Creating a New Organization
You can create a new organization by selecting the  button.
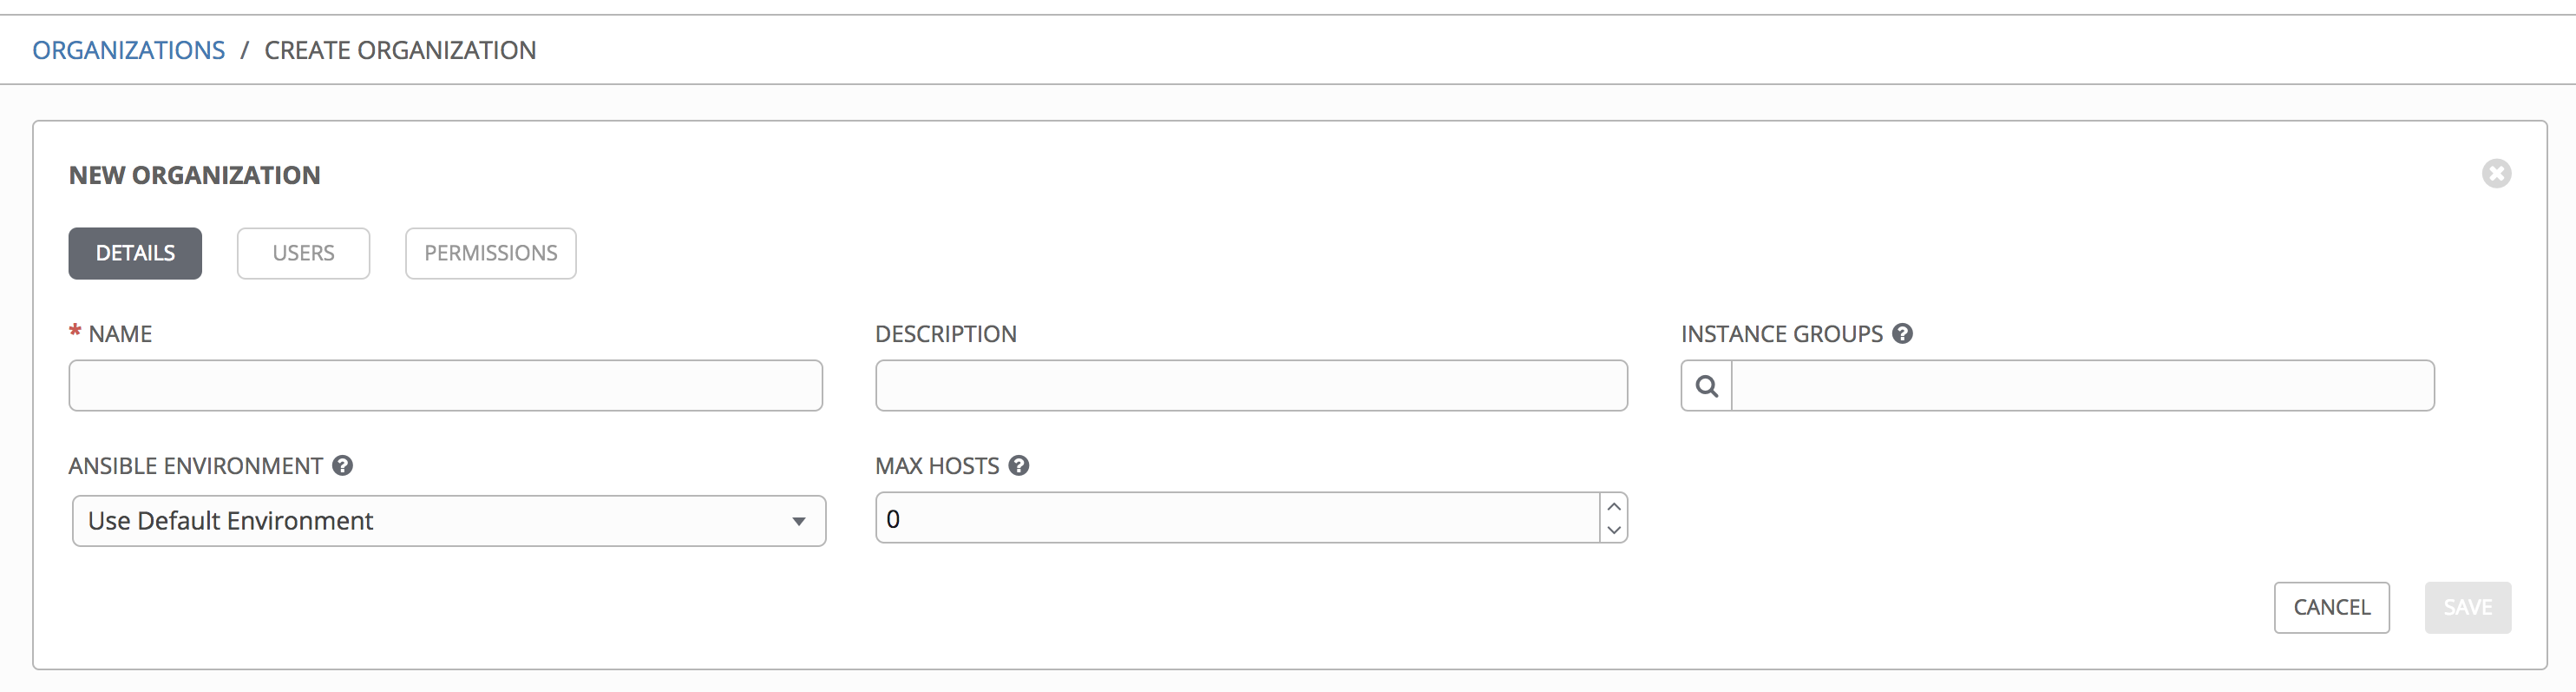
An organization has several attributes that may be configured:
Enter the Name for your organization (required).
Enter a Description for the organization.
Enter an Instance Group on which to run this organization.
Select from the drop-down menu list a custom virtual Ansible Environment on which to run this organization. This field is only present if custom environments were previously created. See Using virtualenv with Ansible Tower in the Ansible Tower Upgrade and Migration Guide.
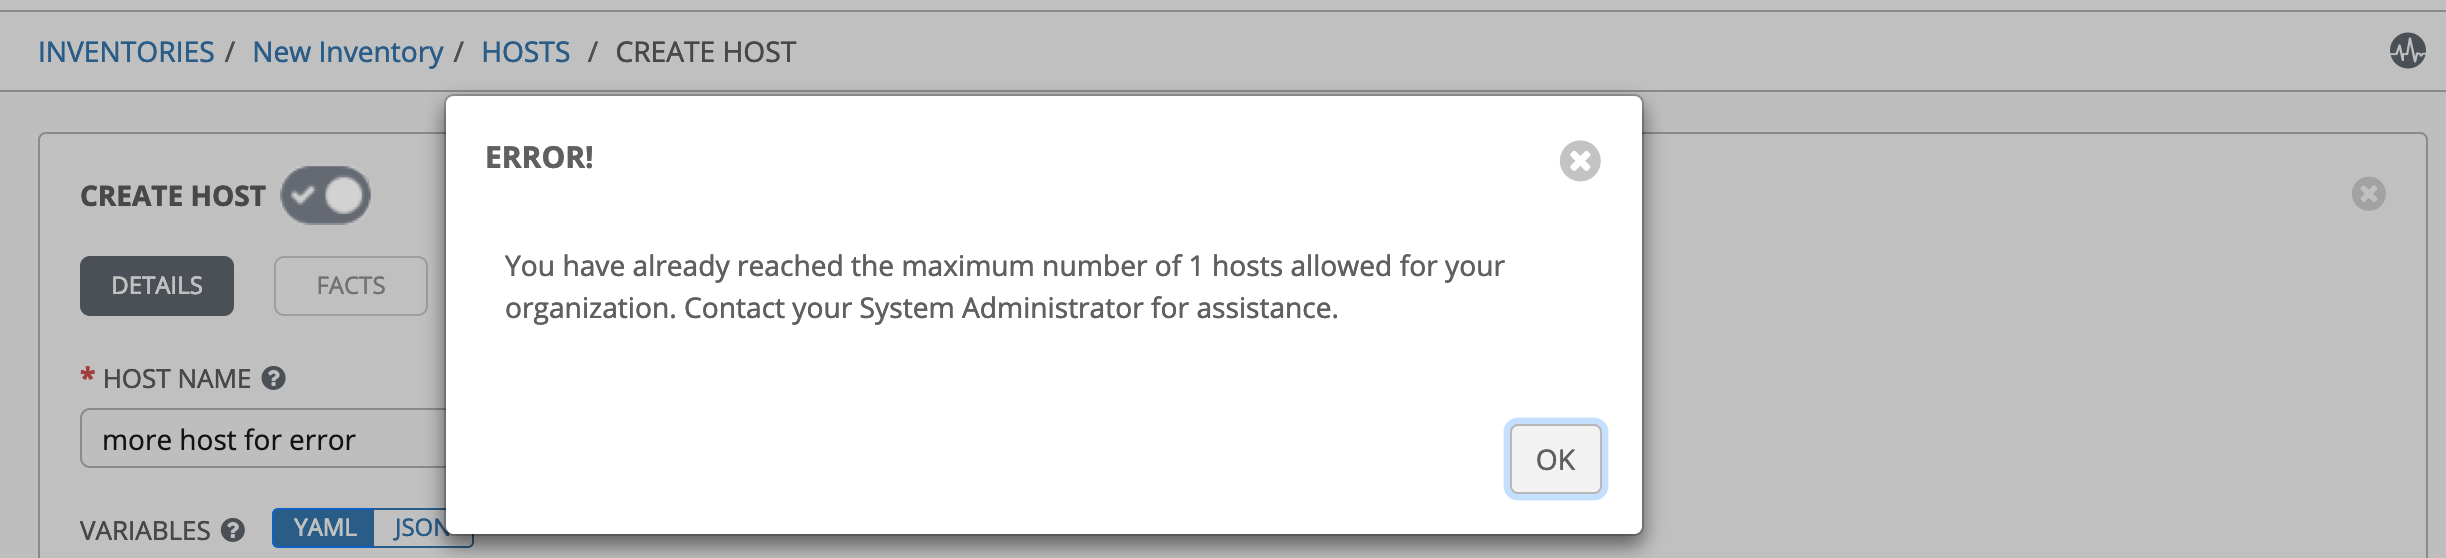
The Max Hosts is only editable by a superuser to set an upper limit on the number of license hosts that an organization can have. Setting this value to 0 signifies no limit. If you try to add a host to an organization that has reached or exceeded its cap on hosts, an error message displays:
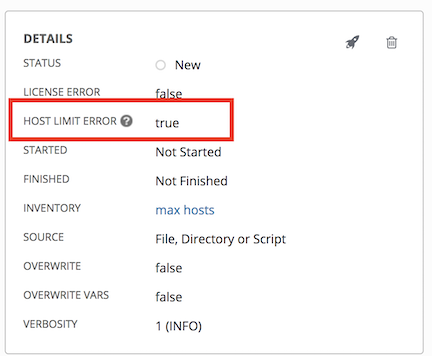
The inventory sync output view also shows the host limit error. Click the ![]() icon for additional detail about the error.
icon for additional detail about the error.
Click Save to finish creating the organization.
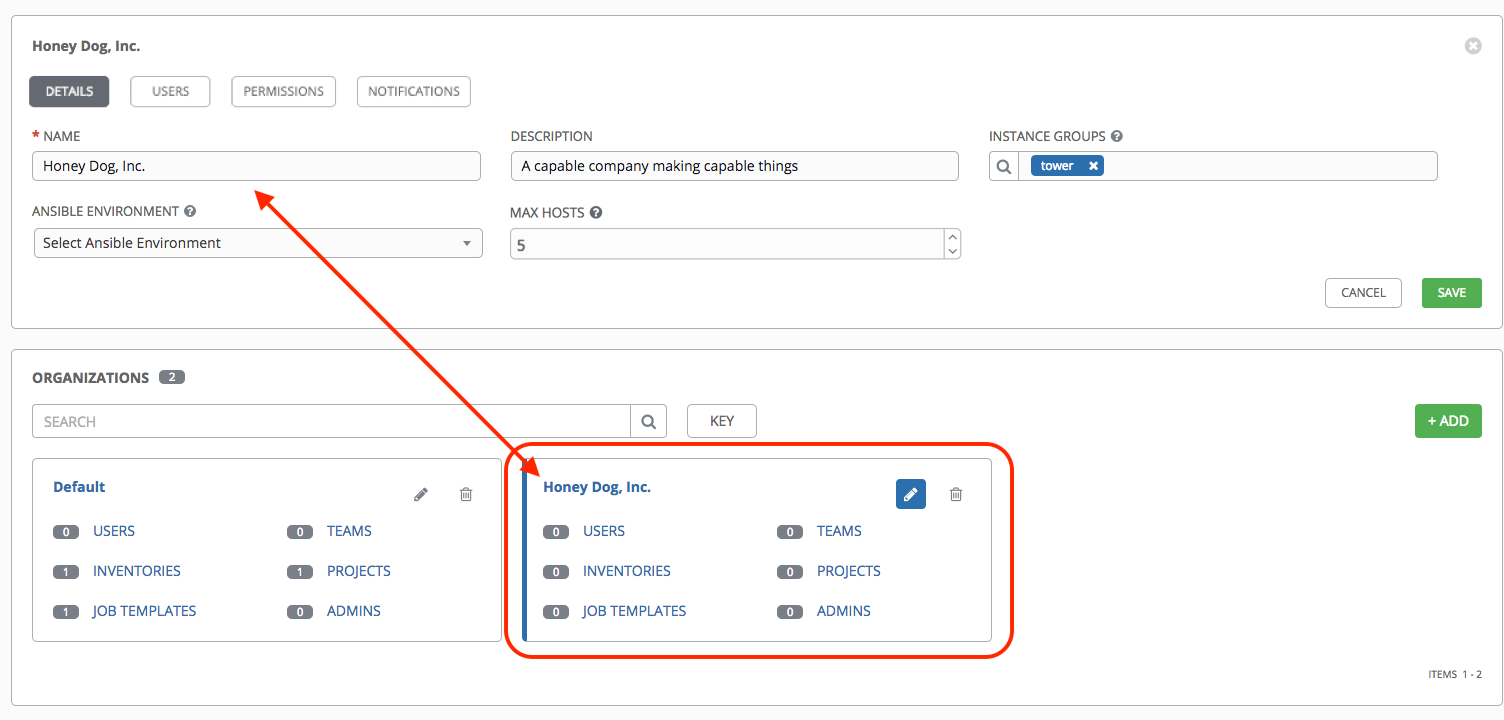
Once created, Tower displays the Organization details, and allows for the managing of users and administrators for the organization.
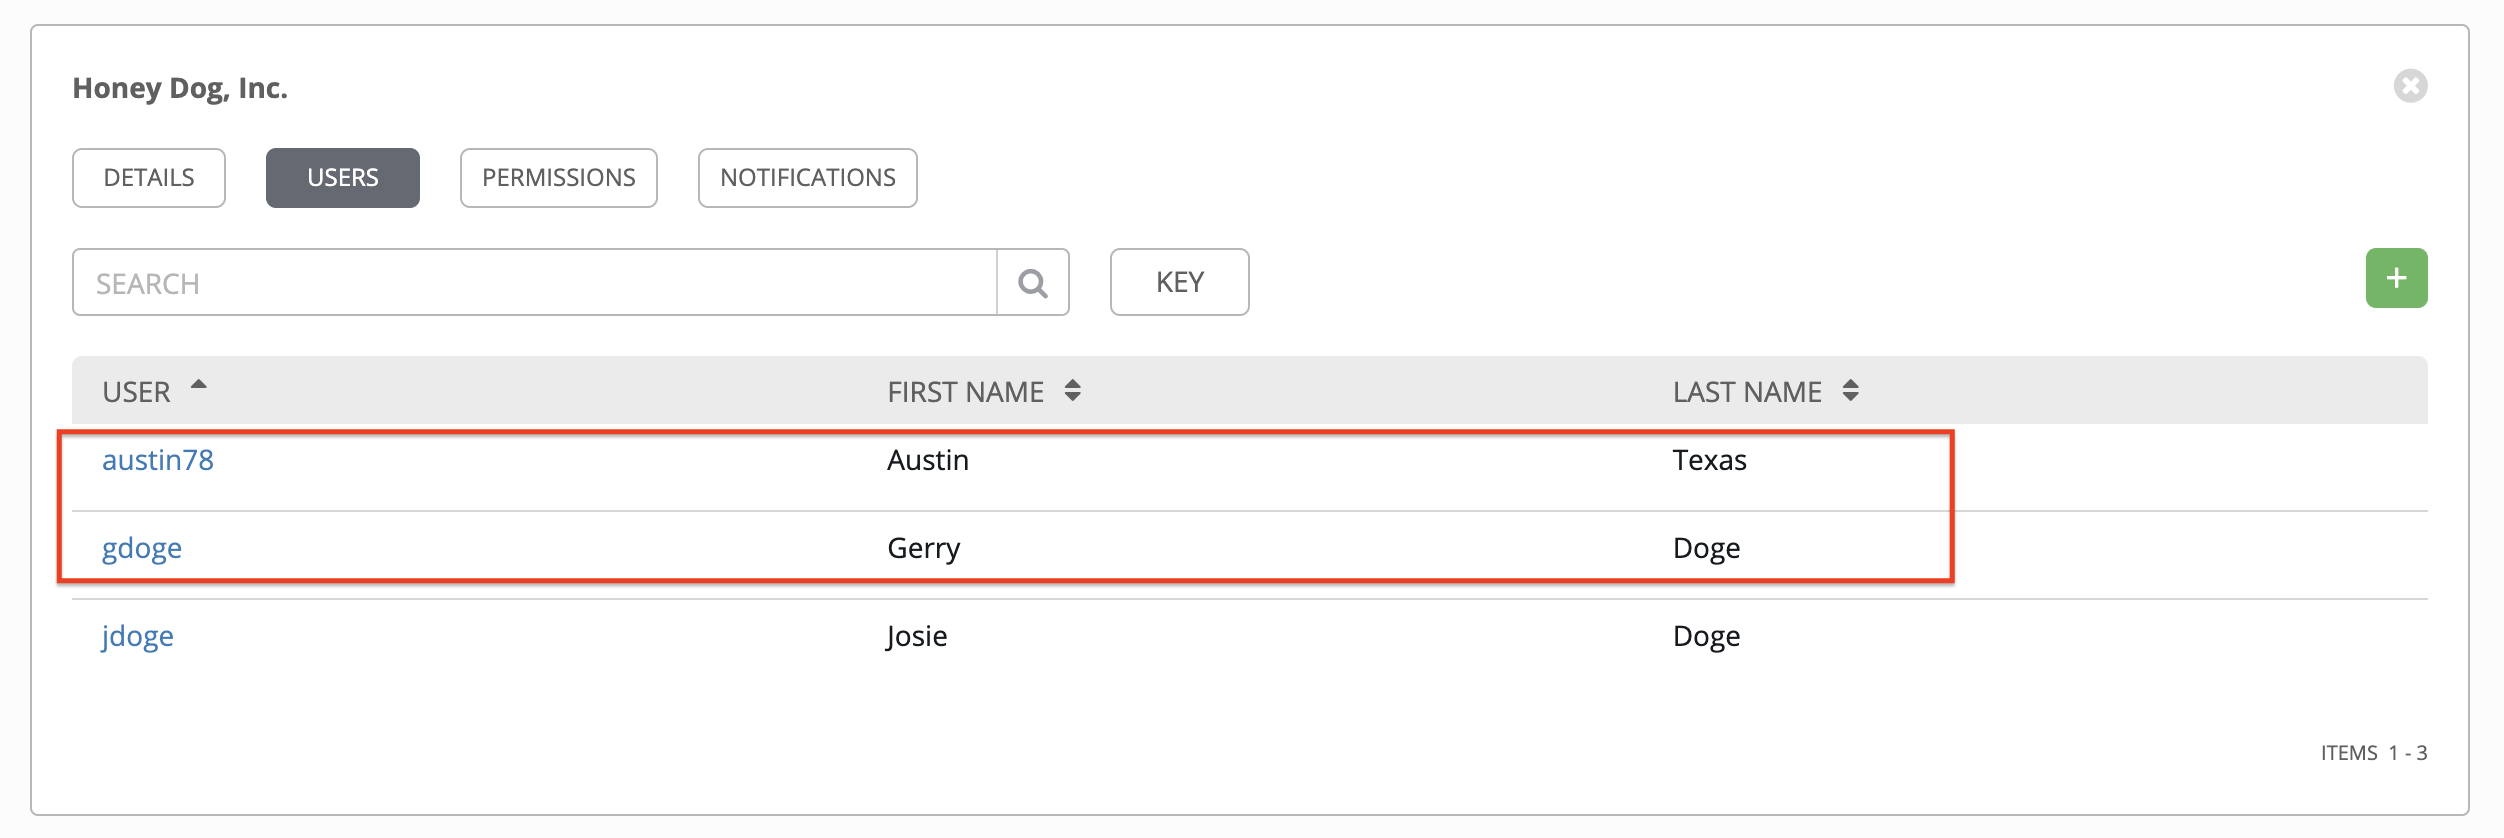
7.2. Work with Users
Clicking on Users (beside Details when viewing your organization), displays all the Users associated with this Organization. A User is someone with access to Tower with associated roles and Credentials. Adding a user to an organization adds them as a member only, specifying a role for the user can be done in the the Permissions tab, as shown in the example below.
As you can manage the user membership for this Organization here, you can manage user membership on a per-user basis from the Users page by clicking the Users (![]() ) icon from the left navigation bar. The user list from the Organizations view may be sorted by username. Use the Tower Search to search for users by various attributes. Click Key for using the search, or refer to the Search chapter for more information.
) icon from the left navigation bar. The user list from the Organizations view may be sorted by username. Use the Tower Search to search for users by various attributes. Click Key for using the search, or refer to the Search chapter for more information.
Clicking on a user brings up that user’s details, allowing you to review, grant, edit, and remove associated permissions for that user. For more information, refer to Users.
7.2.1. Add a User
In order to add a user to an organization, the user must already be created in Tower. Refer to Create a User to create a user. To add existing users to the Organization:
Click the
button.Select one or more users from the list of available users by clicking the check box next to the user(s) to add them as members of the organization.
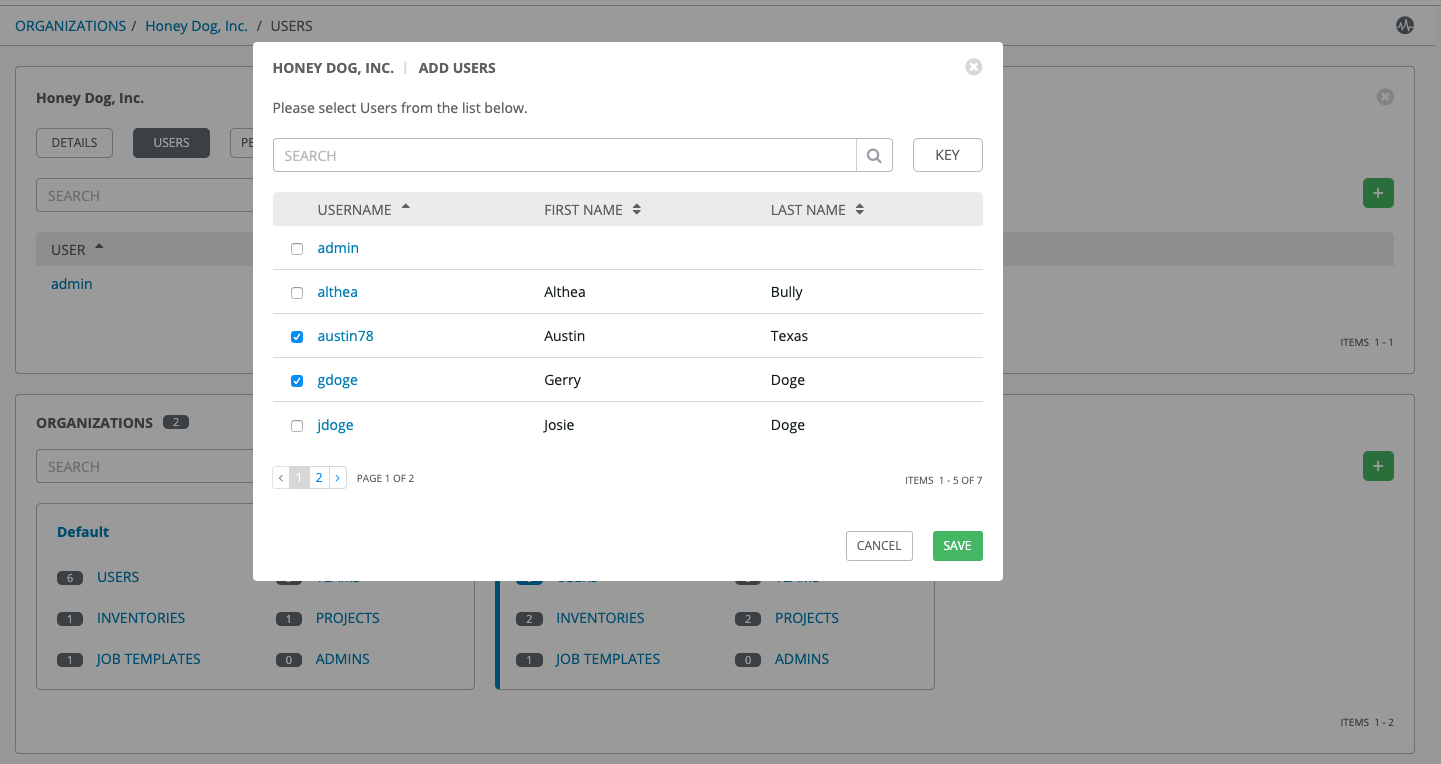
In this example, two users have been selected to be added to this organization.
Click the Save button when done.
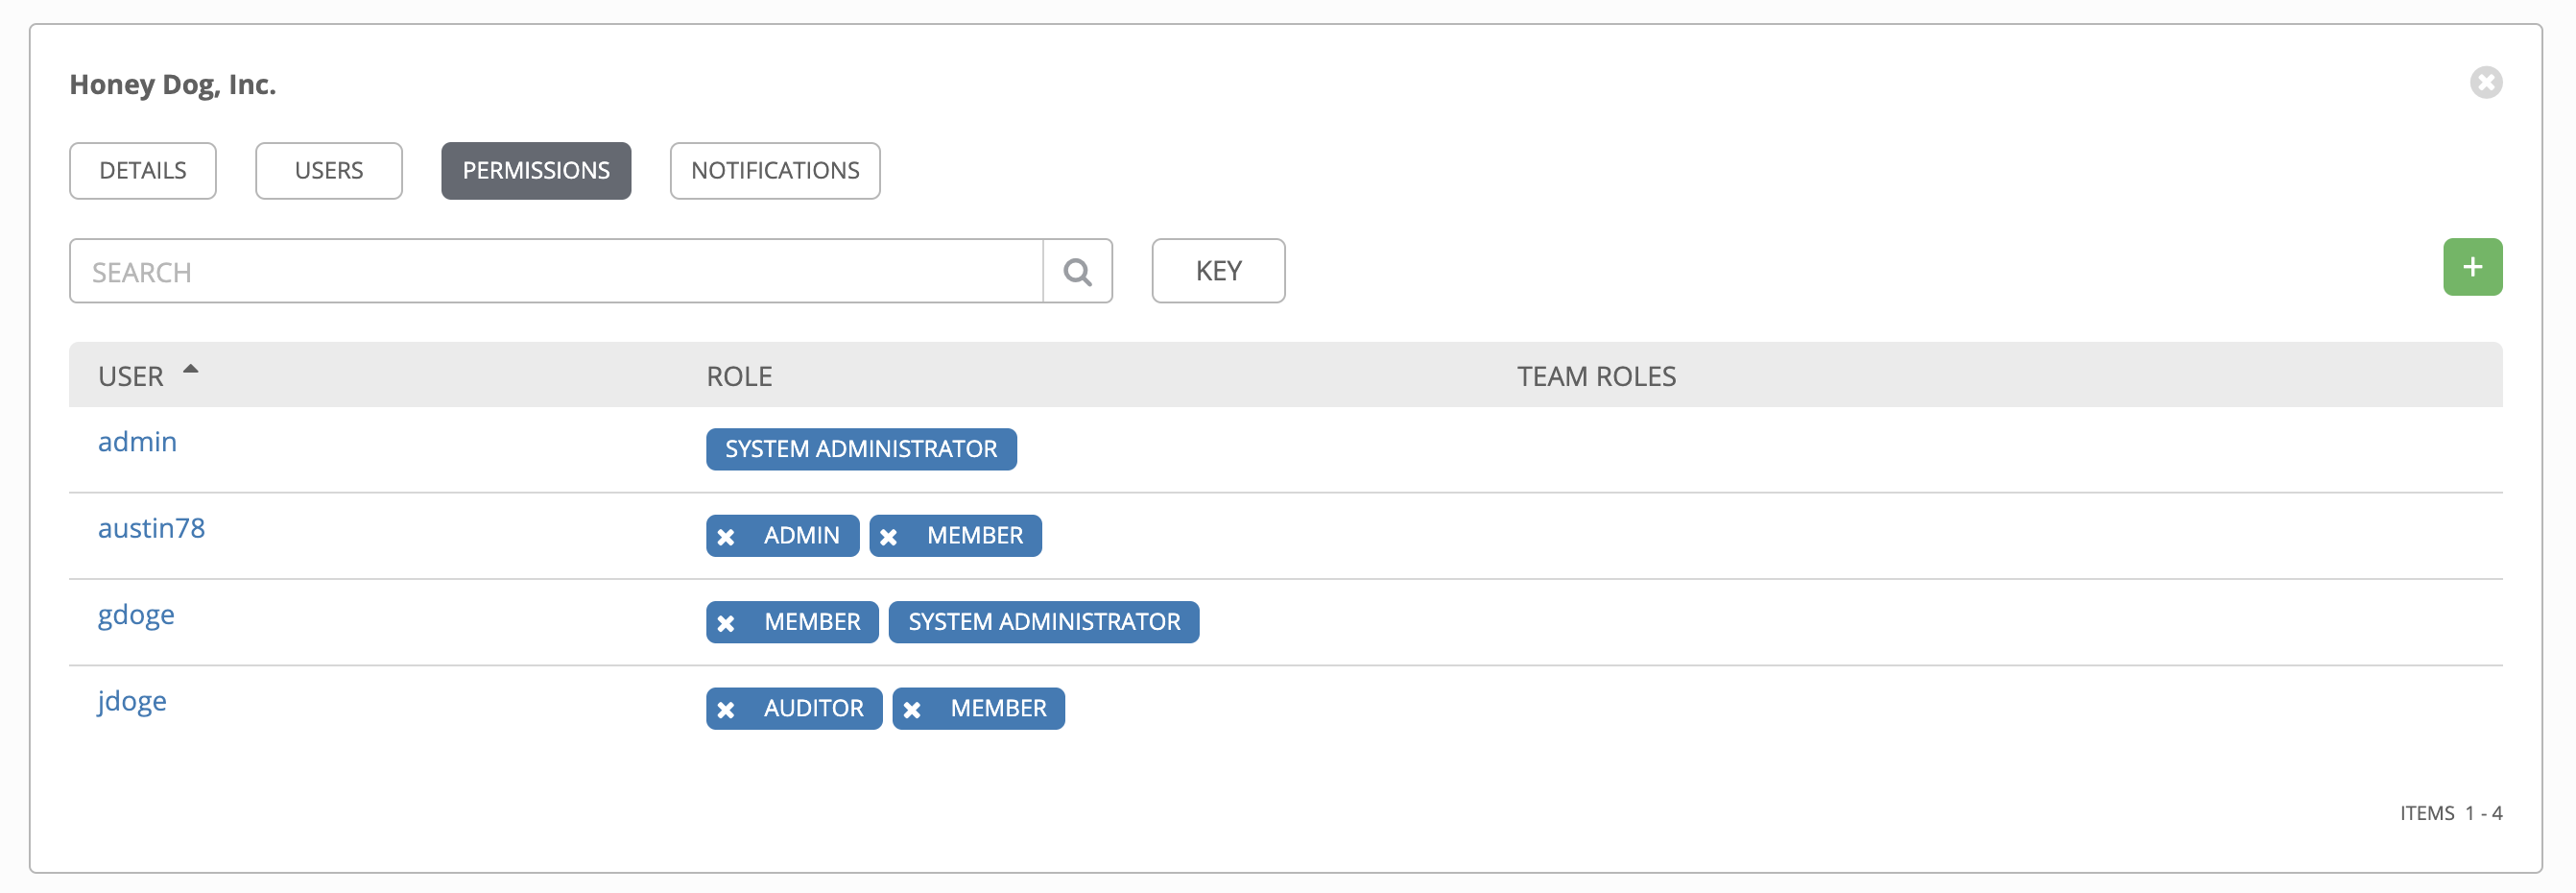
7.3. Work with Permissions
Clicking on Permissions (beside Users when viewing your organization), allows you to easily manage the permissions for this organization.
Organizations have a unique set of roles not described here. You can assign specific users certain levels of permissions within your organization, or allow them to act as an admin for a particular resource. Refer to Role-Based Access Controls for more information.
Note
A credential with roles associated will retain them even after the credential has been reassigned to another organization.
The Permissions tab allows you to review, grant, edit, and remove associated permissions for users as well as team members. To assign permissions to a particular user for this resource:
Click the Permissions tab.
Click the
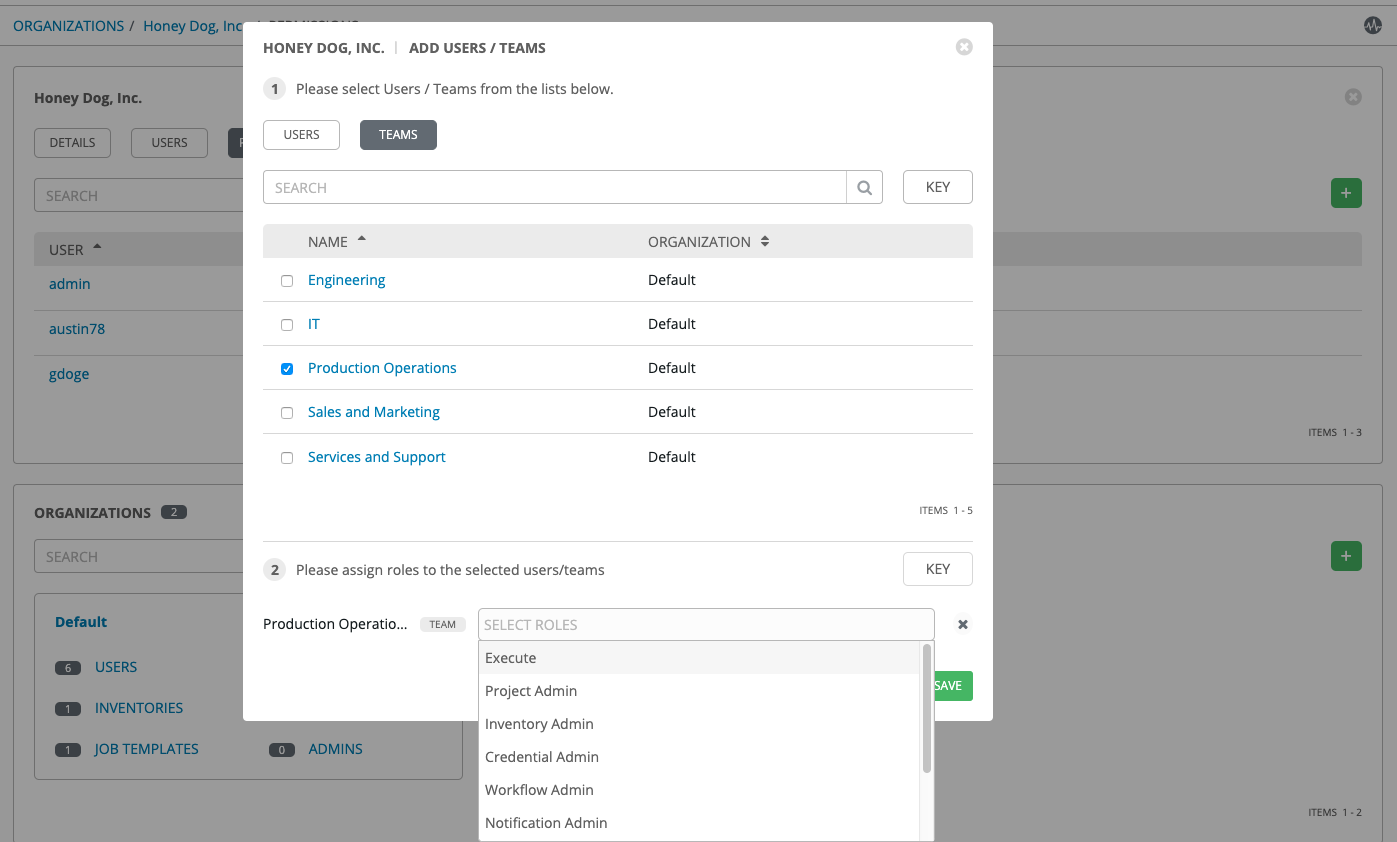
button to open the Add Users/Teams window.
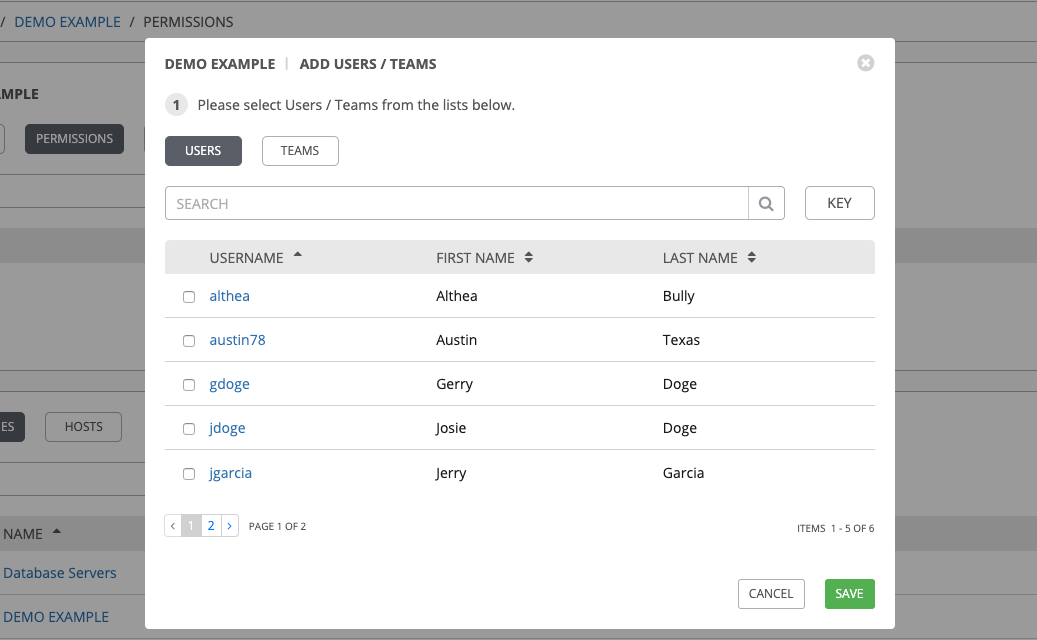
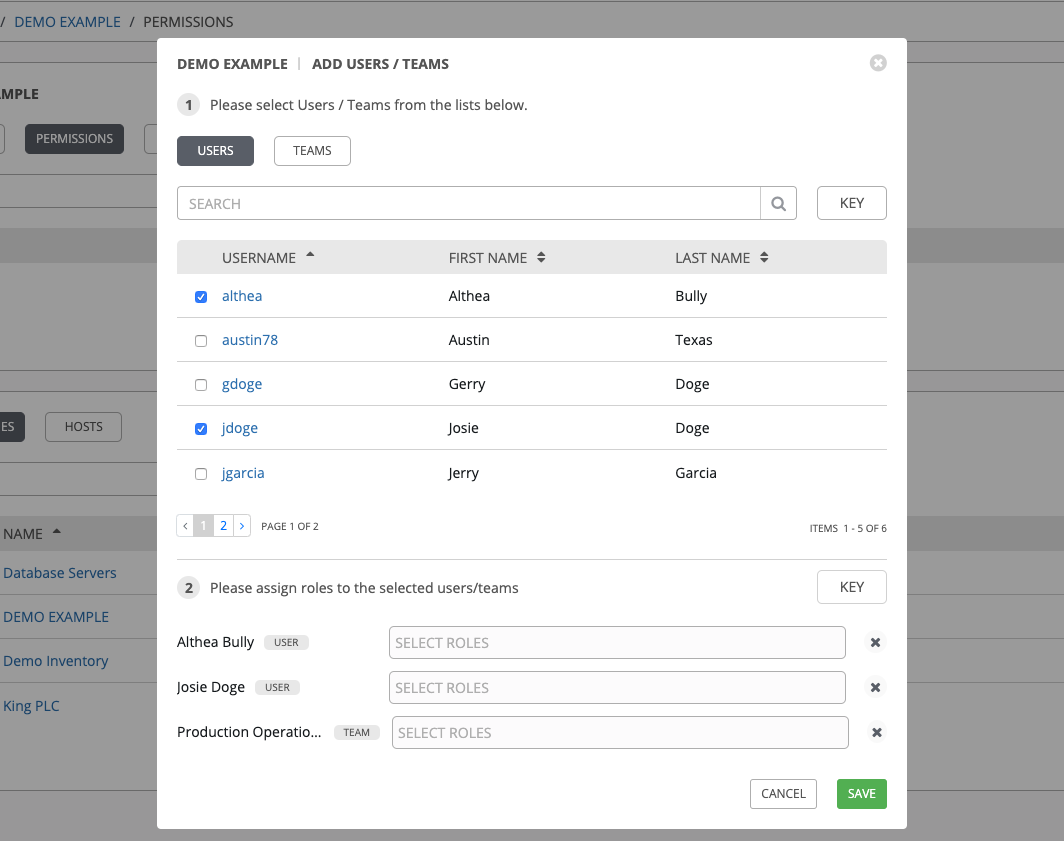
Specify the users or teams that will have access then assign them specific roles:
Click to select one or multiple check boxes beside the name(s) of the user(s) or team(s) to select them.
Note
You can select multiple users and teams at the same time by navigating between the Users and Teams tabs without saving.
After selections are made, the window expands to allow you to select a role from the drop-down menu list for each user or team you chose.

The example above shows options associated with inventories. Different resources have different options available:
Admin allows read, run, and edit privileges (applies to all resources)
Use allows use of a resource in a job template (applies all resources except job templates)
Update allows updating of project via the SCM Update (applies to projects and inventories)
Ad Hoc allows use of Ad Hoc commands (applies to inventories)
Execute allows launching of a job template (applies to job templates)
Read allows view-only access (applies to all resources)
Tip
Use the Key button in the roles selection pane to display a description of each of the roles. For more information, refer to the Roles section of this guide.
Select the role to apply to the selected user or team.
Note
You can assign roles to multiple users and teams by navigating between the Users and Teams tabs without saving.
Review your role assignments for each user and team.
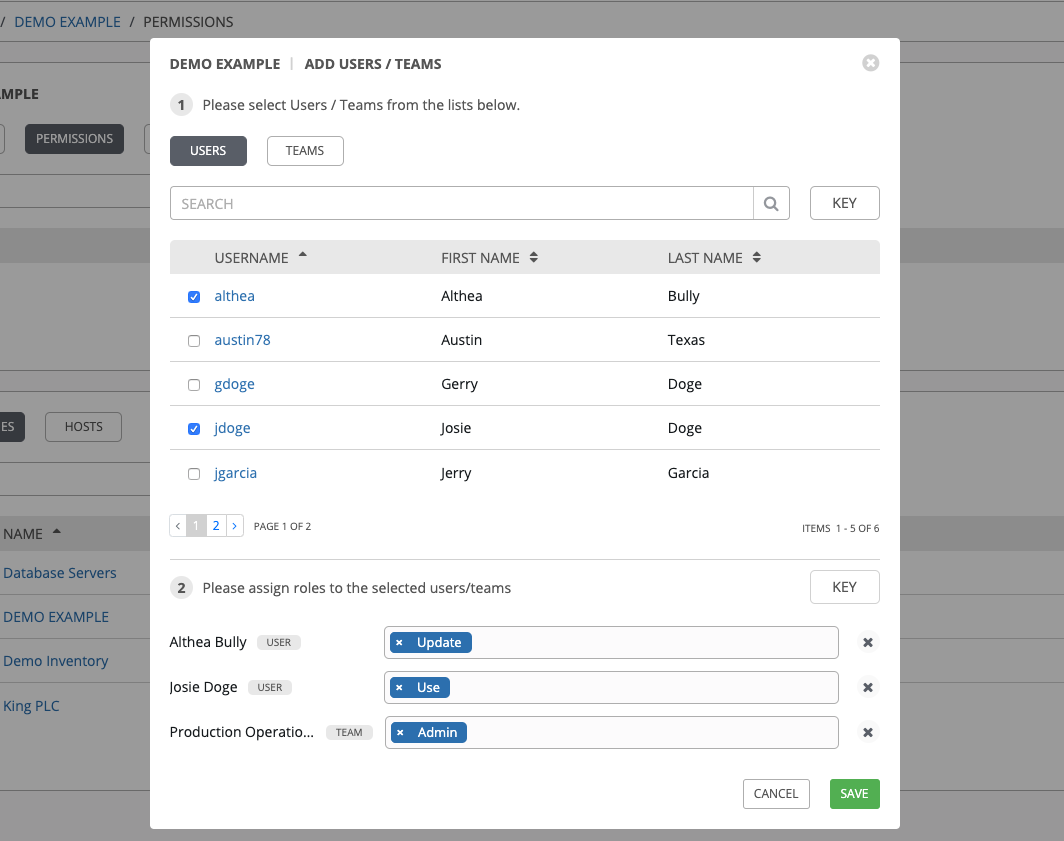
Click Save when done, and the Add Users/Teams window closes to display the updated roles assigned for each user and team.

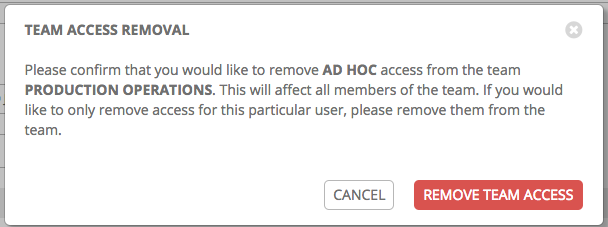
To remove Permissions for a particular user, click the Disassociate (x) button next to its resource.

This launches a confirmation dialog, asking you to confirm the disassociation.
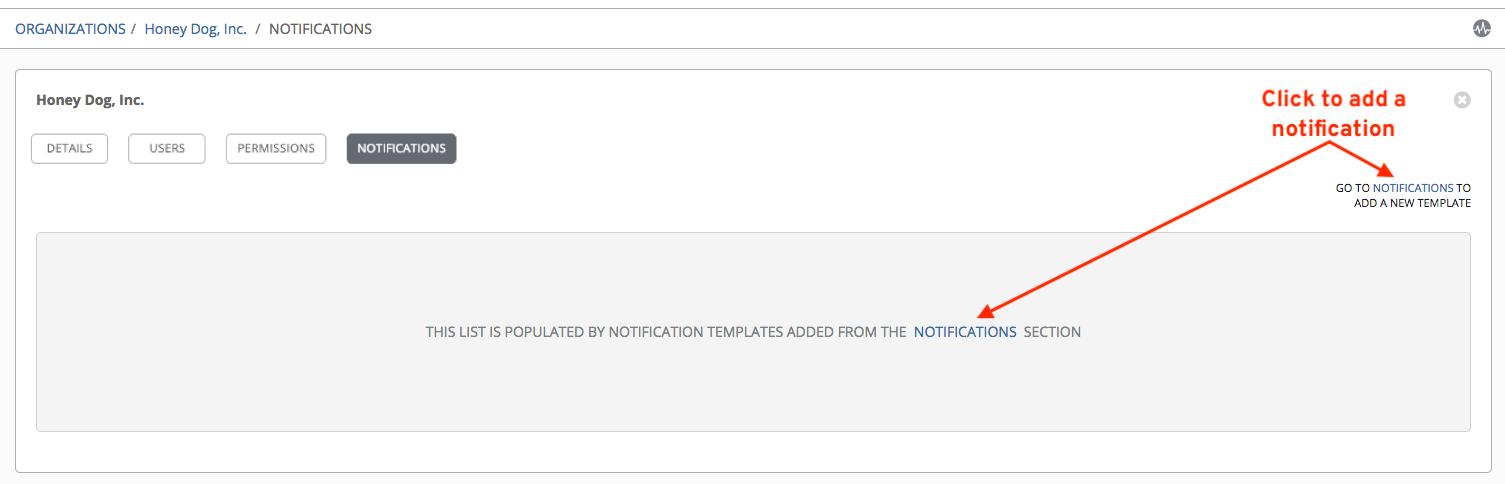
7.4. Work with Notifications
Clicking the Notifications tab allows you to review any notification integrations you have setup.
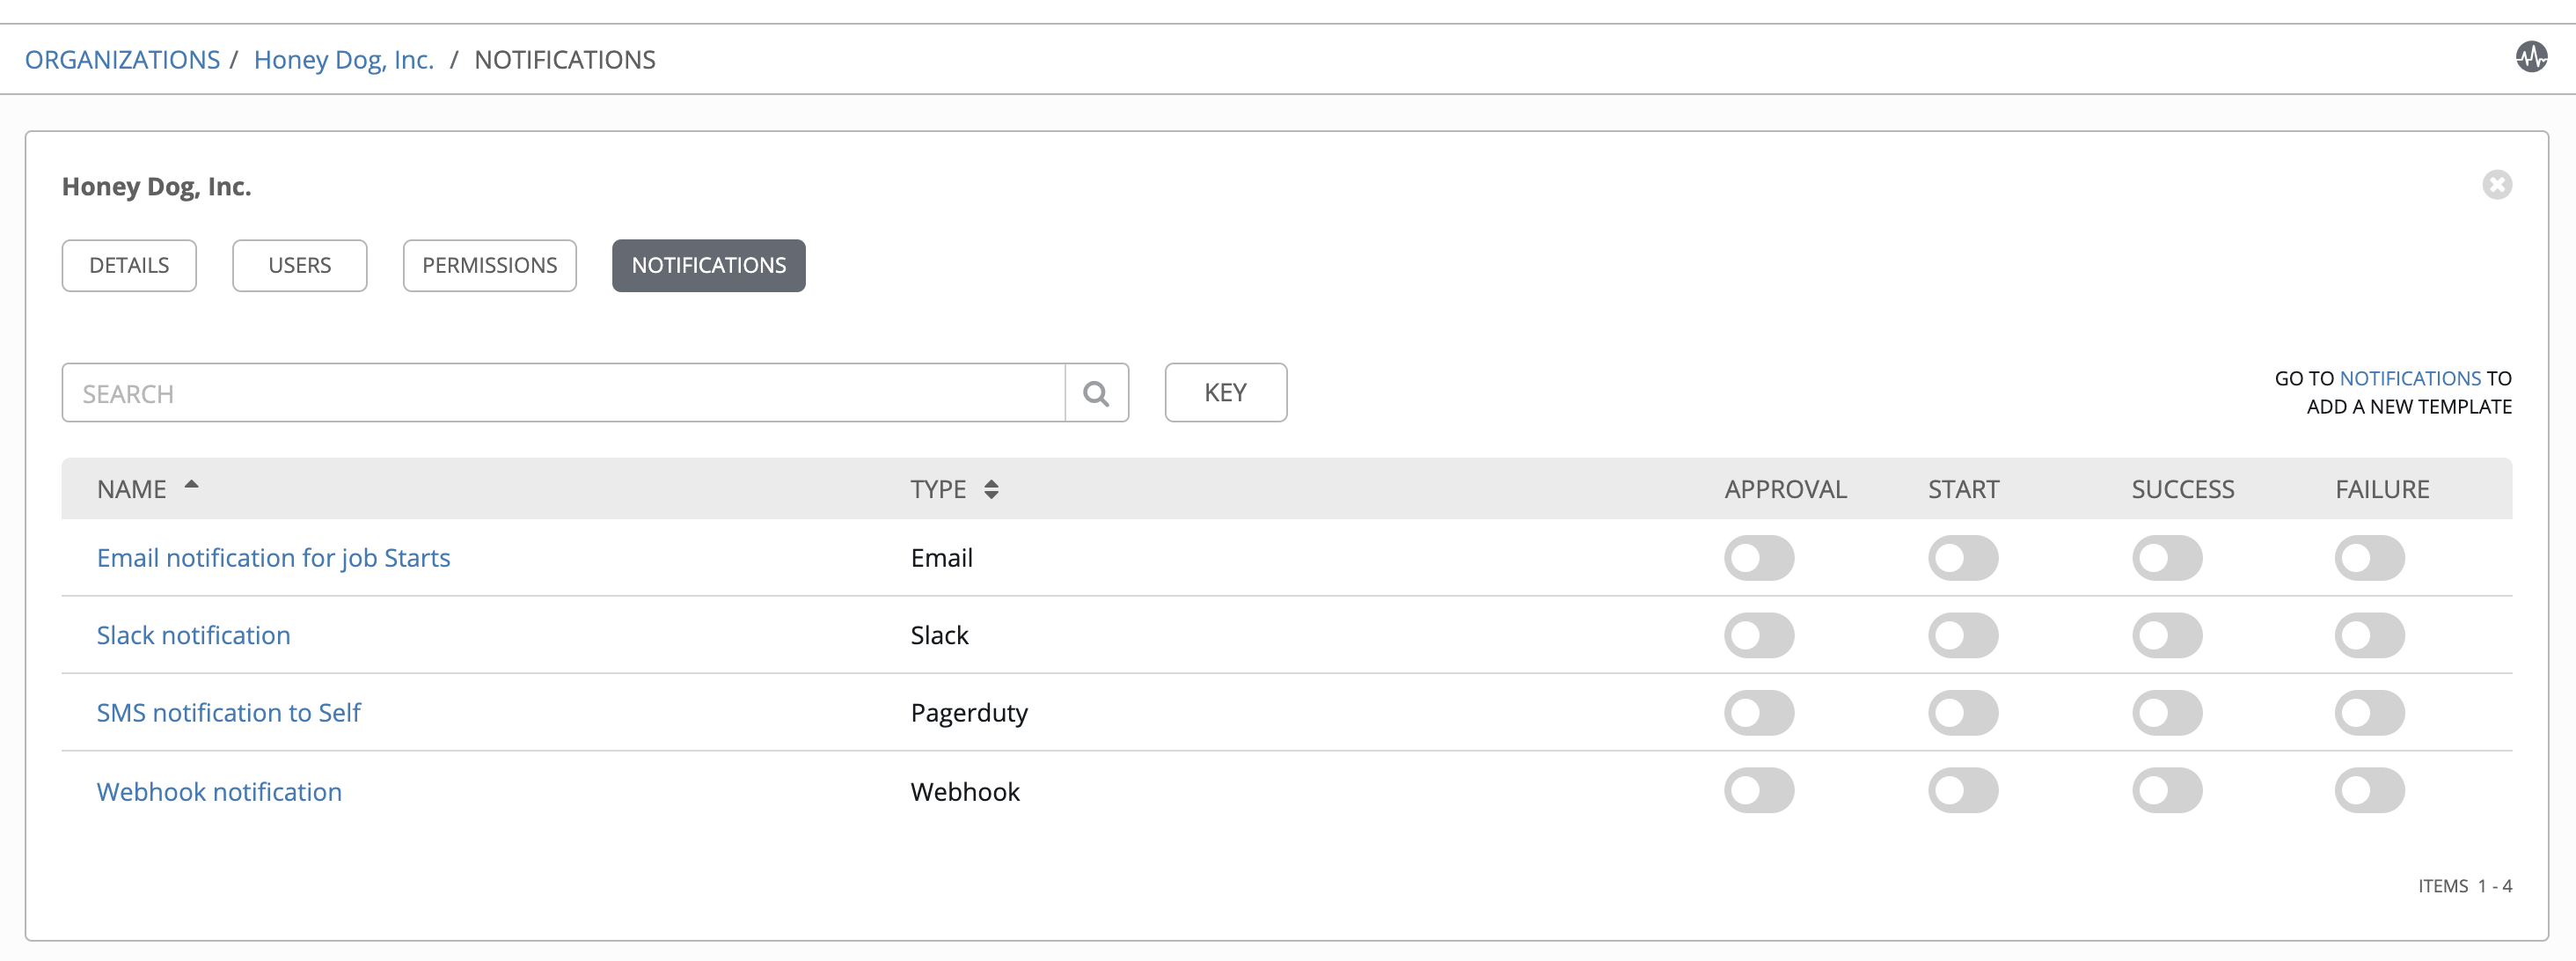
Use the toggles to enable or disable the notifications to use with your particular organization. For more detail, see Enable and Disable Notifications.
If no notifications have been set up, click the NOTIFICATIONS link from above or inside the gray box to add or create a new notification.
Refer to Notification Types for additional details on configuring various notification types.
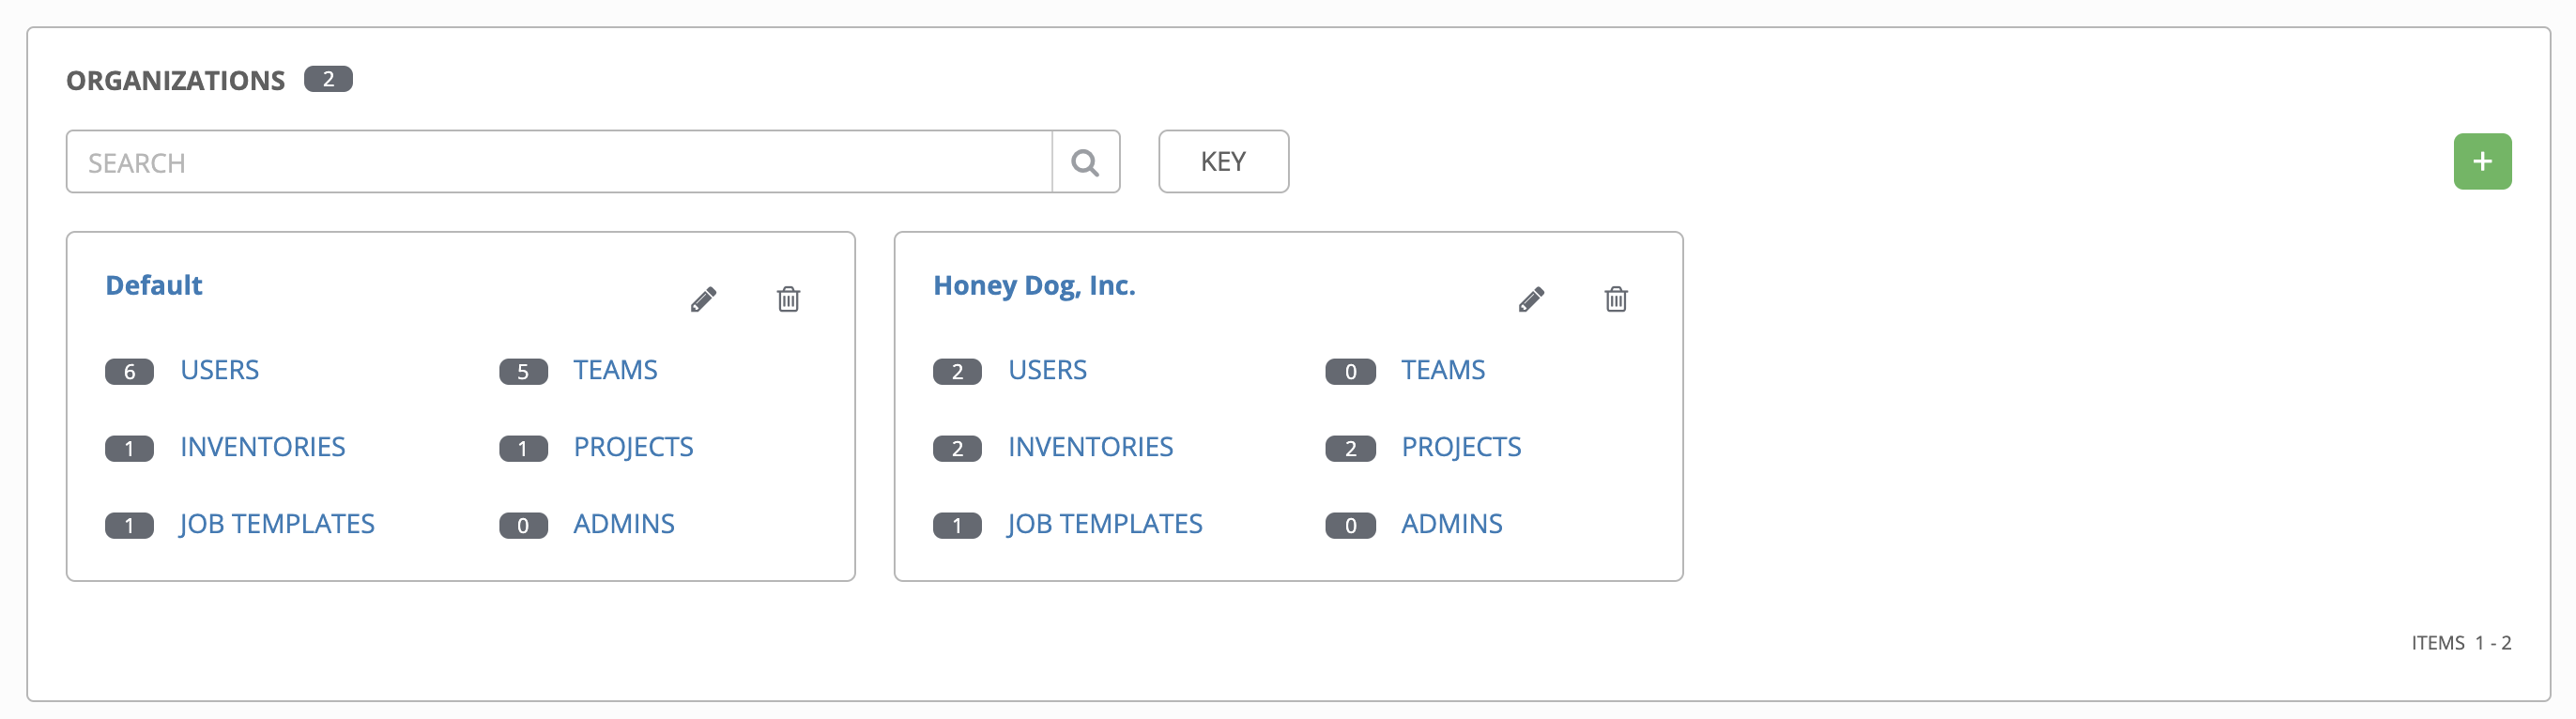
7.5. Organization Summary
An at-a-glance view of various resources associated with an organization displays at the bottom of each Organization view, called the Organization Summary.
Click on each of the categories to view a list of resources associated with them. Some allow resources to be added, edited, or deleted, such as Users and Admins, while others require editing from another area of the user interface.
From the summary, you can edit the details of an organization (
) or delete it altogether (
).
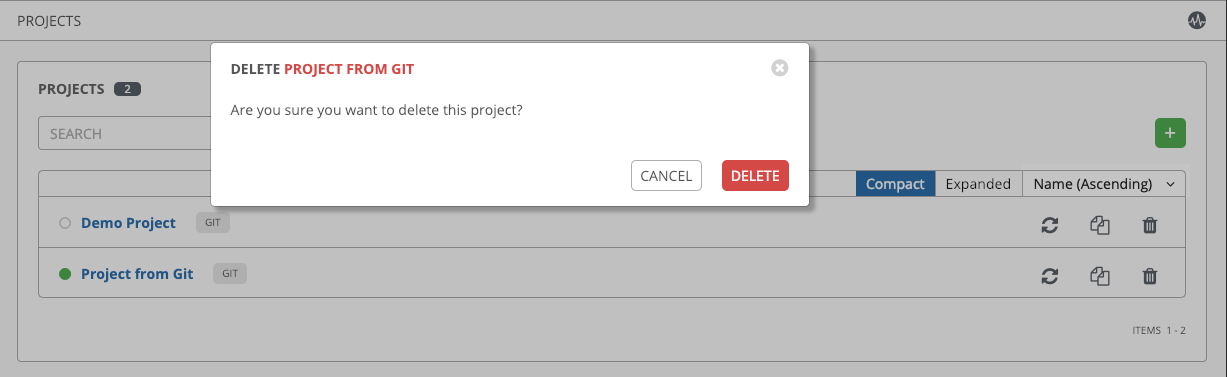
Note
If deleting items that are used by other work items, a message opens listing the items are affected by the deletion and prompts you to confirm the deletion. Some screens will contain items that are invalid or previously deleted, so they will fail to run. Below is an example of such a message: