9. Teams
A Team is a subdivision of an organization with associated users, projects, credentials, and permissions. Teams provide a means to implement role-based access control schemes and delegate responsibilities across organizations. For instance, permissions may be granted to a whole Team rather than each user on the Team.
You can create as many Teams of users as make sense for your Organization. Each Team can be assigned permissions, just as with Users. Teams can also scalably assign ownership for Credentials, preventing multiple Tower interface click-throughs to assign the same Credentials to the same user.
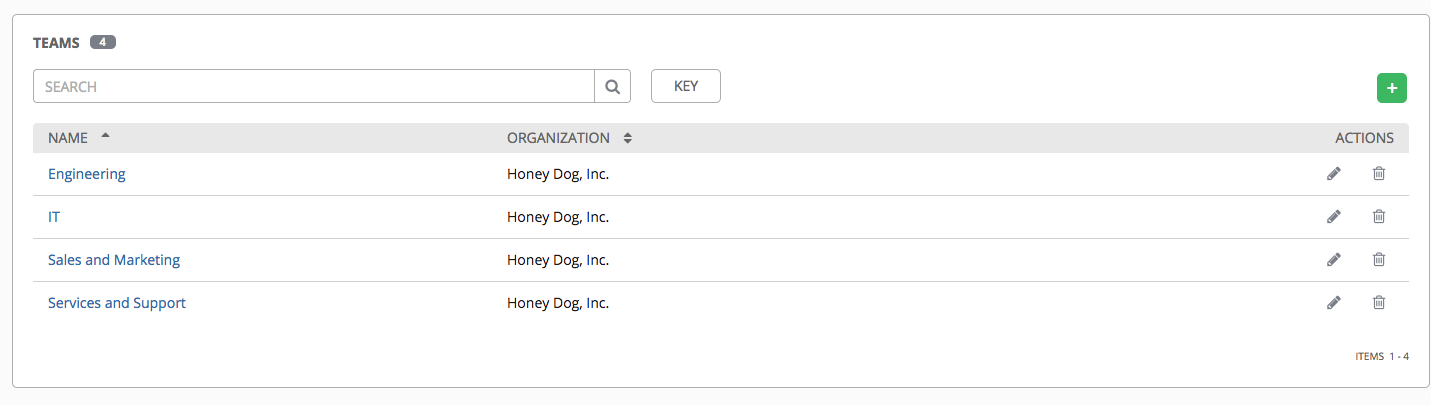
Access the Teams page by clicking the Teams (![]() ) icon from the left navigation bar. The Teams page allows you to manage the teams for Tower. The team list may be sorted and searched by Name or Organization.
) icon from the left navigation bar. The Teams page allows you to manage the teams for Tower. The team list may be sorted and searched by Name or Organization.
9.1. Create a Team
To create a new Team:
Click the
 button.

Enter the appropriate details into the following fields:
Name
Description (optional)
Organization (Choose from an existing organization)
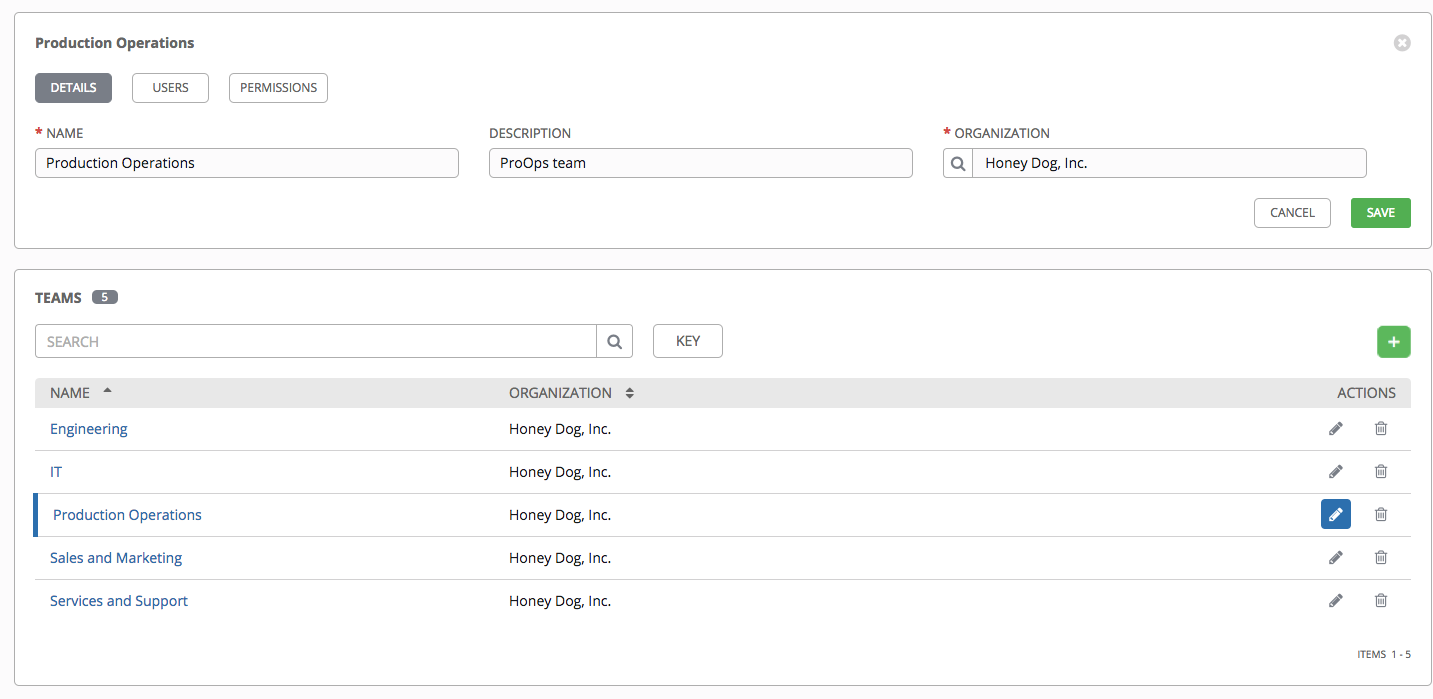
Click Save.
Once the Team is successfully created, Tower opens the Details dialog, which also allows you to review and edit your Team information. This is the same menu that is opened if the Edit ( ) button is clicked from the Teams link. You can also review Users and Permissions associated with this Team.
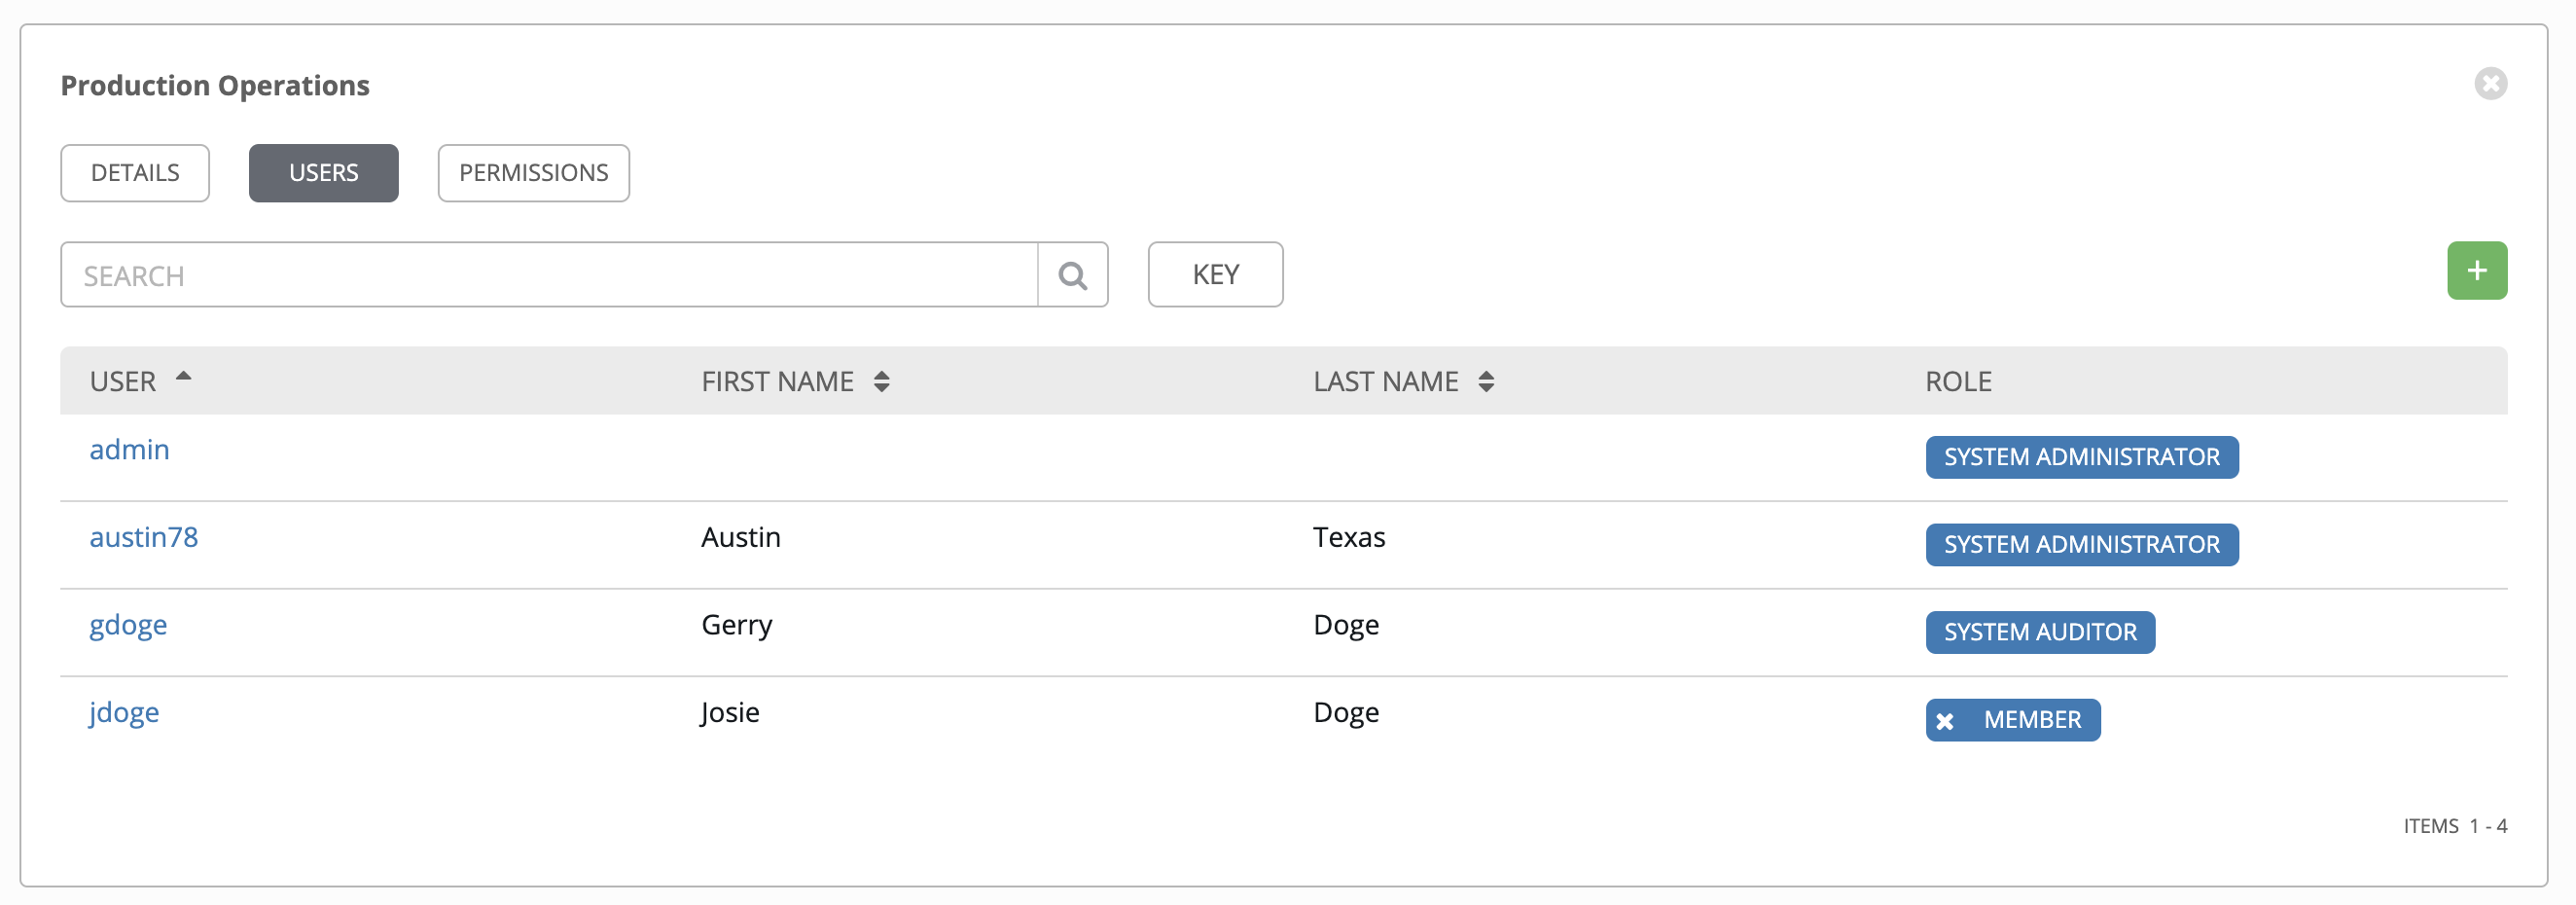
9.1.1. Teams - Users
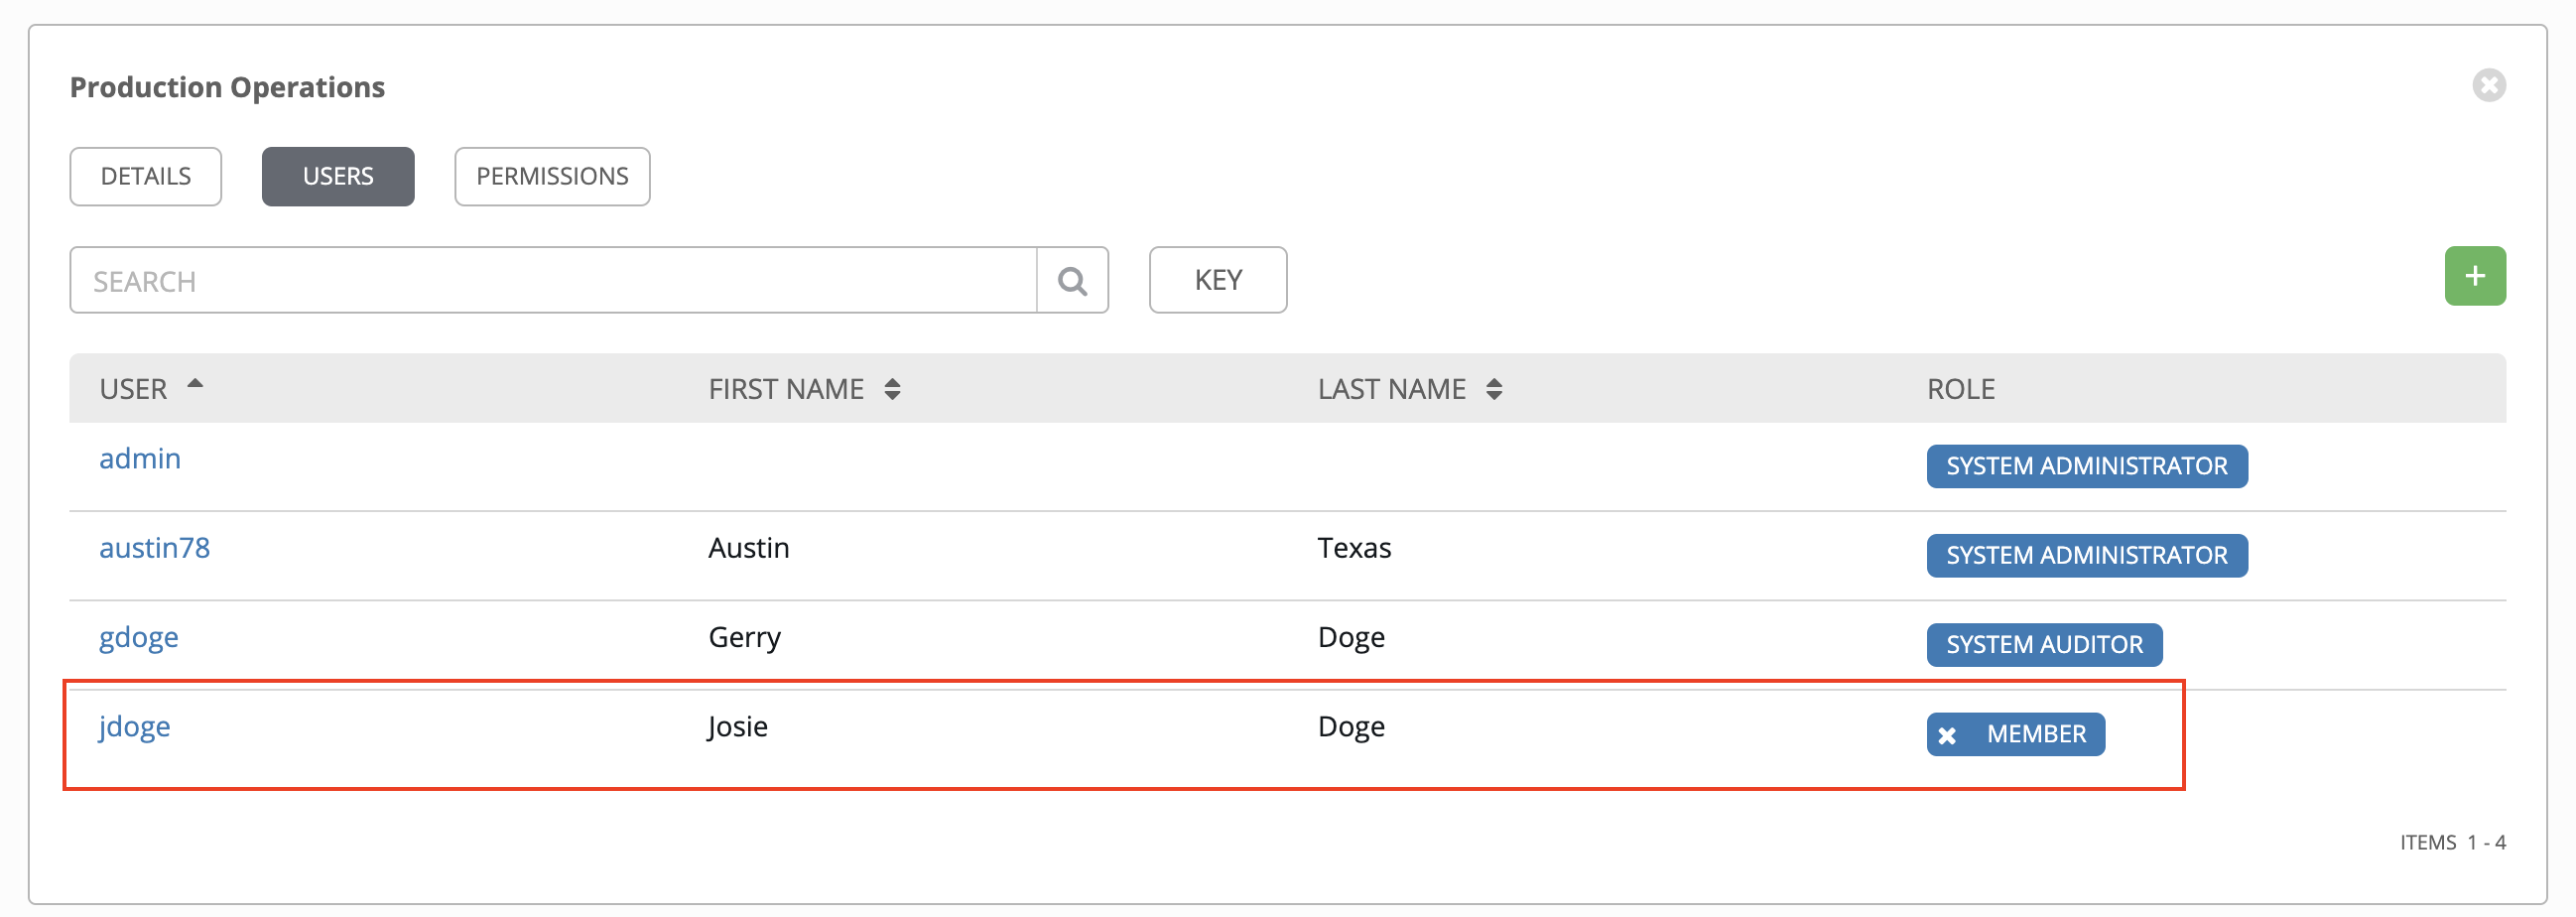
This tab displays the list of Users that are members of this Team. This list may be searched by Username, First Name, or Last Name. For more information, refer to Users.
9.1.1.1. Add a User
In order to add a user to a team, the user must already be created in Tower. Refer to Create a User to create a user. Adding a user to a team adds them as a member only, specifying a role for the user on different resources can be done in the Permissions tab . To add existing users to the Team:
Click the
button.Select one or more users from the list of available users by clicking the checkbox next to the user(s) to add them as members of the team.
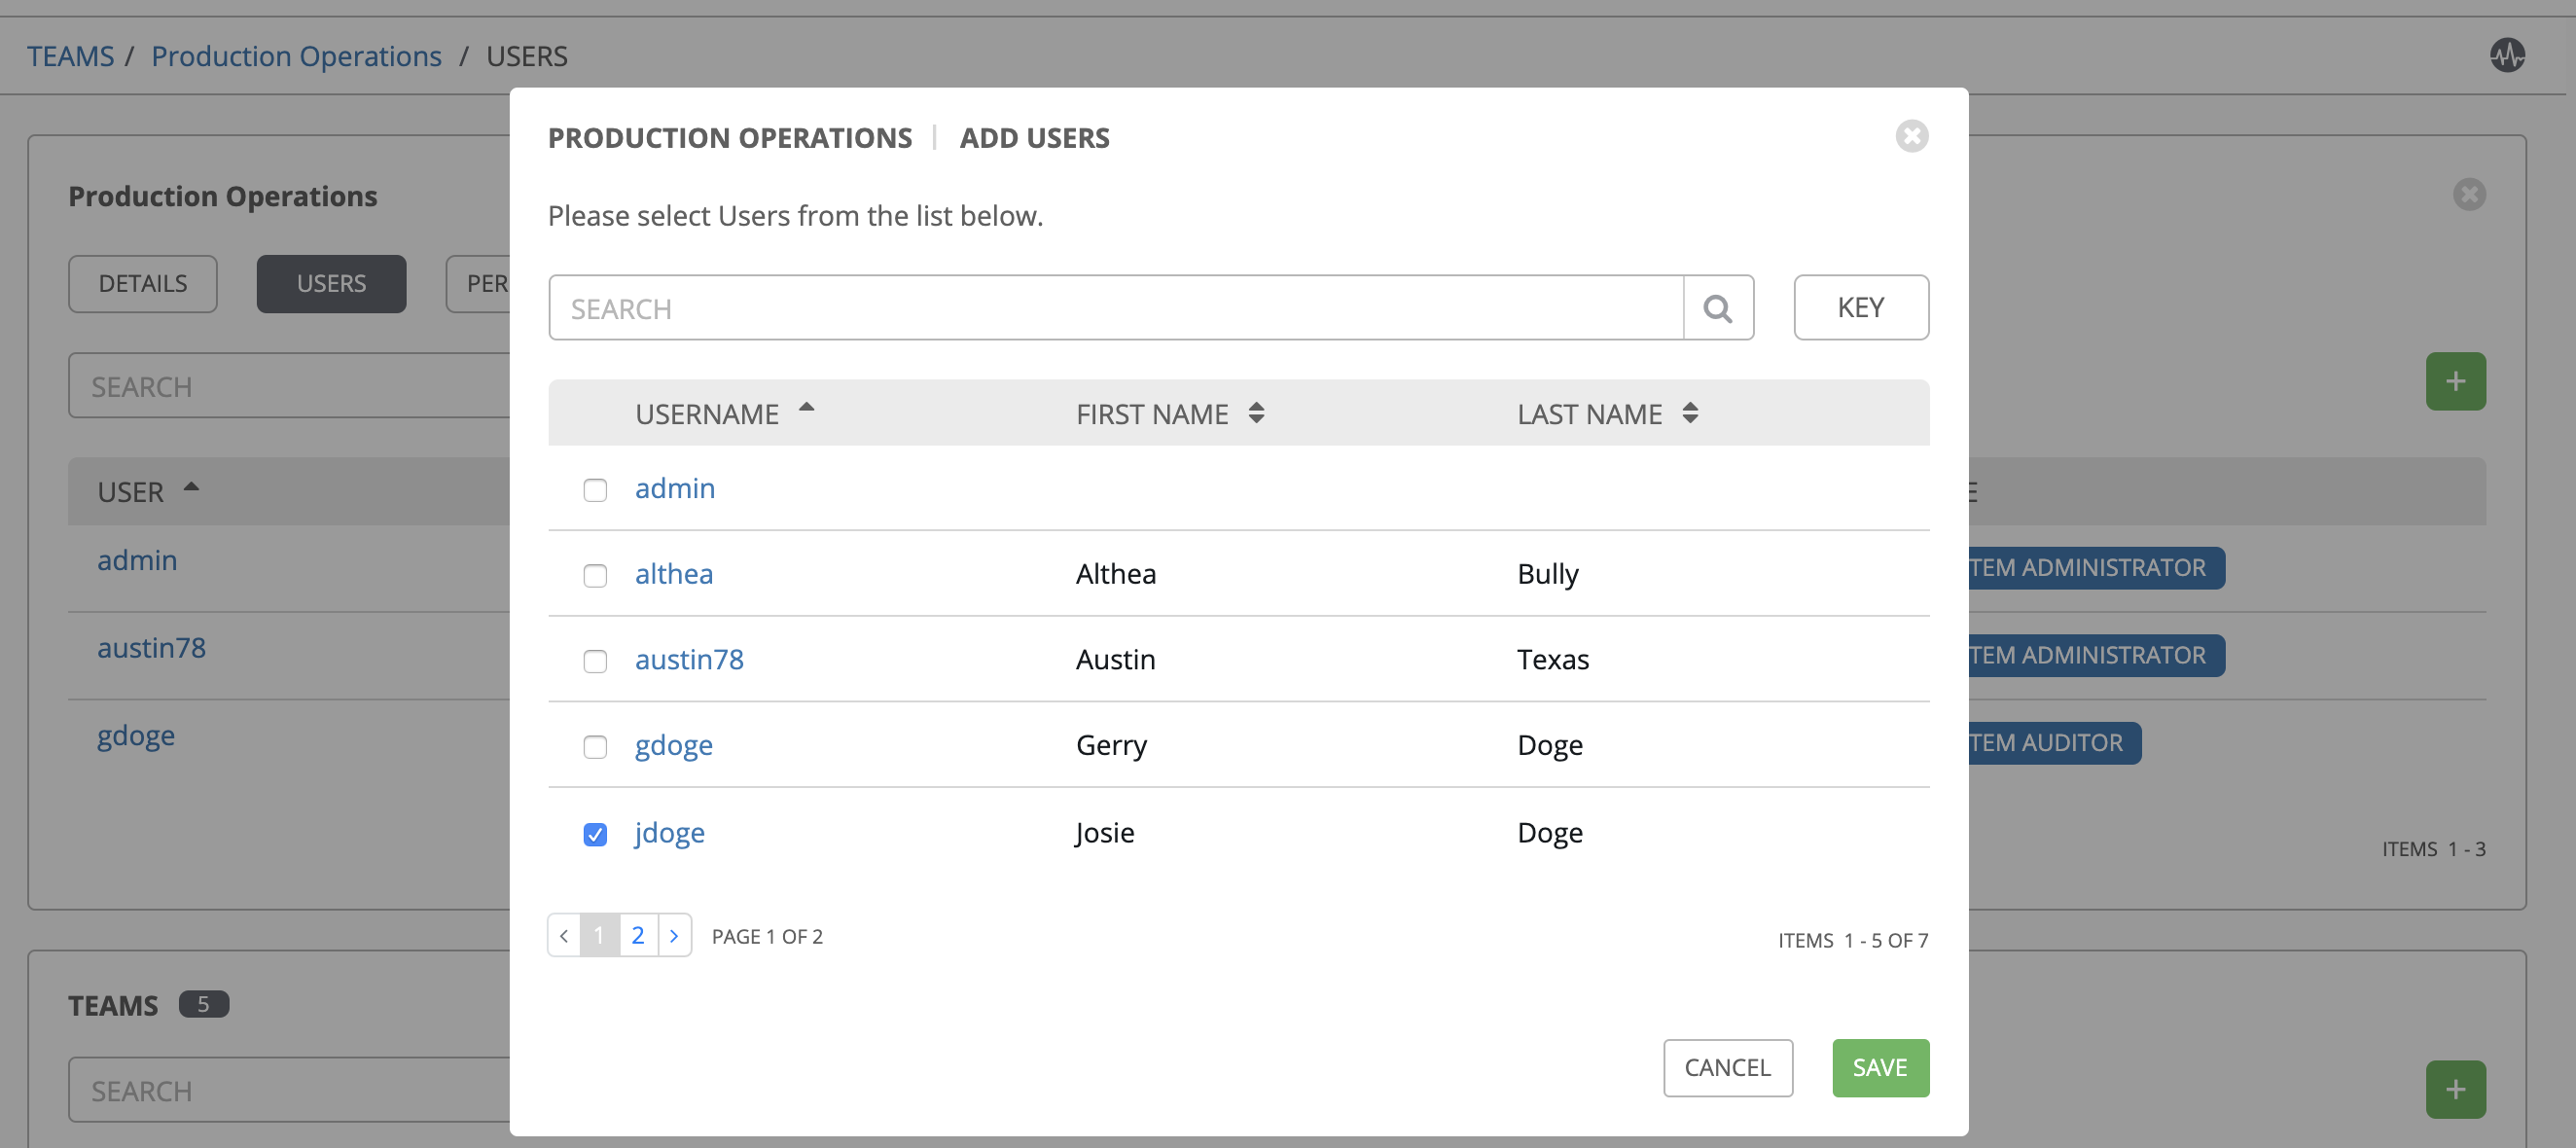
In this example, one user has been selected to be added to this team.
Click the Save button when done.
9.1.2. Teams - Permissions
Selecting the Permissions view displays a list of the permissions that are currently available for this Team. The permissions list may be sorted and searched by Name, Inventory, Project or Permission type.
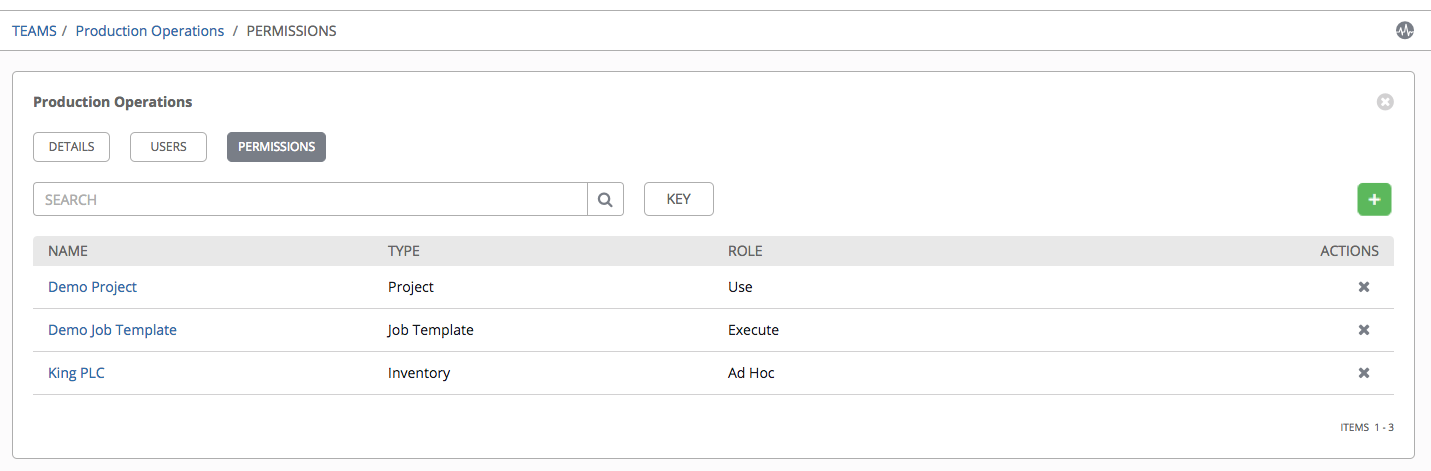
The set of privileges assigned to Teams that provide the ability to read, modify, and administer projects, inventories, and other Tower elements are permissions. By default, the Team is given the “read” permission (also called a role).
Permissions must be set explicitly via an Inventory, Project, Job Template, or within the Organization view.
9.1.2.1. Add Team Permissions
To add permissions to a Team:
Click the
button, which opens the Add Permissions Wizard.
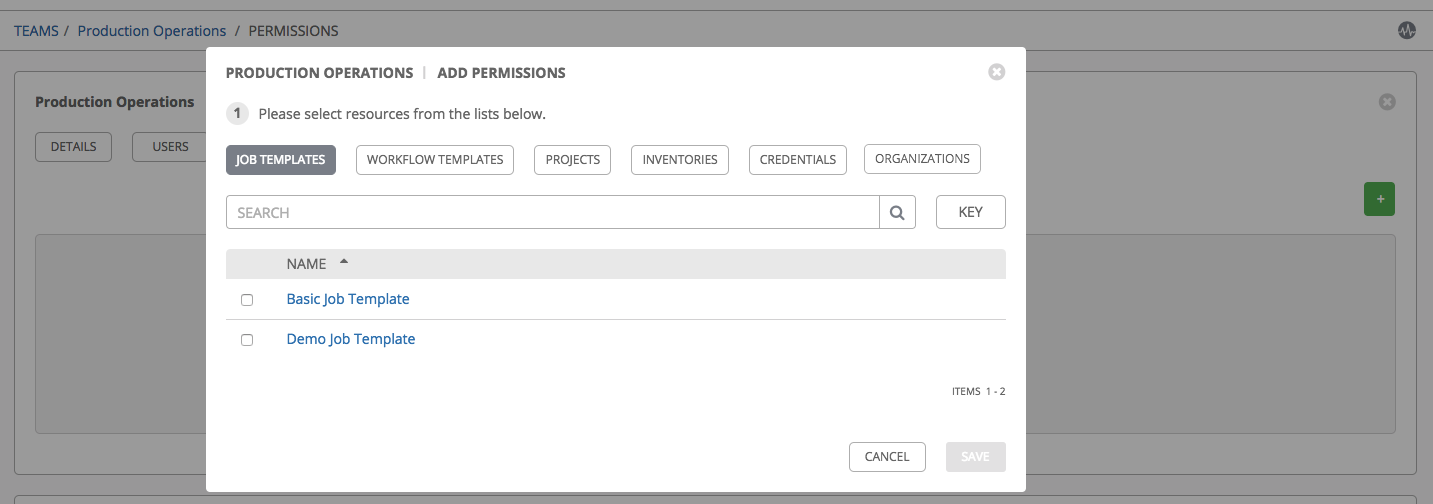
Click to select the Tower object for which the user will have access:
Job Templates. This is the default tab displayed in the Add Permissions Wizard.
Workflow Templates
Projects
Inventories
Credentials
Organizations
Note
You can assign different roles to different resources all at once to avoid having to click the button. To do so, simply go from one tab to another after making your selections without saving.
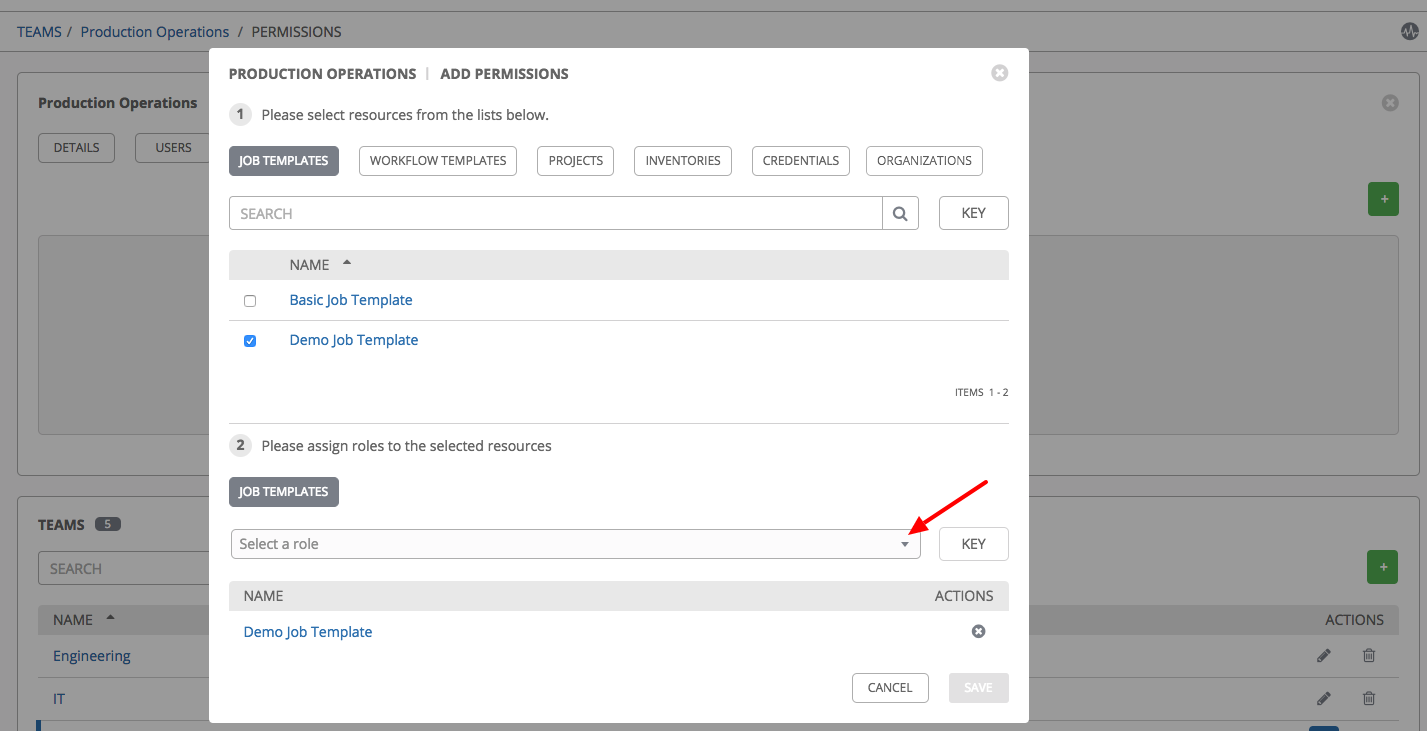
Perform the following steps to assign the user specific roles for each type of resource:
In the desired tab, click the checkbox beside the name of the resource to select it.
The dialog expands to allow you to select the role for the resource you chose.
Select the role from the drop-down menu list provided. Only some roles are applicable to certain resources.
Tip
Use the Key button to display the help text for each of the roles applicable to the resource selected.
Review your role assignments for each of the Tower objects by clicking on their respective buttons in the expanded section 2 of the Add Permissions Wizard.

Click Save when done, and the Add Permissions Wizard closes to display the updated profile for the user with the roles assigned for each selected resource.
To remove Permissions for a particular User, click the Disassociate (
 ) button under Actions. This launches a Remove Role dialog, asking you to confirm the disassociation.
Note
You can also add teams, individual, or multiple users and assign them permissions at the object level (projects, inventories, job templates, and workflow templates) as well. This feature reduces the time for an organization to onboard many users at one time.