7. 組織
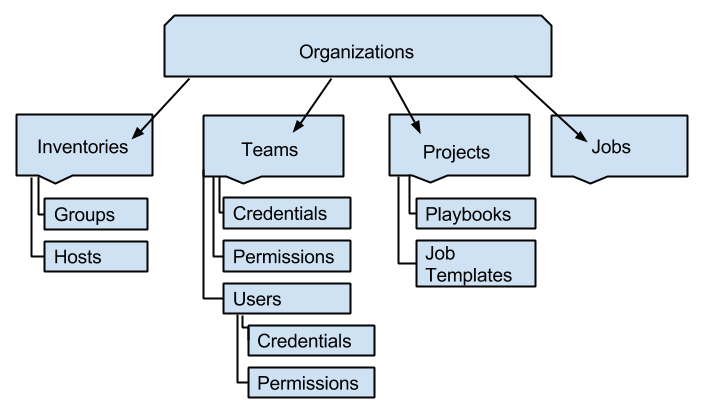
Organization (組織) は、ユーザー、チーム、プロジェクト、および インベントリー の論理コレクションで、automation controller オブジェクトの階層の最上位のオブジェクトです。
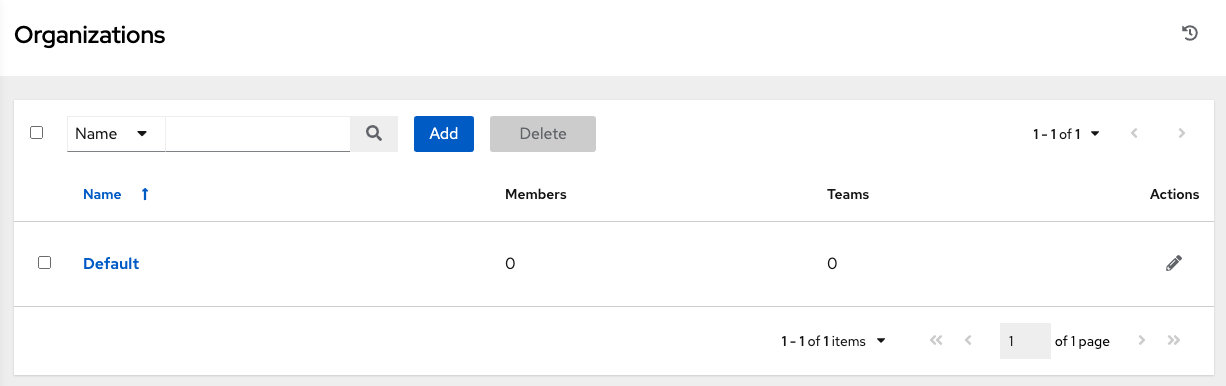
左のナビゲーションバーから 組織 アイコンをクリックして、組織ページにアクセスします。組織ページでは、インストールの既存組織をすべて表示します。組織は、名前 または 説明 で検索できます。編集 ボタンおよび 削除 ボタンを使用して組織を変更したり、削除したりします。
注釈
デフォルトの組織が自動的に作成されます。
7.1. 新しい組織の作成
You can create a new organization by clicking the Add button.
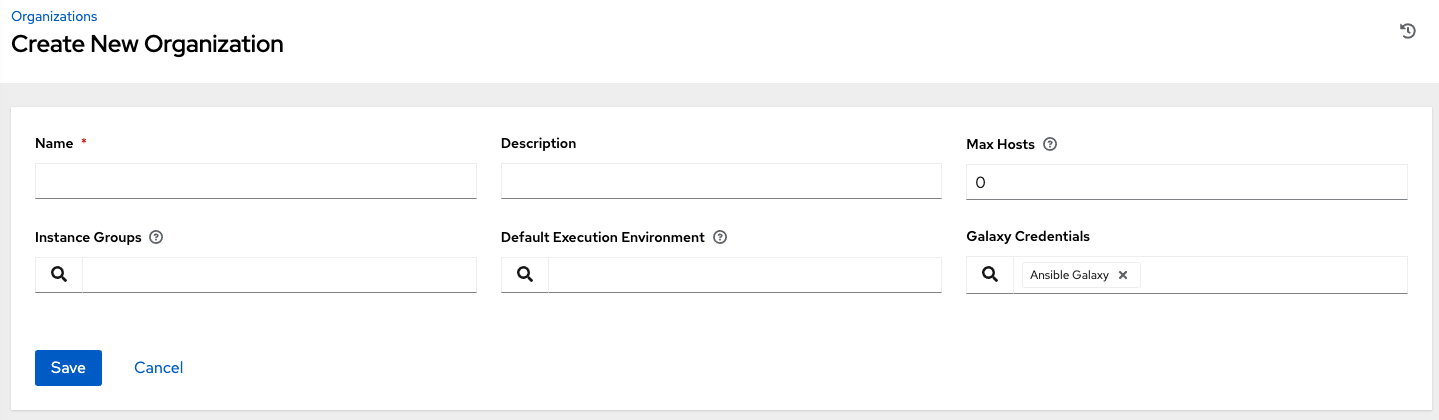
組織には、設定可能な属性が複数あります。
組織の 名前 を入力します (必須)。
組織の 説明 を入力します。
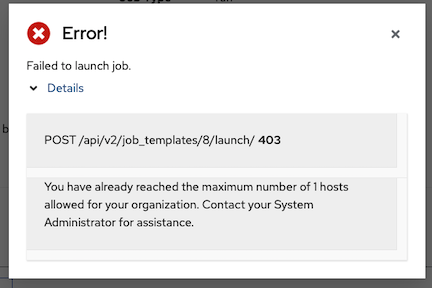
最大ホスト数 を編集できるのは、スーパーユーザーのみで、これを使用して、組織に割り当てることのできるライセンスホスト数の上限を設定します。この値を 0 に設定すると上限がなくなります。ホスト数の上限に到達するか超えた組織に、ホストを追加しようとすると、エラーメッセージが表示されます。

The inventory sync output view also shows the host limit error. Click Details for additional detail about the error.
この組織の実行先の インスタンスグループ を入力します。
実行環境の名前を入力するか、この組織の実行先の既存の デフォルトの実行環境 を検索します。詳細は Ansible Automation Platform Upgrade and Migration Guide の Execution Environments へのアップグレード を参照してください。
使用する場合は、** Galaxy 認証情報** を入力するか、既存の認証情報の一覧から検索します。
組織の作成を完了するには、保存 をクリックします。
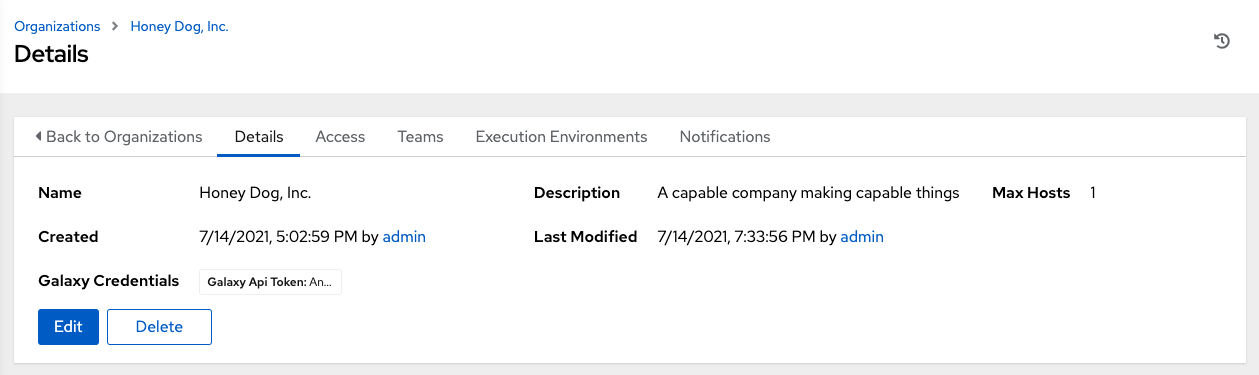
Once created, automation controller displays the Organization details, and allows for the managing access and execution environments for the organization.
7.2. Work with Access
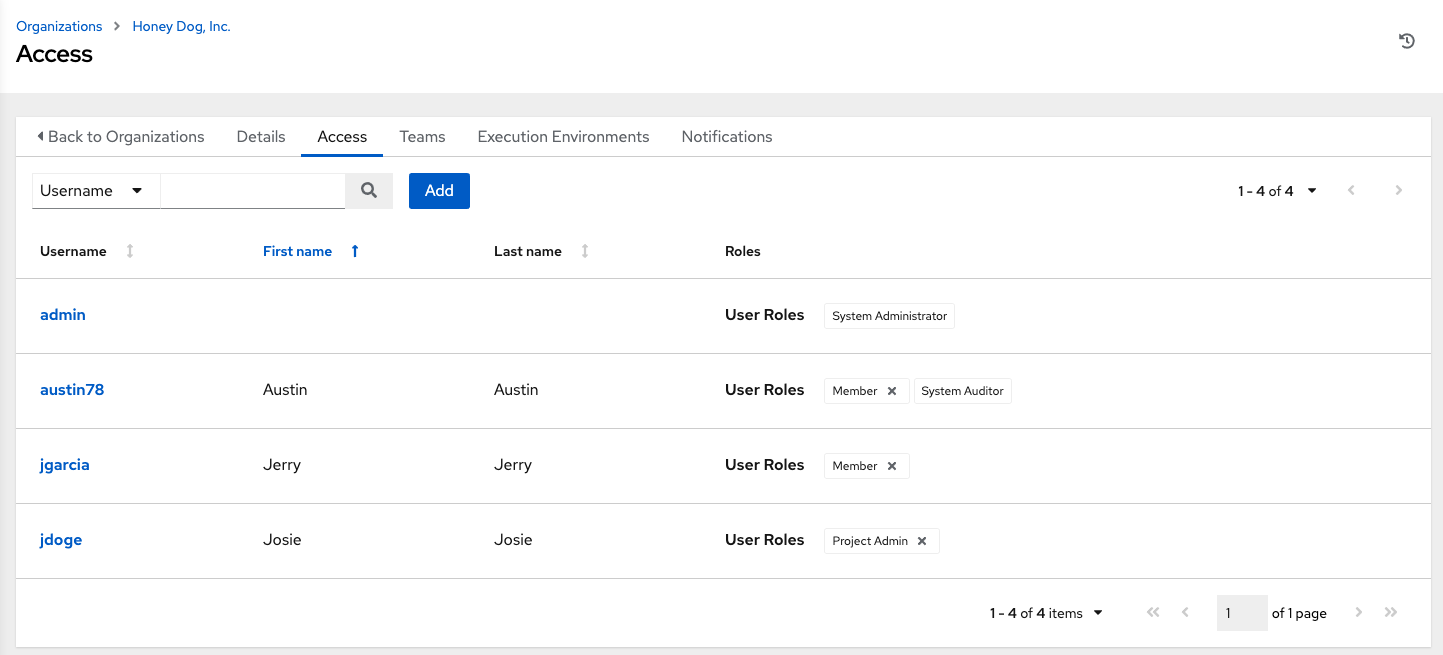
Clicking on Access (beside Details when viewing your organization), displays all the Users associated with this Organization and their roles.
As you can manage the user membership for this Organization here, you can manage user membership on a per-user basis from the Users page by clicking Users from the left navigation bar. Organizations have a unique set of roles not described here. You can assign specific users certain levels of permissions within your organization, or allow them to act as an admin for a particular resource. Refer to ロールベースのアクセス制御 for more information.
ユーザーをクリックすると、そのユーザーの詳細が表示されるため、そのユーザーに関連付けられたパーミッションの確認や、そのパーミッションの付与、編集および削除を実行できます。詳細は、「ユーザー」を参照してください。
7.2.1. Add a User or Team
In order to add a user or team to an organization, the user or team must already be created. See ユーザーの作成 and チームの作成 for additional detail. To add existing users or team to the Organization:
In the Access tab, click the Add button.
Select a user or team to add and click Next
Select one or more users or teams from the list by clicking the check box(es) next to the name(s) to add them as members and click Next.
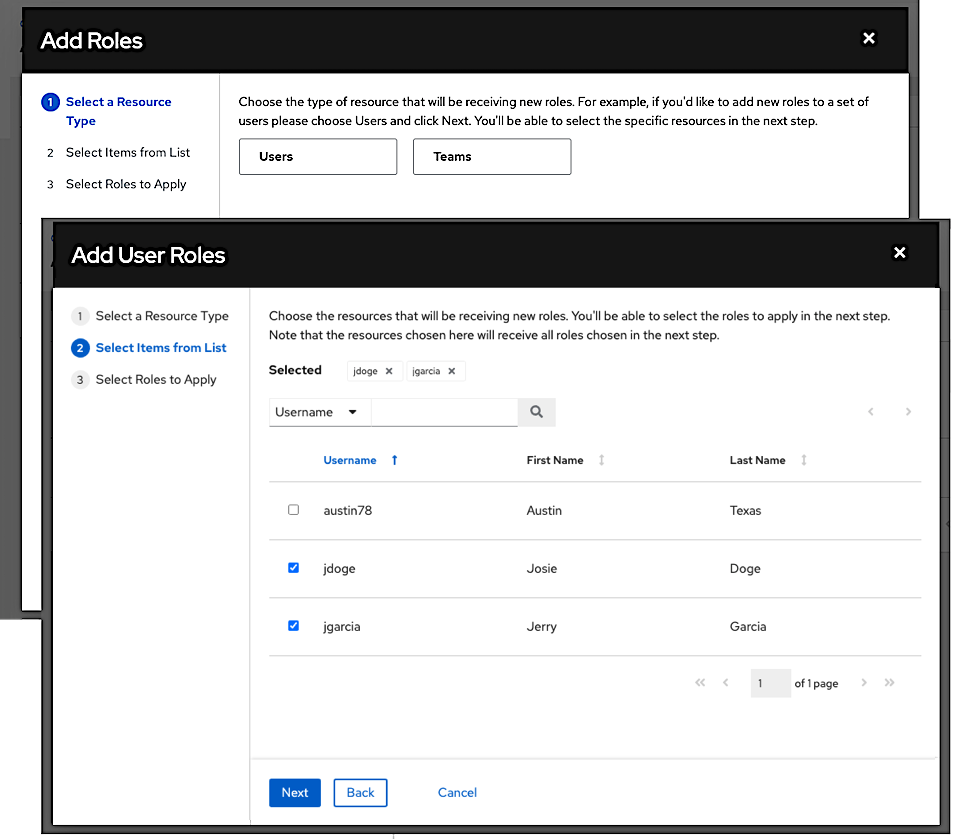
In this example, two users have been selected to be added.
Select the role(s) you want the selected user(s) or team(s) to have. Be sure to scroll down for a complete list of roles. Different resources have different options available.
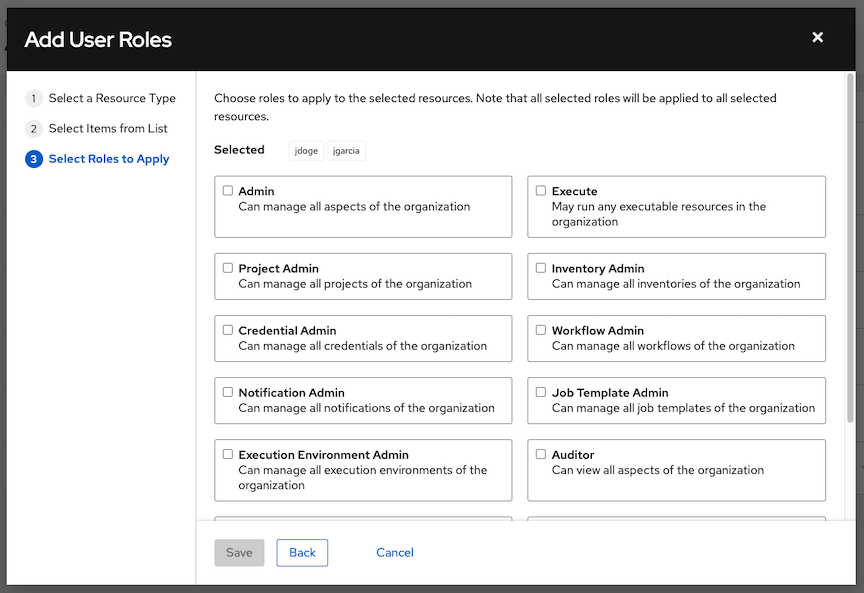
Click the Save button to apply the roles to the selected user(s) or team(s) and to add them as members.
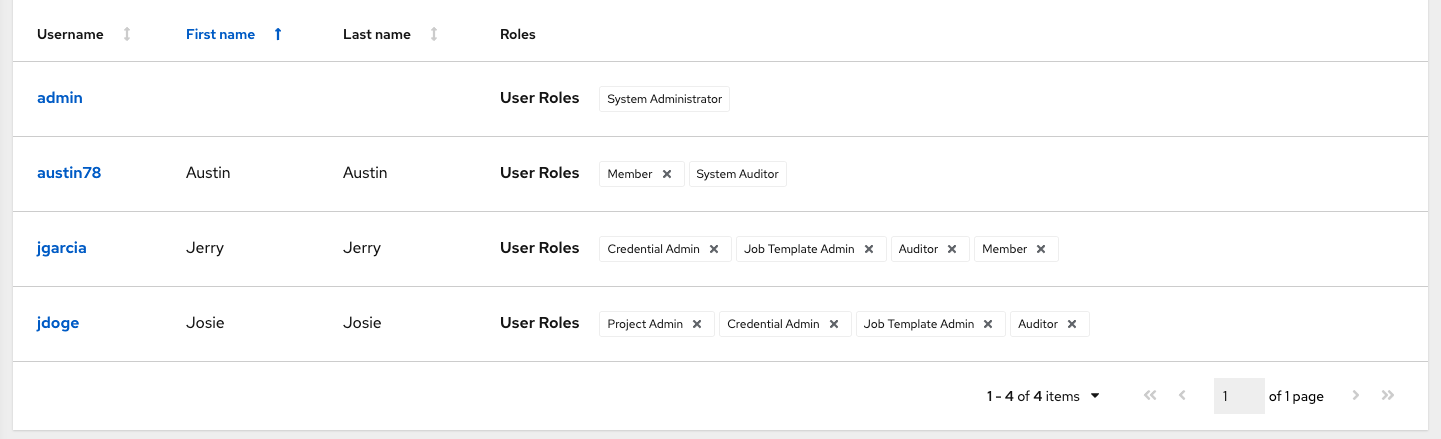
The Add Users/Teams window closes to display the updated roles assigned for each user and team.
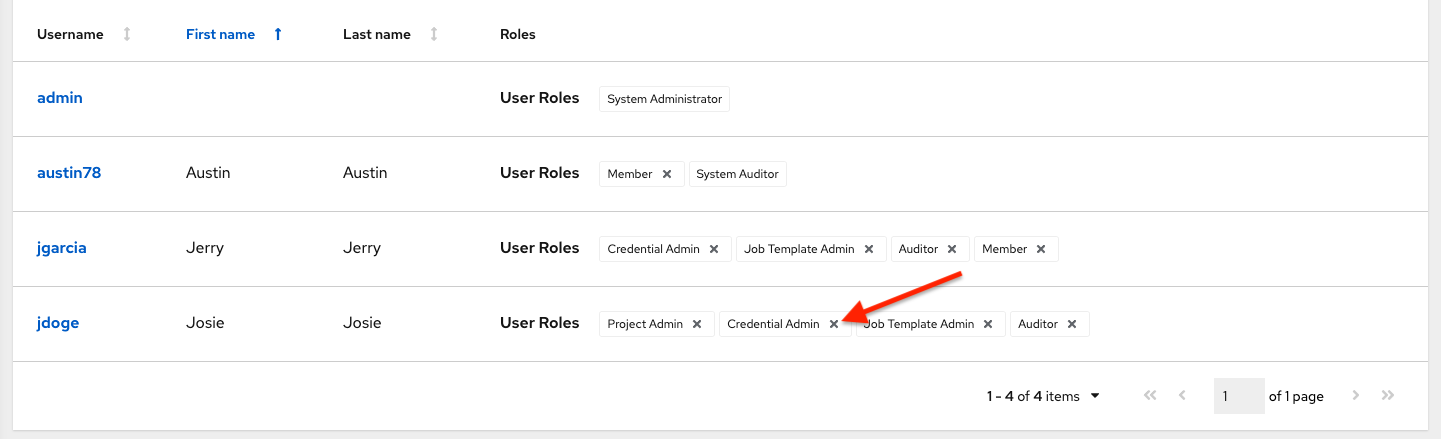
To remove roles for a particular user, click the disassociate (x) button next to its resource.
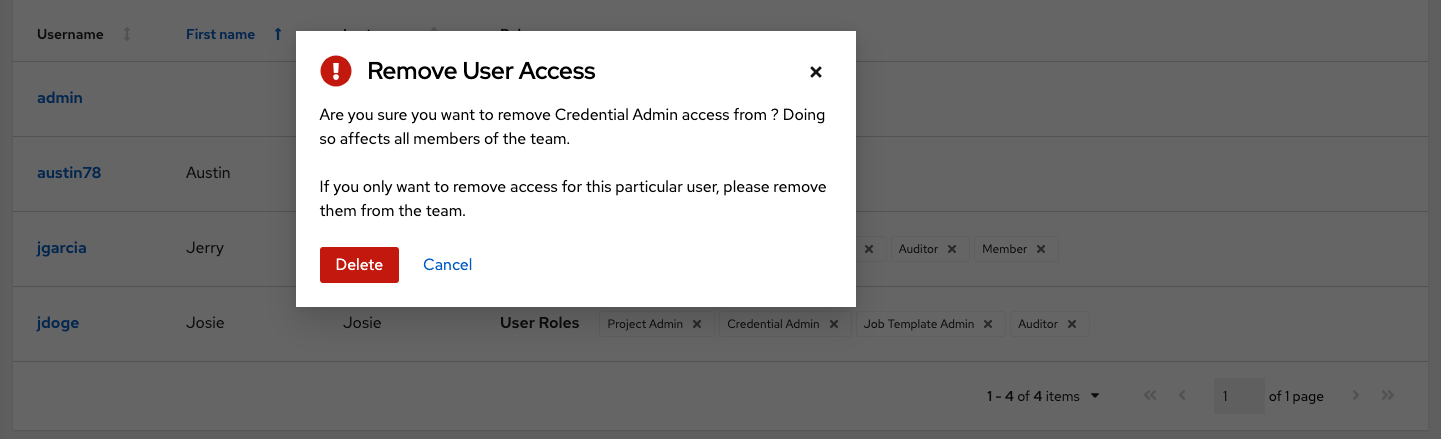
これにより確認ダイアログが起動し、関連付けの解除を確定するように求められます。
注釈
A user or team with roles associated will retain them even after they have been reassigned to another organization.
7.3. 通知の使用
通知 タブをクリックすると、設定した通知の統合を確認できます。
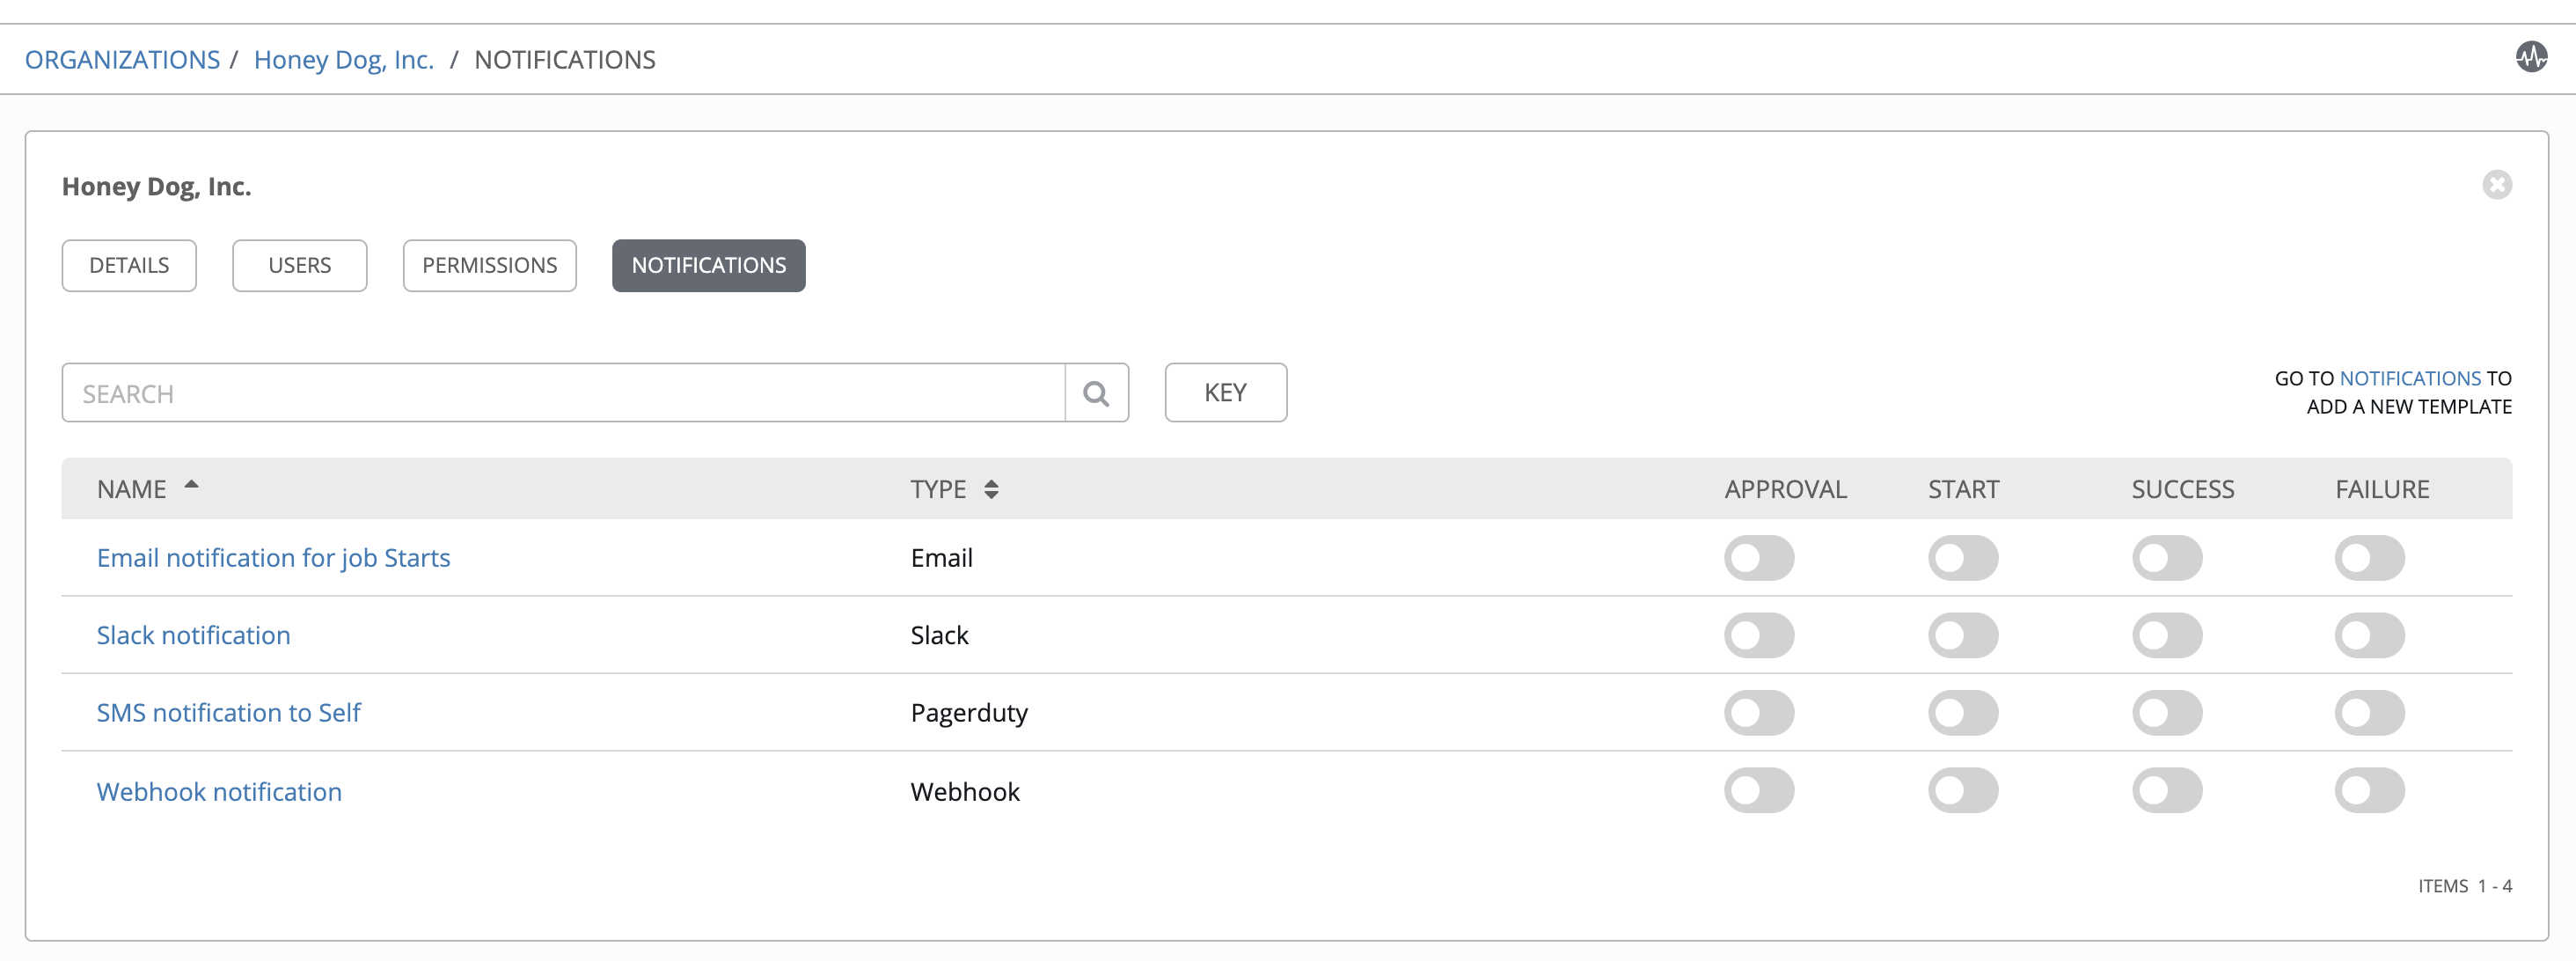
トグルを使用して、特定の組織で使用する通知を有効または無効にします。詳細については、「通知の有効化と無効化」を参照してください。
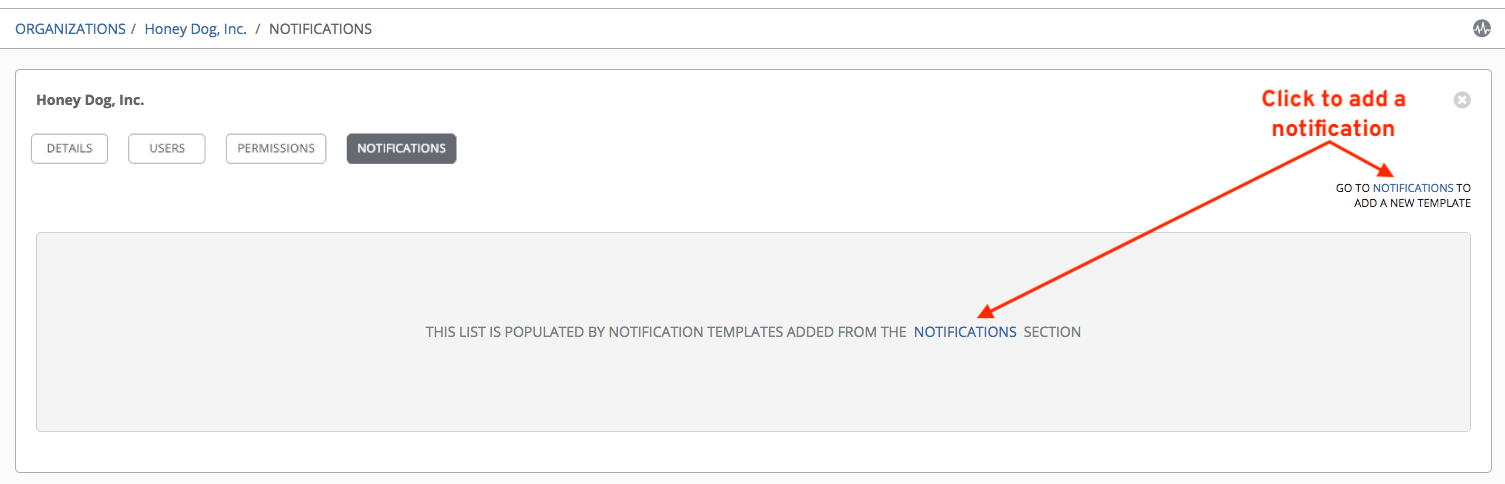
通知が設定されていない場合には、グレーのボックスの上または、中から 通知 リンクをクリックして新規通知を追加または作成します。
さまざまな通知タイプの設定に関する追加の情報は、「通知タイプ」を参照してください。
7.4. 組織の概要
組織に関連付けられている各種リソースの概要ビューは、組織の概要として各組織ビューの下部に表示されます。
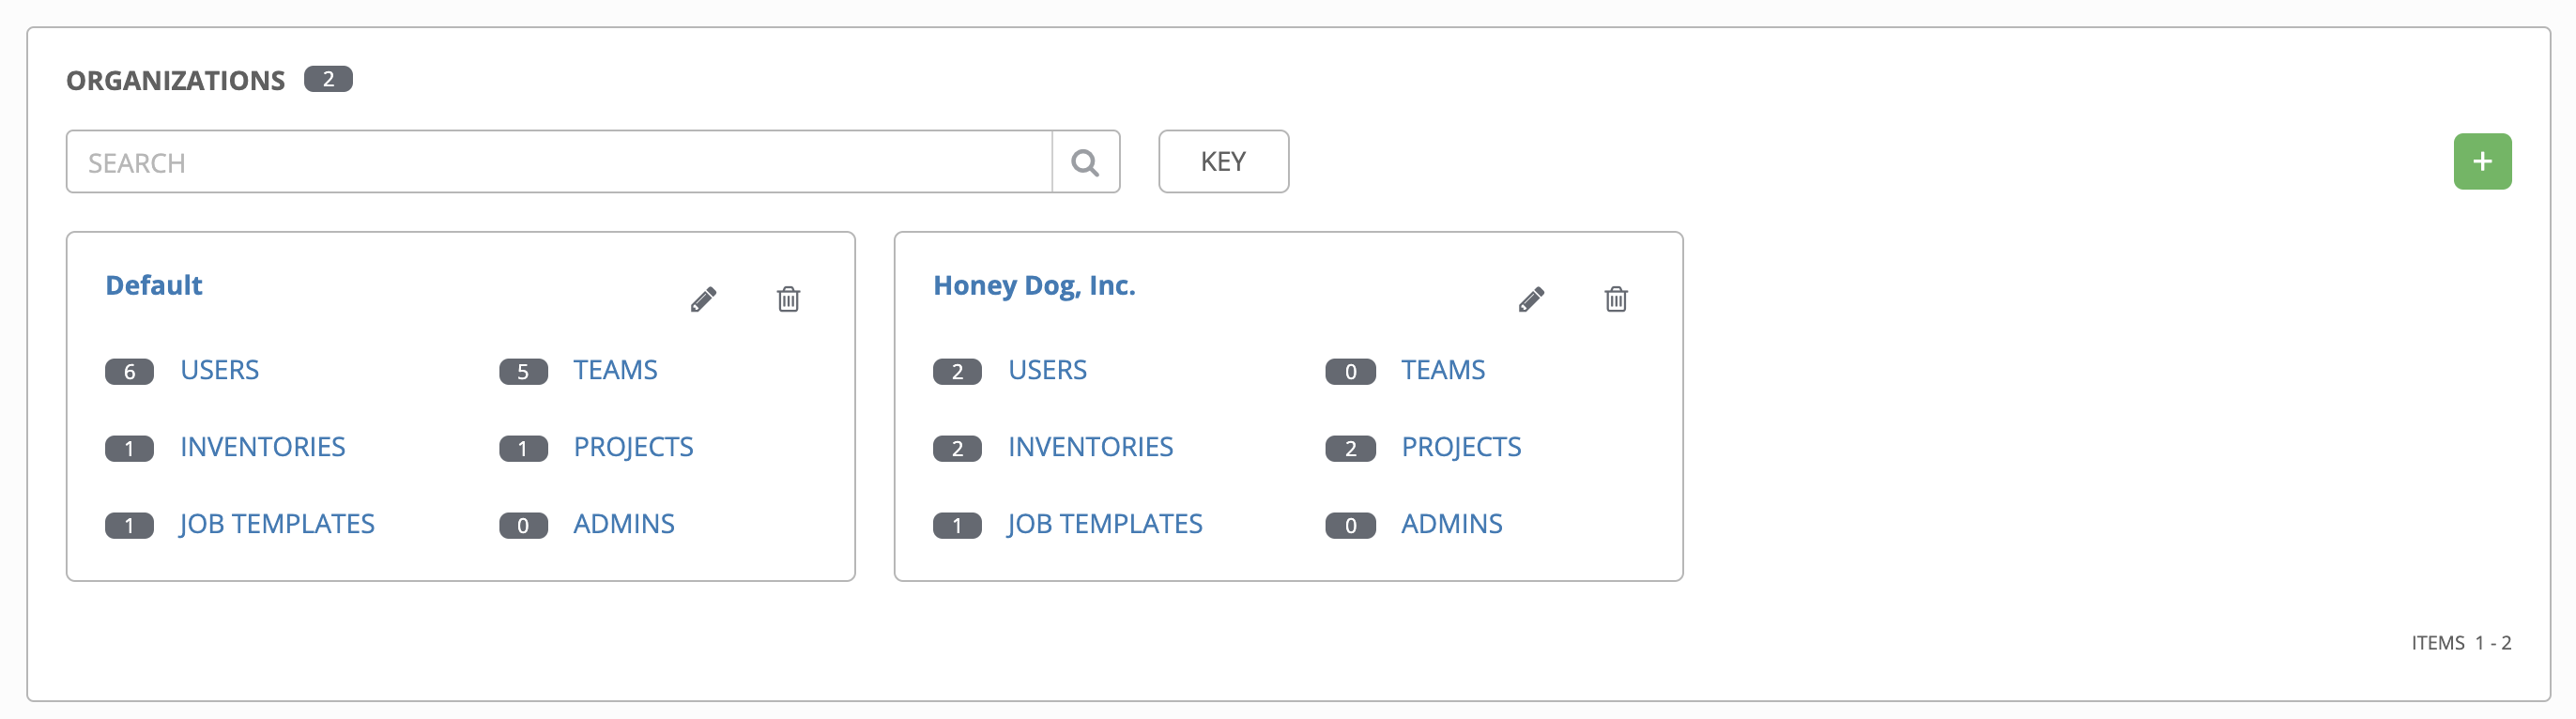
それぞれのカテゴリーをクリックし、それらに関連付けられたリソースの一覧を表示します。ユーザーや管理者の場合など、追加、編集、または削除が可能なリソースもありますが、ユーザーインターフェースの別の部分から編集する必要があるものもあります。
概要から組織の詳細を編集 ( ) したり、詳細をすべて削除 (
 ) したりできます。
注釈
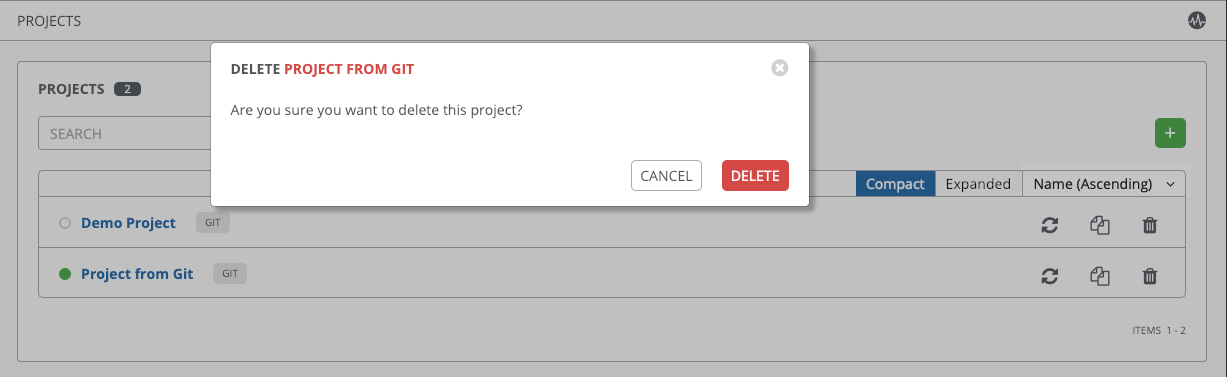
他の作業アイテムが使用するアイテムを削除する場合は、メッセージが開き、削除されるアイテムと、削除の確認を促すプロンプトが表示されます。画面によっては、無効なアイテムや、過去に削除されたアイテムが含まれる場合があるので、それらのアイテムは実行に失敗します。以下は、これらのメッセージ例です。