9. チーム
Team (チーム) は、関連付けられたユーザー、プロジェクト、認証情報、およびパーミッションを持つ組織の下位区分のことです。チームは、ロールベースのアクセス制御スキームを実装し、組織全体で責任を委任する手段となります。たとえば、パーミッションは、チームの各ユーザーではなく、チーム全体に付与することができます。
組織に適した数のユーザーチームを作成できます。ユーザーの場合と同様にパーミッションを割り当てることができます。また、チームは認証情報の所有権をスケーラブルに割り当てでき、インターフェースから複数回クリックして、同じ認証情報を同じユーザーに割り当てられないようにすることができます。
左のナビゲーションバーから チーム をクリックして、チームページにアクセスします。チーム一覧は、名前 別または 組織 別に分類および検索できます。
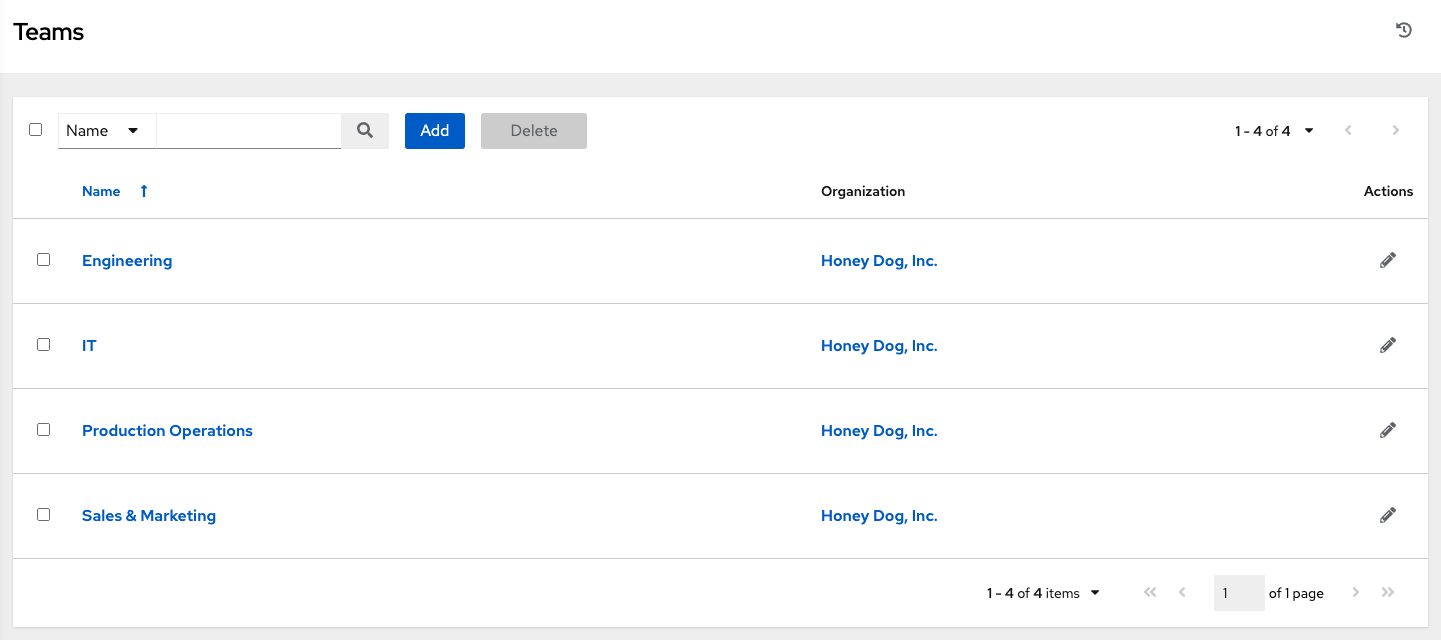
Clicking the Edit ( ) button next to the list of Teams allows you to edit details about the team. You can also review Users and Permissions associated with this Team.
9.1. チームの作成
新規チームを作成するには、以下を実行します。
Click the Add button.
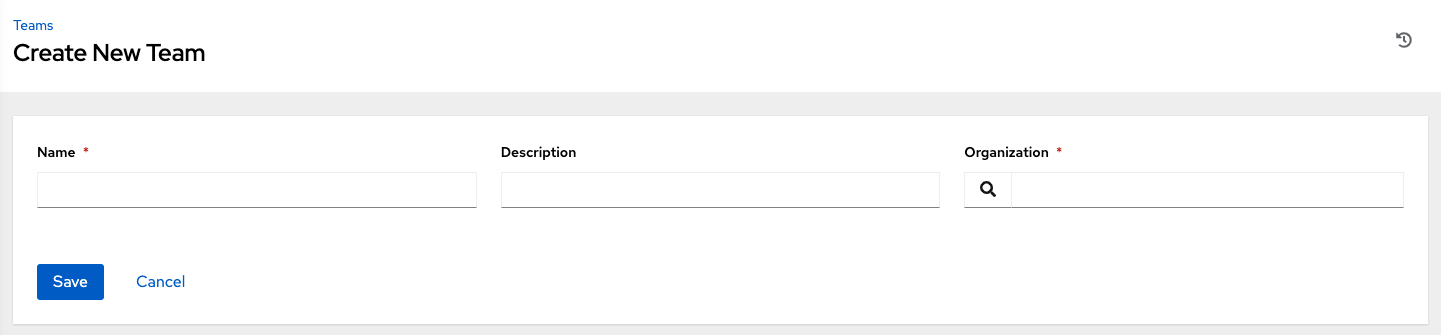
以下のフィールドに該当する詳細を入力します。
名前
説明 (オプション)
組織 (既存の組織から選択します。)
保存 をクリックします。
Once the Team is successfully created, automation controller opens the Details dialog, which also allows you to review and edit your Team information.
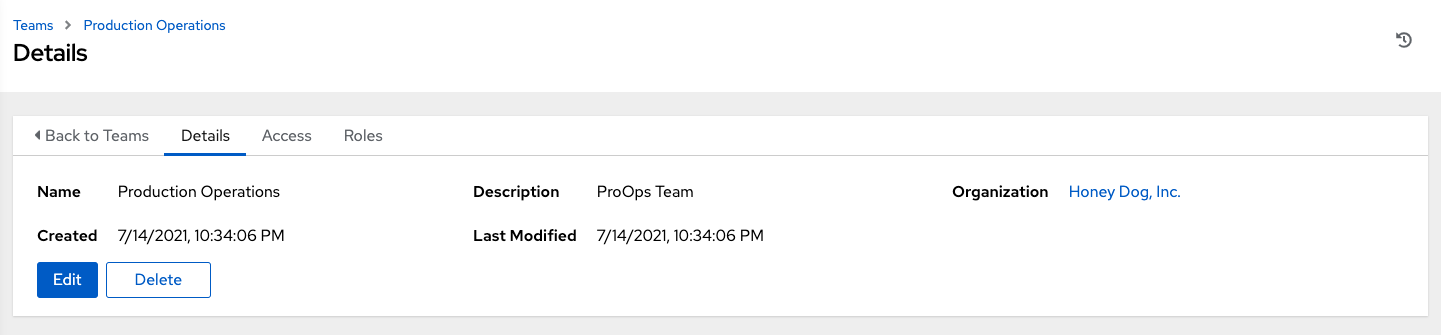
9.1.1. Team Access
このタブには、このチームのメンバーであるユーザーの一覧が表示されます。この一覧は、ユーザー名、名、または 姓 で検索できます。詳細は、ユーザー を参照してください。

9.1.1.1. ユーザーの追加
In order to add a user to a team, the user must already be created. Refer to ユーザーの作成 to create a user. Adding a user to a team adds them as a member only, specifying a role for the user on different resources can be done in the Access tab . To add existing users to the Team:
In the Access tab, click the Add button.
Follow the prompts to add user(s) and assign them to roles.
Click Save when done.
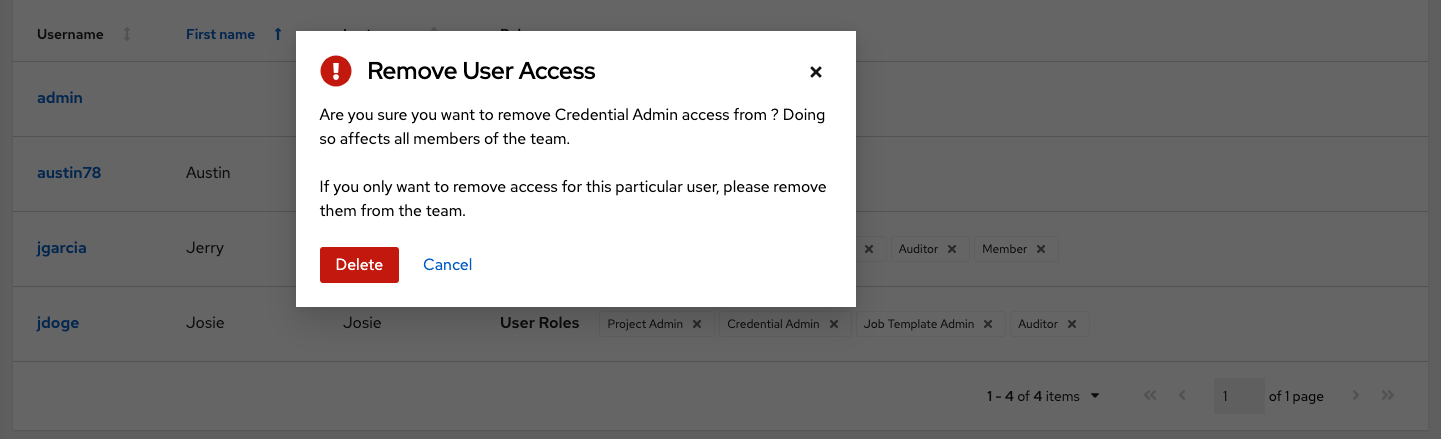
To remove roles for a particular user, click the disassociate (x) button next to its resource.
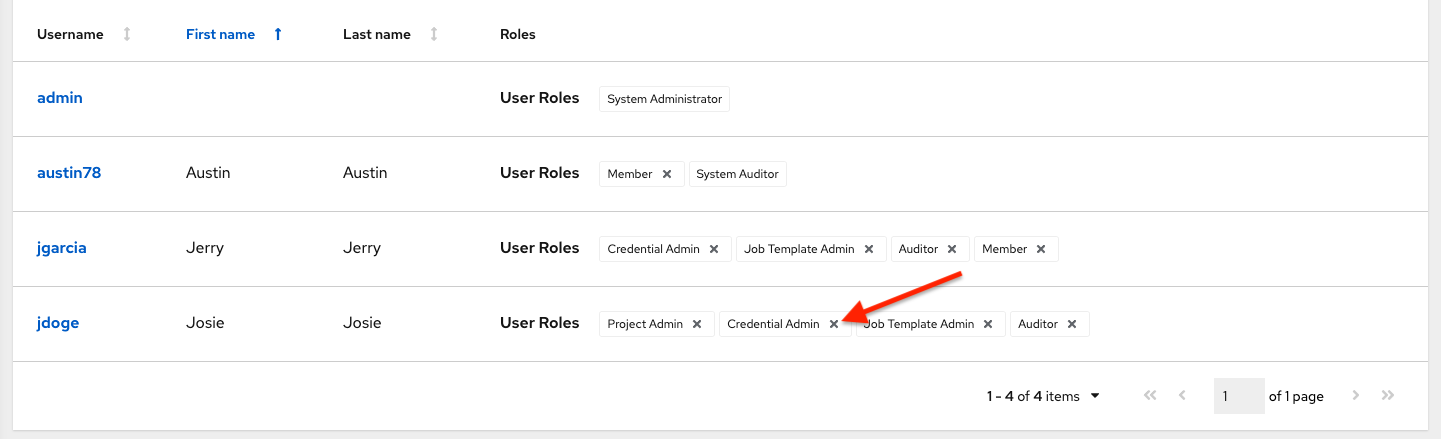
This launches a confirmation dialog, asking you to confirm the disassociation.
9.1.2. Team Roles
Selecting the Roles view displays a list of the permissions that are currently available for this Team. The permissions list may be sorted and searched by Resource Name, Type, or Role.
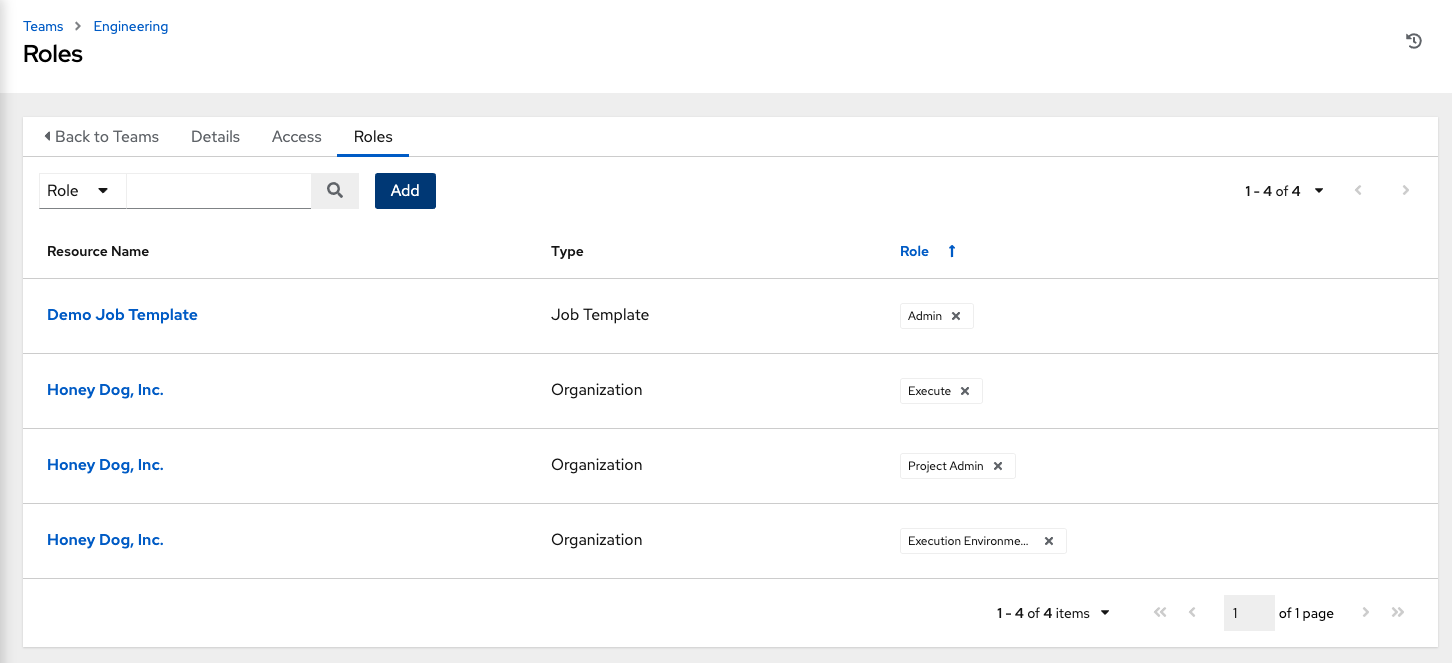
プロジェクト、インベントリー、およびその他の automation controller 要素の読み取り、変更、および管理を実行するためにチームに割り当てられる権限のセットはパーミッションとも呼ばれています。デフォルトでは、チームには「read」パーミッション (ロールとも呼ばれる) が割り当てられます。
パーミッションは、インベントリー、プロジェクト、ジョブテンプレートで設定するか、組織ビュー内で明示的に設定する必要があります。
9.1.2.1. チームパーミッションの追加
パーミッションをチームに追加するには、以下を実行します。
Click the Add button, which opens the Add Permissions Wizard.
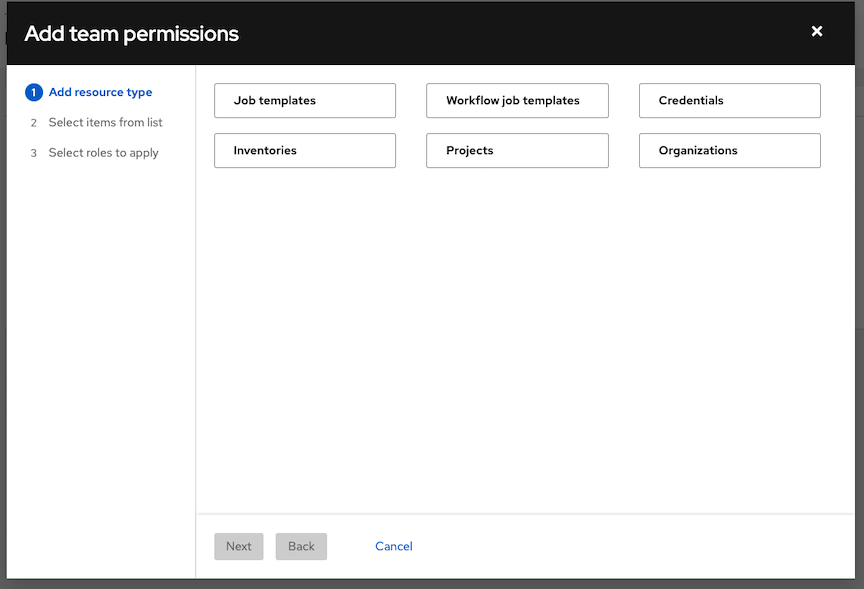
Click to select the object for which the team will have access and click Next.
Click to select the resource to assign team roles and click Next.
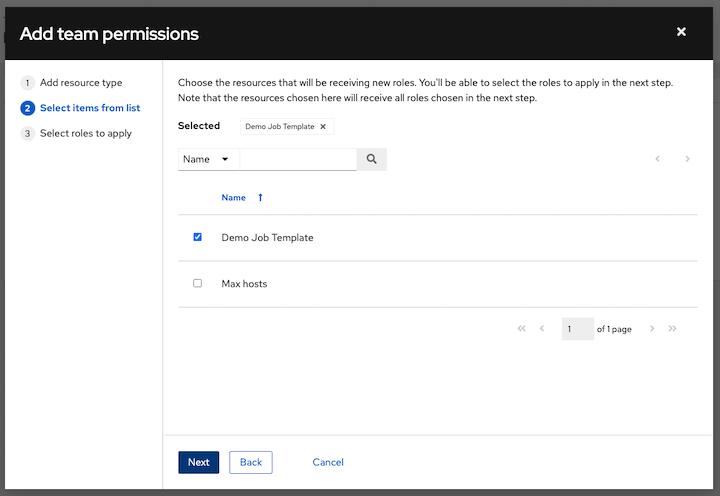
Click the checkbox beside the role to assign that role to your chosen type of resource. Different resources have different options available.
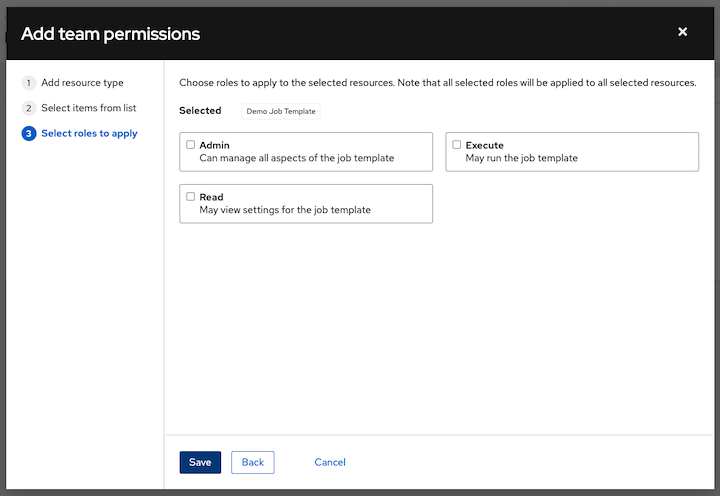
その後に 保存 をクリックすると「パーミッションの追加」ウィザードが閉じ、選択したリソースごとにロールが割り当てられたユーザーの更新後のプロファイルが表示されます。
To remove Permissions for a particular resource, click the disassociate (x) button next to its resource. This launches a confirmation dialog, asking you to confirm the disassociation.
注釈
また、チーム、個々のユーザー、または複数のユーザーを追加して、オブジェクトレベル (プロジェクト、インベントリー、ジョブテンプレート、およびワークフローテンプレート) にパーミッションを割り当てることもできます。この機能により、組織が一度に多数のユーザーが参加する時間を短縮できます。